Diese Version enthält möglicherweise inkorrekte Änderungen. Wechsle zur letzten geprüften Version.
Was du brauchst
-
Dieser Schritt ist noch nicht übersetzt. Hilf mit, ihn zu übersetzen!
-
Open your laptop. Beneath the screen, here is a large plastic piece that contains slots for a speaker, the power button, and numerous indicator lights.
-
To remove this, pry it open with a spudger tool gently. It should pop out of place.
-
-
Dieser Schritt ist noch nicht übersetzt. Hilf mit, ihn zu übersetzen!
-
Remove the three 6mm screws using a Phillips #1 screwdriver.
-
Once the screws are removed, the keyboard is free from the base of the laptop.
-
-
Dieser Schritt ist noch nicht übersetzt. Hilf mit, ihn zu übersetzen!
-
Disconnect the green ribbon cable using a plastic opening tool.
-
-
-
Dieser Schritt ist noch nicht übersetzt. Hilf mit, ihn zu übersetzen!
-
Remove the 6 millimeter screws indicated with a Phillips #1 screwdriver.
-
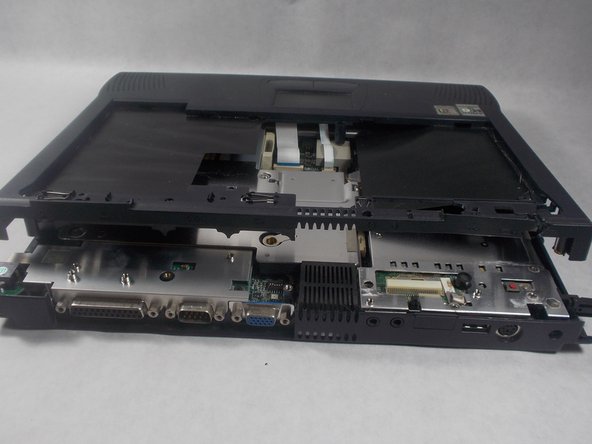
Remove the top plastic covering from the base of the device.
-
-
Dieser Schritt ist noch nicht übersetzt. Hilf mit, ihn zu übersetzen!
-
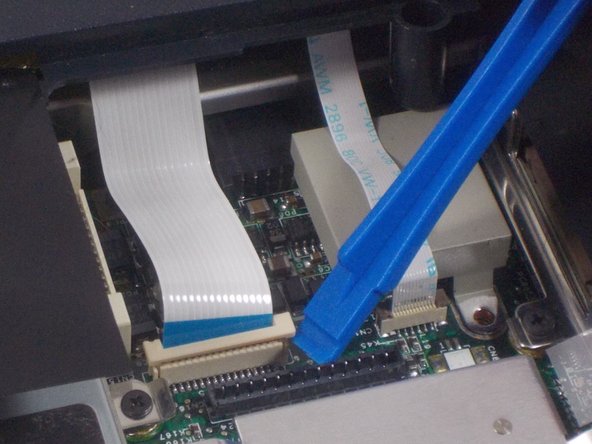
Use a plastic opening tool to disconnect both cable connectors gently.
-
-
Dieser Schritt ist noch nicht übersetzt. Hilf mit, ihn zu übersetzen!
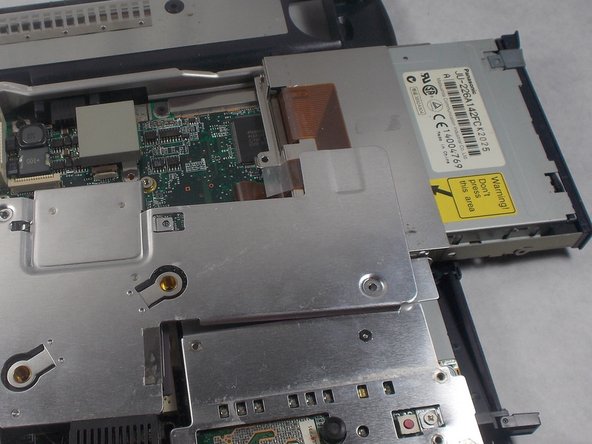
-
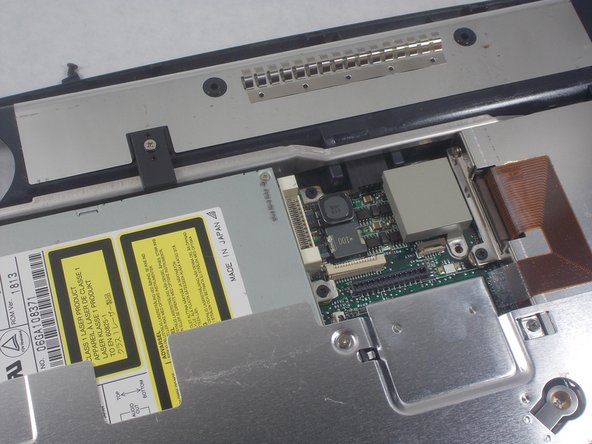
Once these cables are disconnected, the optical drives can be found inside.
-
-
Dieser Schritt ist noch nicht übersetzt. Hilf mit, ihn zu übersetzen!
-
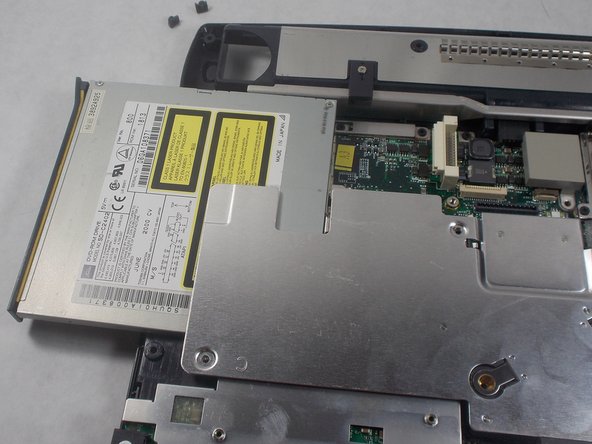
The 1 centimeter screws indicated need to be removed using a Phillips #1 screwdriver to free the CD/DVD combo drive.
-
Once freed, the CD/DVD combo drive should slide out and remove easily.
-
-
Dieser Schritt ist noch nicht übersetzt. Hilf mit, ihn zu übersetzen!
-
The 1 centimeter screws indicated must be removed with a Phillips #1 screwdriver to free the floppy disc drive.
-
Remove the floppy disc drive from the device.
-


Rückgängig: Ich habe diese Anleitung nicht absolviert.
Ein:e weitere:r Nutzer:in hat diese Anleitung absolviert.
Team

UMass Dartmouth, Team S3-G8, Peak Spring 2018 Mitglied von UMass Dartmouth, Team S3-G8, Peak Spring 2018
UMASSD-PEAK-S18S3G8
3 Mitglieder
8 Anleitungen geschrieben