Diese Version enthält möglicherweise inkorrekte Änderungen. Wechsle zur letzten geprüften Version.
Was du brauchst
-
Dieser Schritt ist noch nicht übersetzt. Hilf mit, ihn zu übersetzen!
-
Begin by locating the smallest panel with one screw attaching it to the laptop computer.
-
-
Dieser Schritt ist noch nicht übersetzt. Hilf mit, ihn zu übersetzen!
-
Remove the one screw holding the panel down, and the WiFi receiver will be revealed.
-
-
-
Dieser Schritt ist noch nicht übersetzt. Hilf mit, ihn zu übersetzen!
-
Remove the two screws that hold down the receiver.
-
Gently slide the chip out of the socket.
-
-
Dieser Schritt ist noch nicht übersetzt. Hilf mit, ihn zu übersetzen!
-
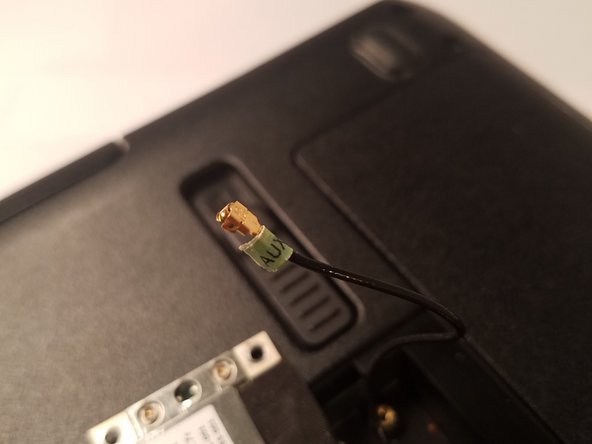
Remove the two wires labelled AUX and MAIN from the chip.
-


Team

UMass Dartmouth, Team 2-7, Isaacson Fall 2016 Mitglied von UMass Dartmouth, Team 2-7, Isaacson Fall 2016
UMASSD-ISAACSON-F16S2G7
3 Mitglieder
4 Anleitungen geschrieben