Einleitung
Before delving into this repair guide, make sure to have a large area for placement of removed components and to keep screws organized.
Before removing the speaker assembly, follow these steps:
Shut down the computer
If unsure whether your computer is off or in hibernation, turn it on, and then shut down through the operating system.
Disconnect devices and power
Disconnect all external devices, plug-ins and power from the computer.
Was du brauchst
-
-
Locate the battery on the bottom side of the laptop.
-
Slide the release switch and the battery will pop out.
-
Remove the battery
-
-
-
Using a Philips #1 Loosen the three 7mm captive screws that secure the memory module compartment cover to the computer.
-
Lift the rear edge of the cover, swing it up and to the front, and remove the cover.
-
-
-
Loosen the two 6mm captive screws that secure the hard drive port bezel cover to the computer, using a Philips #1.
-
Lift the right side of the hard drive port bezel cover, swing it up and to the left, and remove the cover.
-
-
-
Use the Mylar tab to lift the hard drive up, and then slide it to the left to release it from the hard drive bay.
-
-
-
-
Disconnect the hard drive cable from the system board.
-
Remove the hard drive from the hard drive bay and set it aside.
-
-
-
With laptop upside down locate the three sets of screws that fasten the keyboard and switch cover.
-
Two Phillips 7mm screws that secure the switch cover to the computer.
-
Four Phillips 4.0mm screws that secure the switch cover to the computer. (these are inside the battery bay)
-
Four Philips 7mm screws that secure the keyboard to the computer.
-
Remove all ten screws.
-
-
-
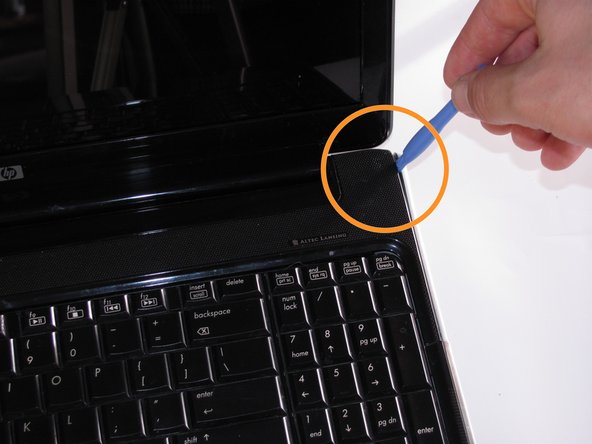
Turn the computer over, and locate the Switch Cover.
-
Using the Safe Pry Tool, un-clip the Switch Cover until it detaches from the computer.
-
-
-
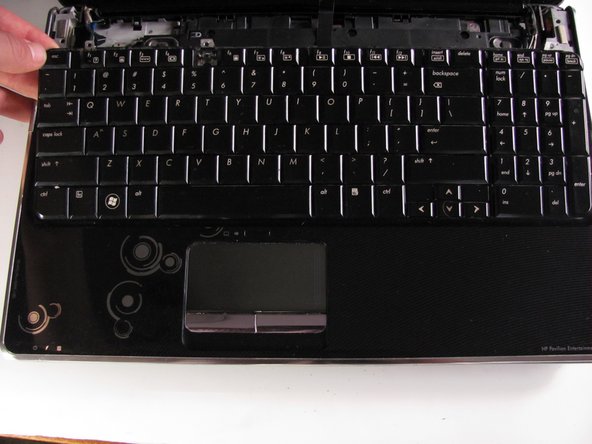
Slide the Switch Cover onto the LCD Monitor, exposing the Speaker Assembly.
-
Detach the two ribbon cables from the speaker assembly.
-
-
-
Remove the three silver Phillips 3.5mm screws that secure the keyboard to the computer.
-
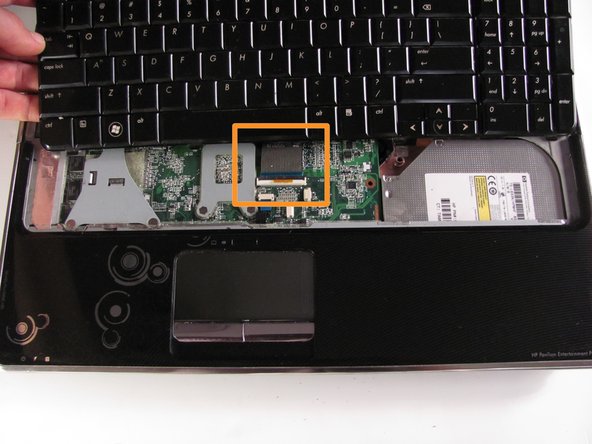
Lift the rear edge of the keyboard and slide the keyboard back until the keyboard connector on the system board is accessible.
-
-
-
Unhinge the zero insertion force (ZIF) connector to release the ribbon cable then pull gently on the cable to release.
-
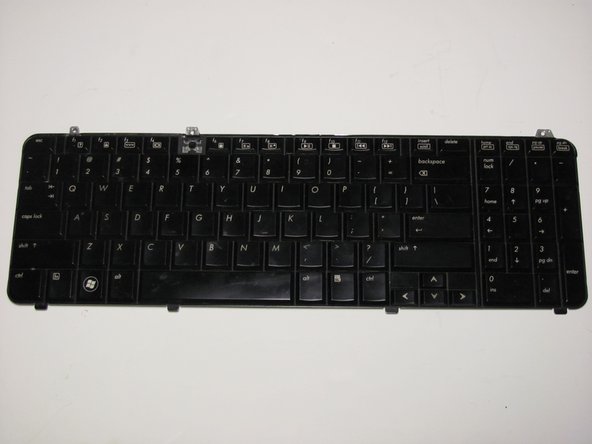
The keyboard can now be lifted off and set aside.
-
-
-
Position the computer with the keyboard facing up its front edge toward you.
-
Disconnect the speaker cable from the system board.
-
-
-
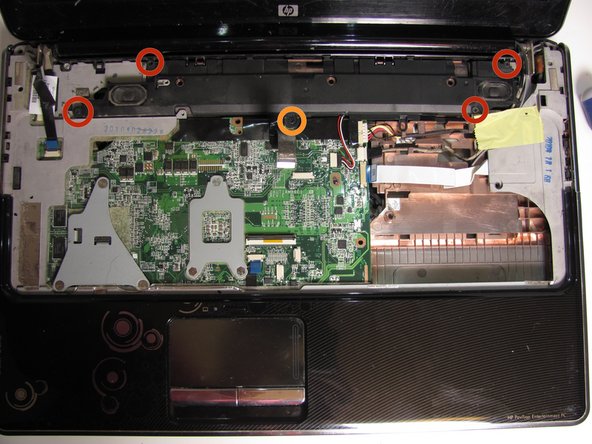
Using the Phillips #1 screwdriver, remove the four Phillips 4mm screws that secure the speaker assembly.
-
You will also need the Phillips #1 screwdriver to remove the Phillips 7mm screw that secures the center of the speaker assembly.
-
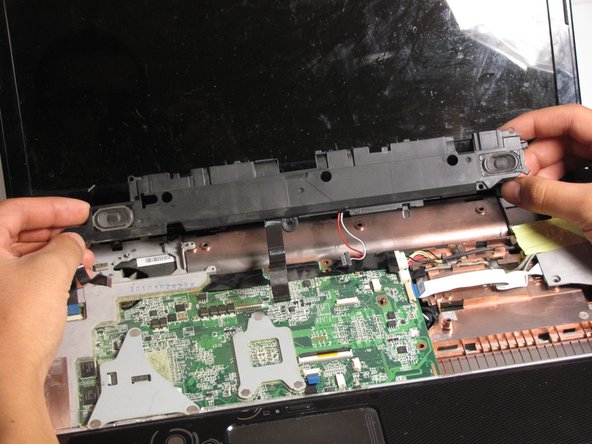
Remove the speaker assembly from the computer.
-








To reassemble your device, follow these instructions in reverse order.
To reassemble your device, follow these instructions in reverse order.
Rückgängig: Ich habe diese Anleitung nicht absolviert.
2 weitere Nutzer:innen haben diese Anleitung absolviert.


Team

Cal Poly, Team 10-34, Maness Winter 2014 Mitglied von Cal Poly, Team 10-34, Maness Winter 2014
CPSU-MANESS-W14S10G34
4 Mitglieder
6 Anleitungen geschrieben
