Zum Hauptinhalt wechseln

HP Pavilion dv6-6117dx Hard Drive Replacement

Was du brauchst

  1. HP Pavilion dv6-6117dx Hard Drive Replacement, Hard Drive: Schritt 1, Bild 1 von 2 HP Pavilion dv6-6117dx Hard Drive Replacement, Hard Drive: Schritt 1, Bild 2 von 2
    • Begin removing the bottom cover by sliding the battery removal slider to the right to pop off the top of the cover.

  2. HP Pavilion dv6-6117dx Hard Drive Replacement: Schritt 2, Bild 1 von 2 HP Pavilion dv6-6117dx Hard Drive Replacement: Schritt 2, Bild 2 von 2
    • Slide a black spudger under the top of the cover to loosen the clips underneath.

  3. HP Pavilion dv6-6117dx Hard Drive Replacement: Schritt 3, Bild 1 von 3 HP Pavilion dv6-6117dx Hard Drive Replacement: Schritt 3, Bild 2 von 3 HP Pavilion dv6-6117dx Hard Drive Replacement: Schritt 3, Bild 3 von 3
    • Slide the spudger down the left side of the cover to loosen the clips.

    • After the left side is loose, the rest of the cover should pop off, and you can remove it with your hands.

    • When reassembling, insert the bottom of the cover first, and then firmly press along the edges from bottom to top to secure it in place.

  4. HP Pavilion dv6-6117dx Hard Drive Replacement: Schritt 4, Bild 1 von 3 HP Pavilion dv6-6117dx Hard Drive Replacement: Schritt 4, Bild 2 von 3 HP Pavilion dv6-6117dx Hard Drive Replacement: Schritt 4, Bild 3 von 3
    • Using a Phillips #0 screw driver, remove the four 4mm screws holding the hard drive in place.

  5. HP Pavilion dv6-6117dx Hard Drive Replacement: Schritt 5, Bild 1 von 3 HP Pavilion dv6-6117dx Hard Drive Replacement: Schritt 5, Bild 2 von 3 HP Pavilion dv6-6117dx Hard Drive Replacement: Schritt 5, Bild 3 von 3
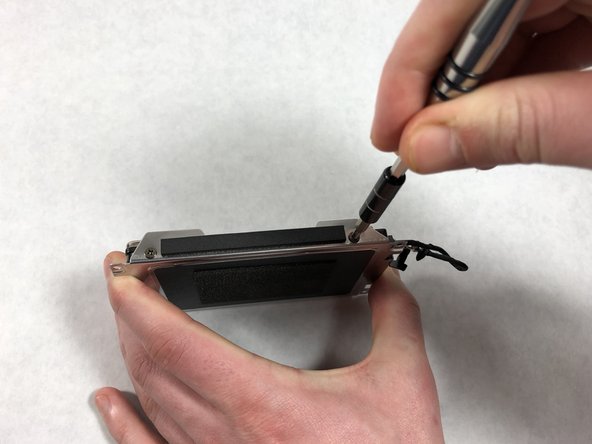
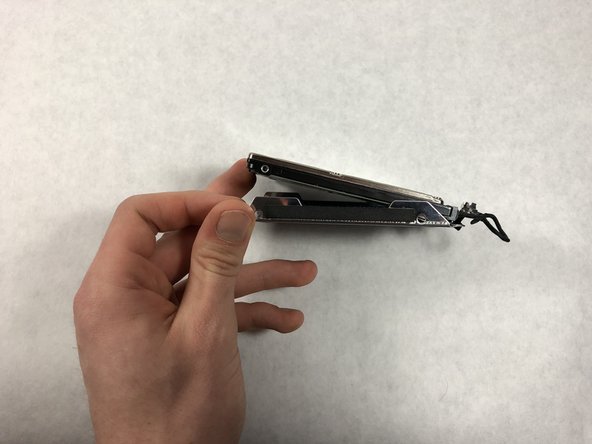
    • Using a plastic spudger, lift up the hard drive from the top left corner and flip it to the right of the laptop like opening a book.

    • There is a cable connecting the hard drive to the laptop, be sure not to pull it out when flipping the hard drive.

  6. HP Pavilion dv6-6117dx Hard Drive Replacement: Schritt 6, Bild 1 von 2 HP Pavilion dv6-6117dx Hard Drive Replacement: Schritt 6, Bild 2 von 2
    • Pull the tab at the end of the cable connecting the hard drive to the laptop.

  7. HP Pavilion dv6-6117dx Hard Drive Replacement: Schritt 7, Bild 1 von 3 HP Pavilion dv6-6117dx Hard Drive Replacement: Schritt 7, Bild 2 von 3 HP Pavilion dv6-6117dx Hard Drive Replacement: Schritt 7, Bild 3 von 3
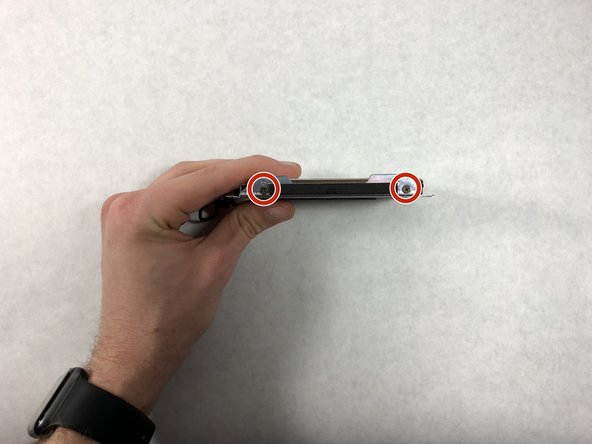
    • Using a Phillips #0 screw driver, remove the four 4mm screws on each side of the hard drive attaching it to its carriage.

  8. HP Pavilion dv6-6117dx Hard Drive Replacement: Schritt 8, Bild 1 von 2 HP Pavilion dv6-6117dx Hard Drive Replacement: Schritt 8, Bild 2 von 2
    • Remove the hard drive from its carriage.

  9. HP Pavilion dv6-6117dx Hard Drive Replacement: Schritt 9, Bild 1 von 2 HP Pavilion dv6-6117dx Hard Drive Replacement: Schritt 9, Bild 2 von 2
    • Remove the SATA cable from the hard drive.

Abschluss

To reassemble your device, follow these instructions in reverse order.

4 weitere Nutzer:innen haben diese Anleitung absolviert.

Joshua Holme

Mitglied seit: 03/19/18

765 Reputation

4 Anleitungen geschrieben

Team

UMass Dartmouth, Team S6-G3, Bernier Spring 2018 Mitglied von UMass Dartmouth, Team S6-G3, Bernier Spring 2018

UMASSD-BERNIER-S18S6G3

3 Mitglieder

4 Anleitungen geschrieben

0 Kommentare

Kommentar hinzufügen

Seitenaufrufe:

Letzte 24 Stunden: 2

Letzte 7 Tage: 7

Letzte 30 Tage: 38

Insgesamt: 2,423