Einleitung
This guide will show you how to replace the HP Pavilion g7-1368 hard drive. This process should take approximately 10 minutes using only a Phillips #1 screwdriver. Make sure to shut down the device before proceeding with the replacement.
Was du brauchst
-
-
Turn the device over so that the lower case is facing up.
-
Slide the battery release latch. The battery will pop up.
-
-
-
-
Loosen the two Phillips #1 screws that connect the service panel to the device.
-
-
-
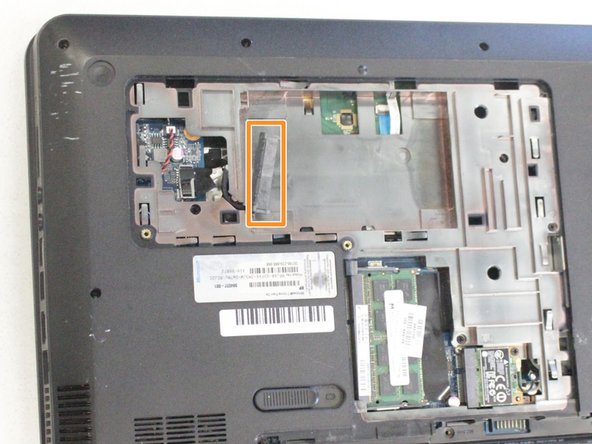
Locate the hard drive.
-
Disconnect the cable connector by pulling it away from the hard drive.
-
Remove the hard drive from the device.
-
To reassemble your device, follow these instructions in reverse order.
To reassemble your device, follow these instructions in reverse order.
Rückgängig: Ich habe diese Anleitung nicht absolviert.
Ein:e weitere:r Nutzer:in hat diese Anleitung absolviert.


