Einleitung
In this guide, you will learn how to replace the keyboard of your HP Pavilion g7-1368dx. this process takes roughly 25 minutes. The tools that you will need to preform this replacement are a Philips #1 Screwdriver, and the plastic iFixit opening tool.
Was du brauchst
-
-
Turn the device over so that the lower case is facing up.
-
Slide the battery release latch. The battery will pop up.
-
-
-
-
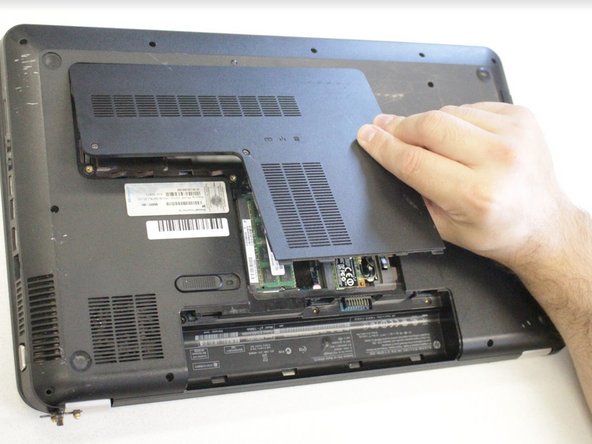
Loosen the two Phillips #1 screws that connect the service panel to the device.
-
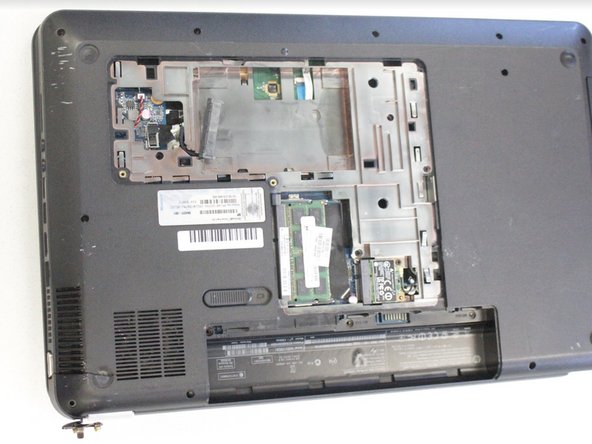
Slide the service panel down and pull it up to remove.
-
-
-
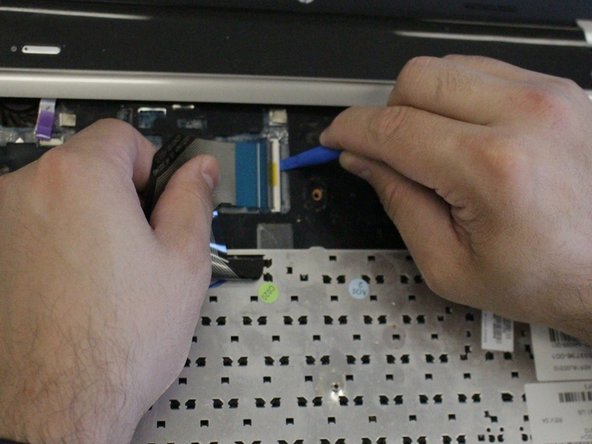
Flip the keyboard over and locate the black ribbon cable that attaches the keyboard to the device.
-
Using a plastic opening tool, flip up the white tab on the zero insertion force connector.
-
Disconnect the ribbon cable by sliding it out of the ZIF connector.
-
Remove the keyboard.
-
To reassemble your device, follow these instructions in reverse order.
To reassemble your device, follow these instructions in reverse order.


