Einleitung
Before using this guide, make sure to review the troubleshooting page for the HP Pavilion x360 14m-ba011dx. The touchpad may not actually need to be replaced depending on the problem, which is why it is good to trouble shoot first.
This guide serves the purpose of taking the users step by step through accessing and removing the touchpad on the HP Pavillion x360 14m-ba011dx laptop. The model number for this device is 1KT47UA. If your touchpad is not responding or is moving your cursor erratically, you may need to replace replace your touchpad.
Was du brauchst
-
-
Remove the top left and right rubber pads closest to the hinge of the screen using a plastic spudger to locate the screws underneath.
-
Remove the following 6 screws from the bottom of the device using a Phillips #00 Screwdriver:
-
Remove two 7.5 mm screws.
-
Remove three 5 mm screws.
-
Remove one 6.5 mm screw.
-
-
-
Push into the two screw holes located under the rubber pads with the screwdriver to pop the keyboard out slightly.
-
-
-
-
Separate the keyboard from the rest of the device using a metal spudger around edges.
-
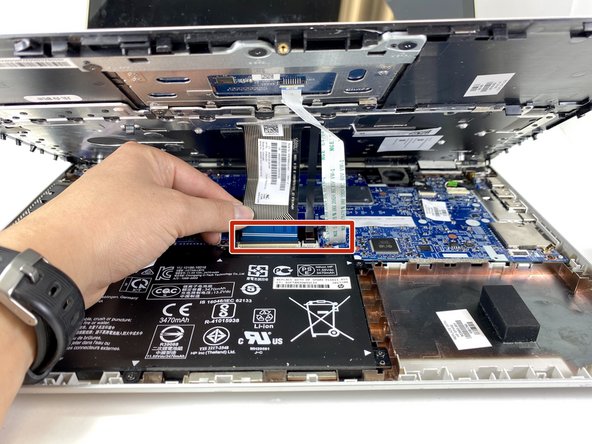
Pull up gently until you can see the cables attaching the keyboard to the motherboard.
-
Flip the small white clasps that hold the three cables to the motherboard open and unplug the cables.
-
-
-
Flip the now removed keyboard over to expose the bottom side.
-
Unclasp the cable that connects the touchpad to the keyboard.
-
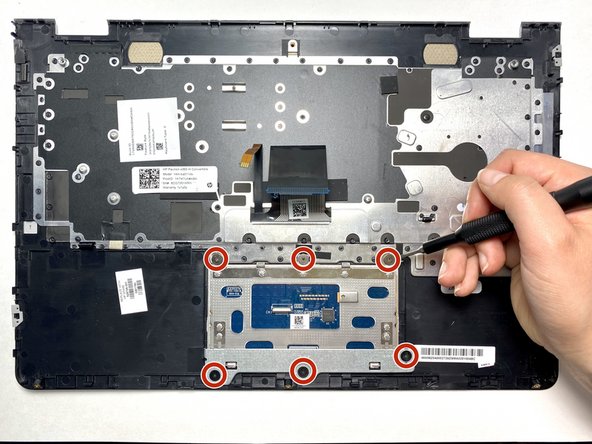
Remove the six 2.3 mm screws that attach the touch pad using a Phillips #00 Screwdriver.
-
-
-
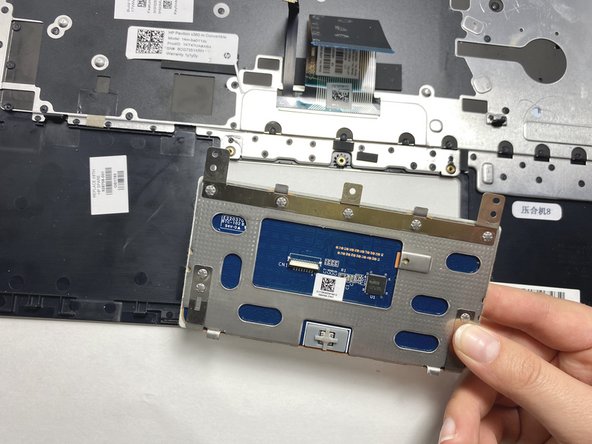
Pull off the metal piece holding the touchpad in place.
-
Remove the touchpad from the device.
-


To reassemble your device, follow these instructions in reverse order.
To reassemble your device, follow these instructions in reverse order.
Team

Embry-Riddle Aeronautical University, Team S7-G5, Rauch Spring 2020 Mitglied von Embry-Riddle Aeronautical University, Team S7-G5, Rauch Spring 2020
ERAU-RAUCH-S20S7G5
3 Mitglieder
5 Anleitungen geschrieben