Diese Version enthält möglicherweise inkorrekte Änderungen. Wechsle zur letzten geprüften Version.
Was du brauchst
-
Dieser Schritt ist noch nicht übersetzt. Hilf mit, ihn zu übersetzen!
-
Power off your device and disconnect all external devices connected to the laptop.
-
-
Dieser Schritt ist noch nicht übersetzt. Hilf mit, ihn zu übersetzen!
-
Flip the laptop over and remove the rubber foot with a Metal Spudger.
-
-
Dieser Schritt ist noch nicht übersetzt. Hilf mit, ihn zu übersetzen!
-
Remove the screws from the bottom of the laptop with a Phillips 00 Screwdriver.
-
5 Phillips 2.4 x 5.7 mm screws
-
7 Phillips 2.0 x 5.0 mm screws
-
-
-
Dieser Schritt ist noch nicht übersetzt. Hilf mit, ihn zu übersetzen!
-
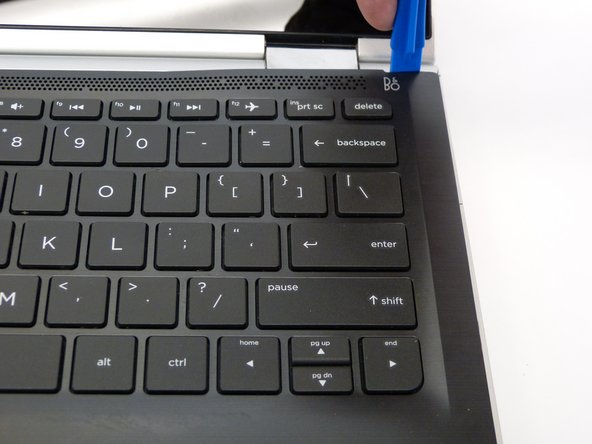
Flip the laptop back over and open it; the keyboard should be facing upwards.
-
Using the Plastic Opening Tool, separate the keyboard from the base of the laptop.
-
-
Dieser Schritt ist noch nicht übersetzt. Hilf mit, ihn zu übersetzen!
-
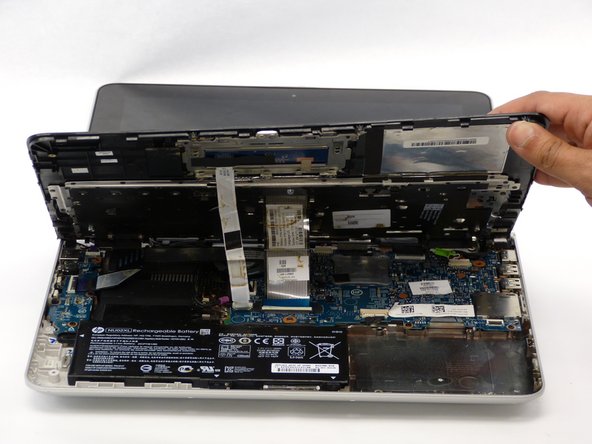
Raising the keyboard, disconnect the first of two cable ribbons with the Heavy-Duty Spudger.
-
Gently flip up the white plastic lock connecting the ribbon cable to the motherboard.
-
Use the blue plastic tab on the ribbon cable to disconnect the ribbon cable from the lock.
-
-
Dieser Schritt ist noch nicht übersetzt. Hilf mit, ihn zu übersetzen!
-
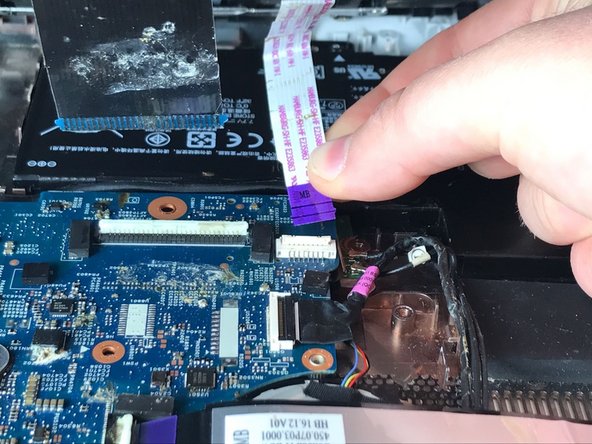
Gently flip up the white plastic lock connecting the second ribbon cable to the motherboard with the Heavy-Duty Spudger.
-
Use the blue purple tab on the ribbon cable to disconnect the ribbon cable from the lock.
-
-
Dieser Schritt ist noch nicht übersetzt. Hilf mit, ihn zu übersetzen!
-
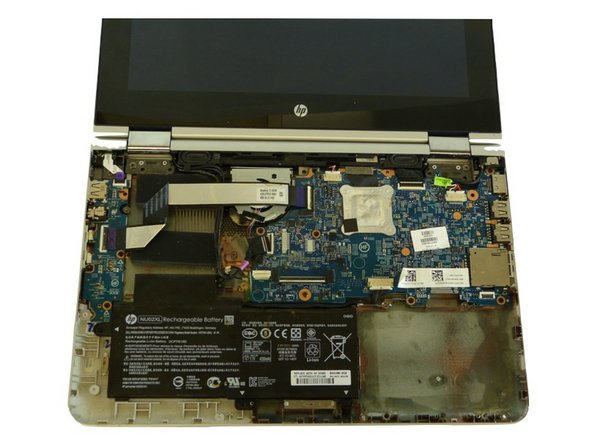
After the ribbon cables are disconnected, gently lift up the keyboard to disconnect it from the base of the laptop.
-


Rückgängig: Ich habe diese Anleitung nicht absolviert.
Ein:e weitere:r Nutzer:in hat diese Anleitung absolviert.
Team

Idaho State University, Team S4-G5, Watkins Fall 2017 Mitglied von Idaho State University, Team S4-G5, Watkins Fall 2017
ISU-WATKINS-F17S4G5
4 Mitglieder
5 Anleitungen geschrieben