Zum Hauptinhalt wechseln

HP Pavilion ze5000 Primary Fan Replacement

Was du brauchst

  1. HP Pavilion ze5000 Primary Fan Replacement, Battery: Schritt 1, Bild 1 von 1
    • Push up on the arrow-shaped switch.

  2. HP Pavilion ze5000 Primary Fan Replacement: Schritt 2, Bild 1 von 2 HP Pavilion ze5000 Primary Fan Replacement: Schritt 2, Bild 2 von 2
    • While still holding the switch up, remove the battery.

  3. HP Pavilion ze5000 Primary Fan Replacement, Keyboard: Schritt 3, Bild 1 von 3 HP Pavilion ze5000 Primary Fan Replacement, Keyboard: Schritt 3, Bild 2 von 3 HP Pavilion ze5000 Primary Fan Replacement, Keyboard: Schritt 3, Bild 3 von 3
    • Remove the two 5mm Phillips #0 screws from the hinges

  4. HP Pavilion ze5000 Primary Fan Replacement: Schritt 4, Bild 1 von 2 HP Pavilion ze5000 Primary Fan Replacement: Schritt 4, Bild 2 von 2
    • Open the device as if you were going to use the device. Using Tweezers, pry the hinges from underneath the screen

    • Not much force is needed to pull the hinges off once the tweezers are properly positioned

  5. HP Pavilion ze5000 Primary Fan Replacement: Schritt 5, Bild 1 von 2 HP Pavilion ze5000 Primary Fan Replacement: Schritt 5, Bild 2 von 2
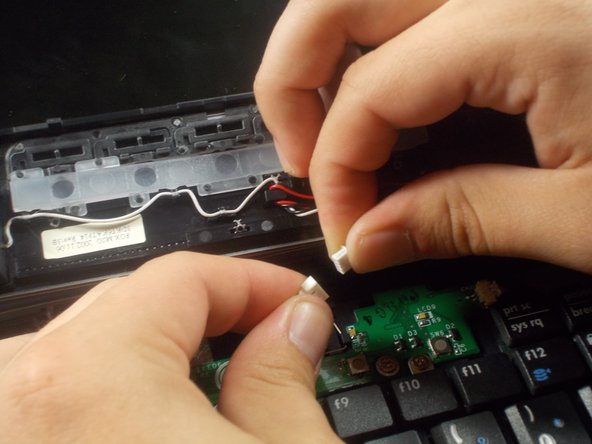
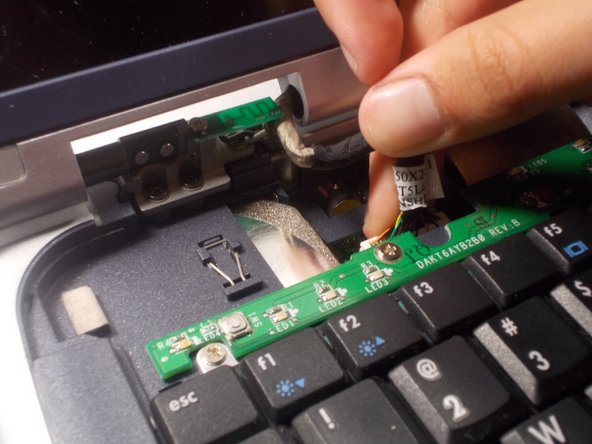
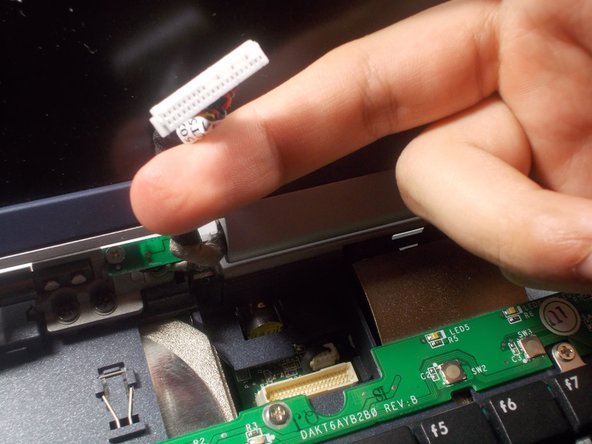
    • Remove the wire connection by gently pulling on the fuse and connection itself.

    • Do not pull on the wires, as this can remove the wires from the connection, destroying the fuse.

  6. HP Pavilion ze5000 Primary Fan Replacement: Schritt 6, Bild 1 von 3 HP Pavilion ze5000 Primary Fan Replacement: Schritt 6, Bild 2 von 3 HP Pavilion ze5000 Primary Fan Replacement: Schritt 6, Bild 3 von 3
    • Remove the four 4.0 mm Phillips #0 connecting the keyboard to the frame

  7. HP Pavilion ze5000 Primary Fan Replacement: Schritt 7, Bild 1 von 2 HP Pavilion ze5000 Primary Fan Replacement: Schritt 7, Bild 2 von 2
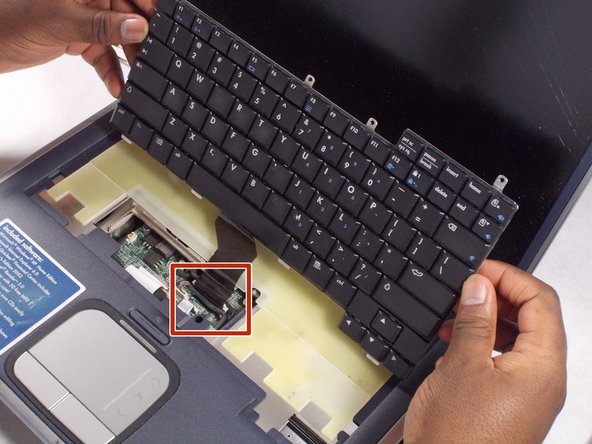
    • Gently lift the keyboard up from the frame so that you can see the ribbon still connected.

  8. HP Pavilion ze5000 Primary Fan Replacement: Schritt 8, Bild 1 von 3 HP Pavilion ze5000 Primary Fan Replacement: Schritt 8, Bild 2 von 3 HP Pavilion ze5000 Primary Fan Replacement: Schritt 8, Bild 3 von 3
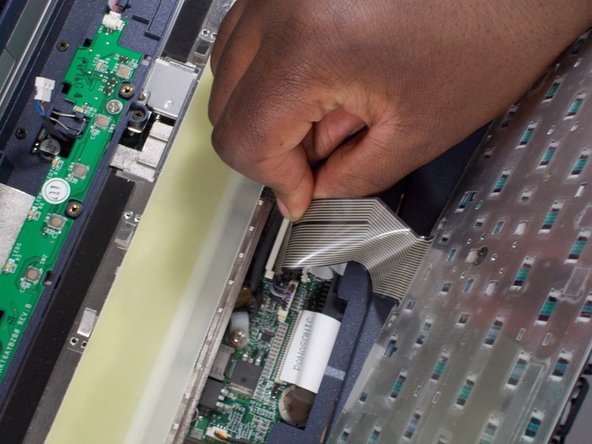
    • Remove the ribbon by gently pulling up the ends of the white receiver it is inserted in to.

    • You may need to use tweezers for this part.

    • During reassembly, when inserting the ribbon, you will hear a quiet, clicking sound when pushing down on the ends of the receiver. Hearing this ensures the ribbon is in place.

  9. HP Pavilion ze5000 Primary Fan Replacement, Primary Fan: Schritt 9, Bild 1 von 1
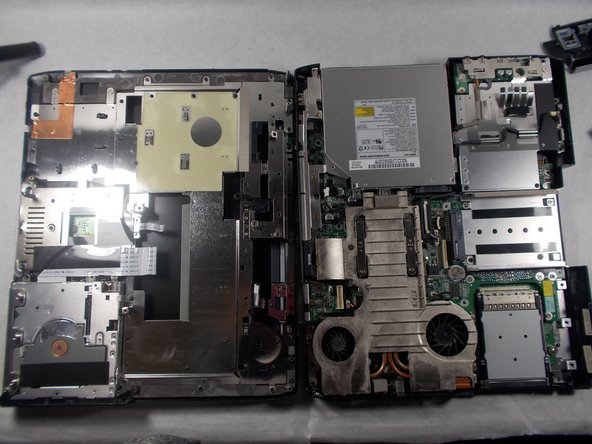
    • Remove sixteen 5.0 mm Phillips #1 screws from the underside of the device

  10. HP Pavilion ze5000 Primary Fan Replacement: Schritt 10, Bild 1 von 1
    • Remove the one 5.0 mm Phillips #1 screw underneath the battery home

  11. HP Pavilion ze5000 Primary Fan Replacement: Schritt 11, Bild 1 von 3 HP Pavilion ze5000 Primary Fan Replacement: Schritt 11, Bild 2 von 3 HP Pavilion ze5000 Primary Fan Replacement: Schritt 11, Bild 3 von 3
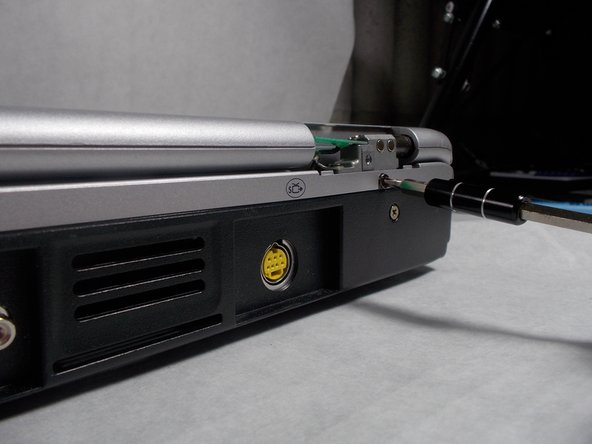
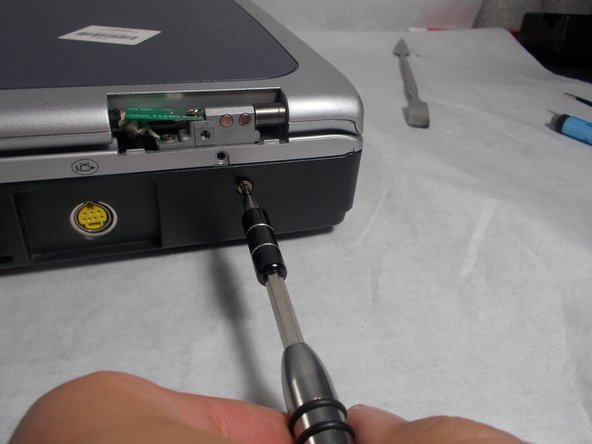
    • Remove the additional four 5.0 mm Phillips #1 screws from the hinge of the device

  12. HP Pavilion ze5000 Primary Fan Replacement: Schritt 12, Bild 1 von 2 HP Pavilion ze5000 Primary Fan Replacement: Schritt 12, Bild 2 von 2
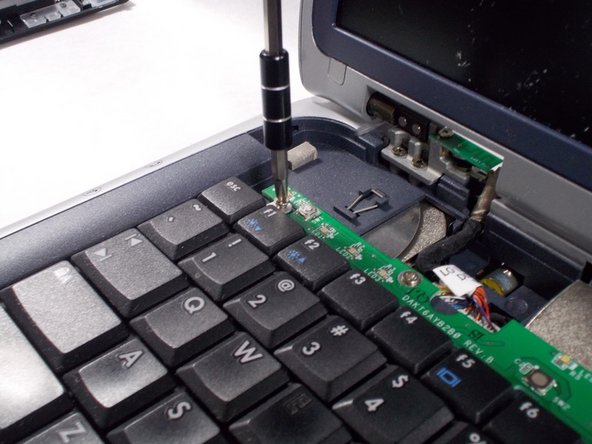
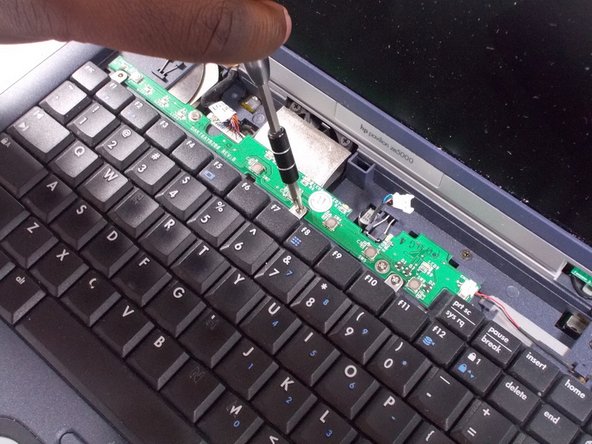
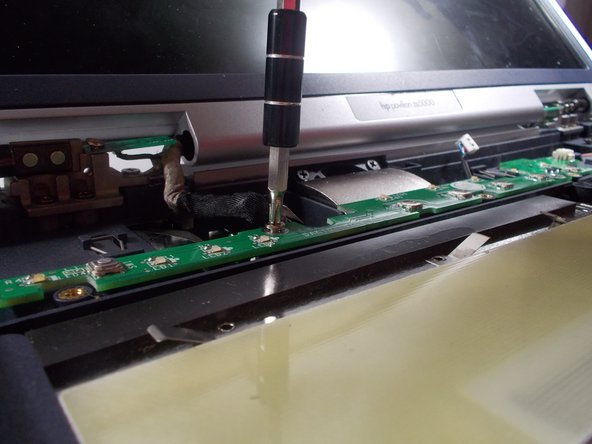
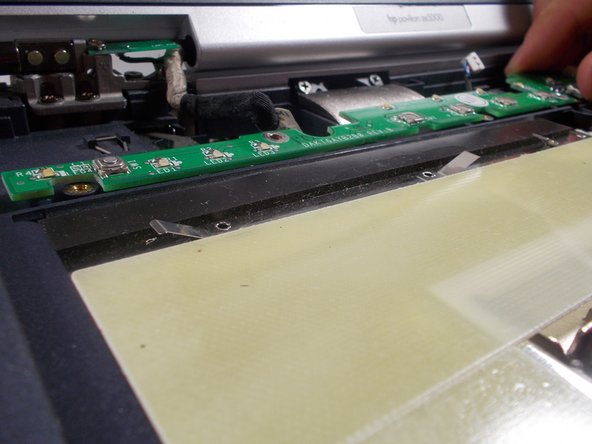
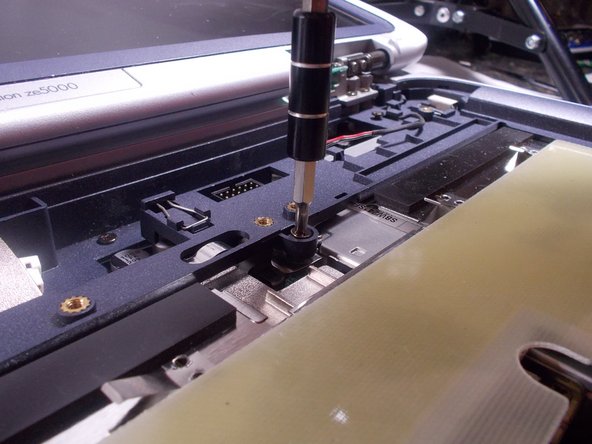
    • Remove the two 4.0 mm Phillips #0 screws attached to the cicuit board above the keyboard

  13. HP Pavilion ze5000 Primary Fan Replacement: Schritt 13, Bild 1 von 1
    • Gently remove the disconnection to the right of the circuit board

  14. HP Pavilion ze5000 Primary Fan Replacement: Schritt 14, Bild 1 von 2 HP Pavilion ze5000 Primary Fan Replacement: Schritt 14, Bild 2 von 2
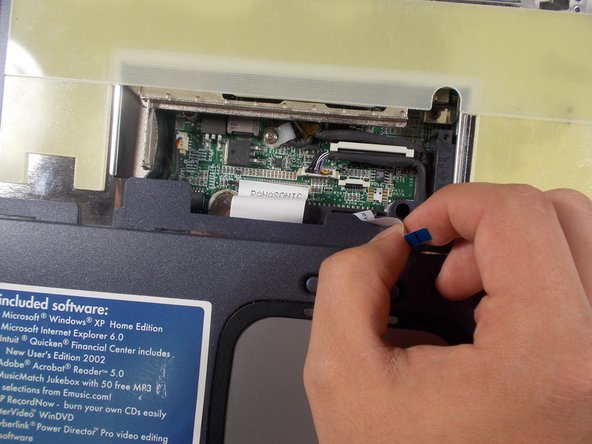
    • Take the circuit board off by pulling up on the right side of the circuit board

    • The board is plugged in to the device at this location still, but the outlet is hidden.

    • Pulling on the right side can snap the circuit board, so it is essential you pull on this side only

  15. HP Pavilion ze5000 Primary Fan Replacement: Schritt 15, Bild 1 von 2 HP Pavilion ze5000 Primary Fan Replacement: Schritt 15, Bild 2 von 2
    • Remove the five 5.0 mm Phillips #1 screws from underneath the keyboard

  16. HP Pavilion ze5000 Primary Fan Replacement: Schritt 16, Bild 1 von 3 HP Pavilion ze5000 Primary Fan Replacement: Schritt 16, Bild 2 von 3 HP Pavilion ze5000 Primary Fan Replacement: Schritt 16, Bild 3 von 3
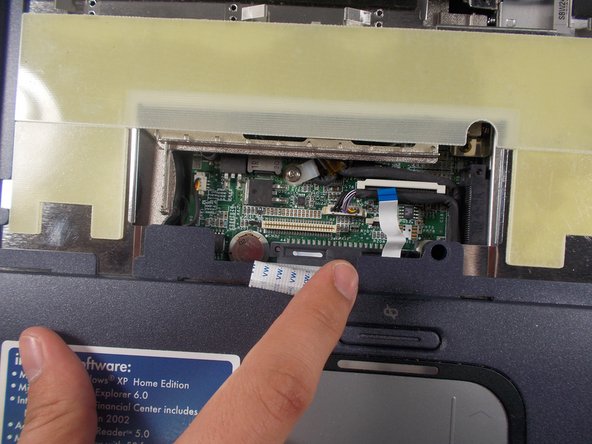
    • Disconnect the ribbons from the circuit board underneath the keyboard housing unit

  17. HP Pavilion ze5000 Primary Fan Replacement: Schritt 17, Bild 1 von 3 HP Pavilion ze5000 Primary Fan Replacement: Schritt 17, Bild 2 von 3 HP Pavilion ze5000 Primary Fan Replacement: Schritt 17, Bild 3 von 3
    • Remove the connection beneath the left hinge of the device

  18. HP Pavilion ze5000 Primary Fan Replacement: Schritt 18, Bild 1 von 2 HP Pavilion ze5000 Primary Fan Replacement: Schritt 18, Bild 2 von 2
    • Pry the device apart to expose the inside of the device

    • This should be relatively easy since all connections and screws are removed. However, a spudger can be used if you are having difficulties.

  19. HP Pavilion ze5000 Primary Fan Replacement: Schritt 19, Bild 1 von 3 HP Pavilion ze5000 Primary Fan Replacement: Schritt 19, Bild 2 von 3 HP Pavilion ze5000 Primary Fan Replacement: Schritt 19, Bild 3 von 3
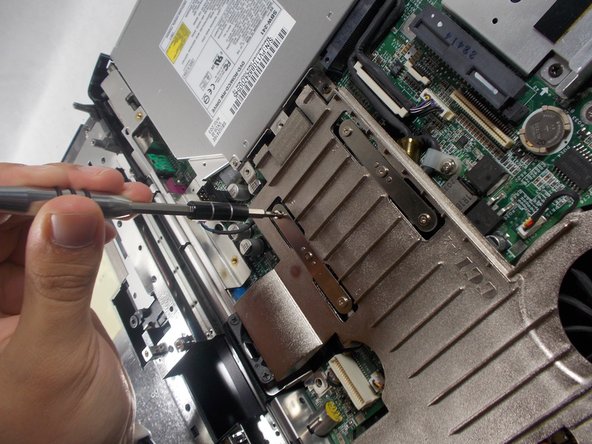
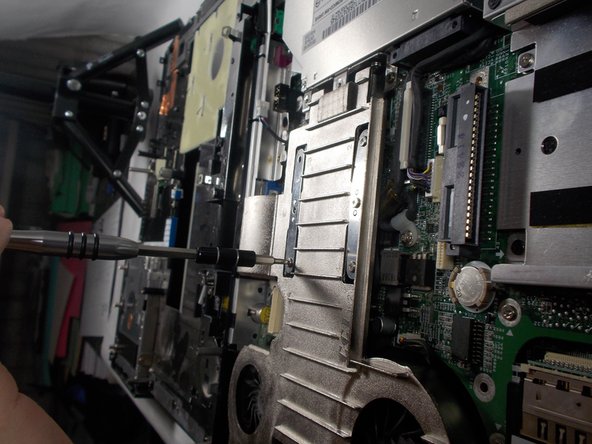
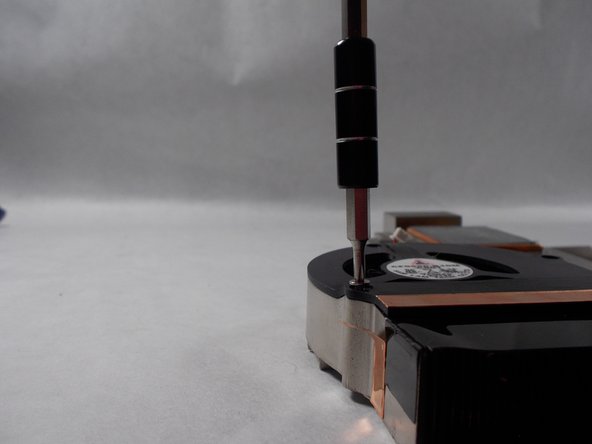
    • Remove the latches securing the fan housing unit by unscrewing the six 4.0 mm Phillips #0 screws

  20. HP Pavilion ze5000 Primary Fan Replacement: Schritt 20, Bild 1 von 1
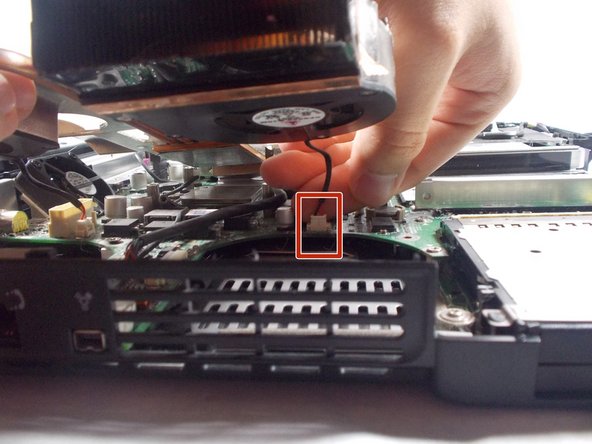
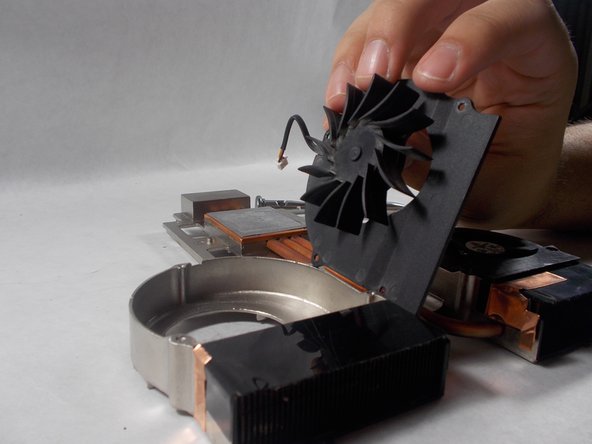
    • Lift the housing unit a few inches from the device to expose the two small connections.

  21. HP Pavilion ze5000 Primary Fan Replacement: Schritt 21, Bild 1 von 2 HP Pavilion ze5000 Primary Fan Replacement: Schritt 21, Bild 2 von 2
    • Remove the two small connections directly above and below the fan housing unit

  22. HP Pavilion ze5000 Primary Fan Replacement: Schritt 22, Bild 1 von 2 HP Pavilion ze5000 Primary Fan Replacement: Schritt 22, Bild 2 von 2
    • Remove the fan housing unit and flip it over

  23. HP Pavilion ze5000 Primary Fan Replacement: Schritt 23, Bild 1 von 3 HP Pavilion ze5000 Primary Fan Replacement: Schritt 23, Bild 2 von 3 HP Pavilion ze5000 Primary Fan Replacement: Schritt 23, Bild 3 von 3
    • Remove the eight 3.5 mm Phillips #00 screws from the fan housing unit

  24. HP Pavilion ze5000 Primary Fan Replacement: Schritt 24, Bild 1 von 2 HP Pavilion ze5000 Primary Fan Replacement: Schritt 24, Bild 2 von 2
    • Remove both or whichever fan needs to be replaced

    • There should be bronze electric tape on the fan housing unit. Do not hesitate to tear the tape in order to open the housing unit

Abschluss

To reassemble your device, follow these instructions in reverse order.

2 weitere Nutzer:innen haben diese Anleitung absolviert.

Eric Beaudry

Mitglied seit: 03/06/18

823 Reputation

3 Anleitungen geschrieben

Team

UMass Dartmouth, Team S2-G7, Bernier Spring 2018 Mitglied von UMass Dartmouth, Team S2-G7, Bernier Spring 2018

UMASSD-BERNIER-S18S2G7

2 Mitglieder

4 Anleitungen geschrieben

0 Kommentare

Kommentar hinzufügen

Seitenaufrufe:

Letzte 24 Stunden: 0

Letzte 7 Tage: 0

Letzte 30 Tage: 0

Insgesamt: 204