Zum Hauptinhalt wechseln

HP ProBook 440 G1 Optical Drive Replacement

Was du brauchst

  1. HP ProBook 440 G1 Optical Drive Replacement, Battery: Schritt 1, Bild 1 von 2 HP ProBook 440 G1 Optical Drive Replacement, Battery: Schritt 1, Bild 2 von 2
    • Make sure the laptop is turned off before you start.

    • Push and hold the release tab on the right and left toward the center.

  2. HP ProBook 440 G1 Optical Drive Replacement: Schritt 2, Bild 1 von 2 HP ProBook 440 G1 Optical Drive Replacement: Schritt 2, Bild 2 von 2
    • Pull the battery out.

  3. HP ProBook 440 G1 Optical Drive Replacement, Backplate: Schritt 3, Bild 1 von 3 HP ProBook 440 G1 Optical Drive Replacement, Backplate: Schritt 3, Bild 2 von 3 HP ProBook 440 G1 Optical Drive Replacement, Backplate: Schritt 3, Bild 3 von 3
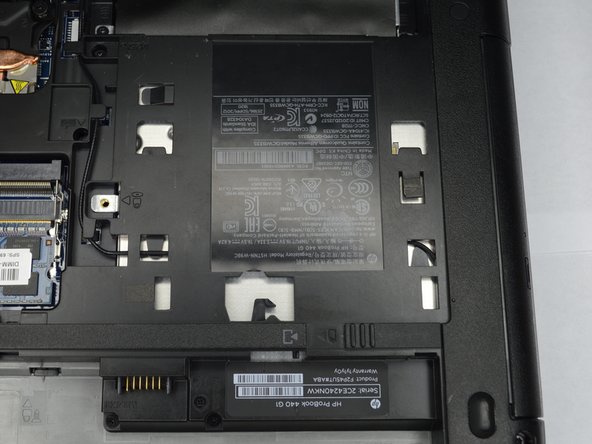
    • Push and hold the release tabs on the right and left toward the center again.

  4. HP ProBook 440 G1 Optical Drive Replacement: Schritt 4, Bild 1 von 1
    • Slide the backplate off.

  5. HP ProBook 440 G1 Optical Drive Replacement, Optical Drive: Schritt 5, Bild 1 von 2 HP ProBook 440 G1 Optical Drive Replacement, Optical Drive: Schritt 5, Bild 2 von 2
    • Locate the optical drive, near the battery on the right side.

  6. HP ProBook 440 G1 Optical Drive Replacement: Schritt 6, Bild 1 von 3 HP ProBook 440 G1 Optical Drive Replacement: Schritt 6, Bild 2 von 3 HP ProBook 440 G1 Optical Drive Replacement: Schritt 6, Bild 3 von 3
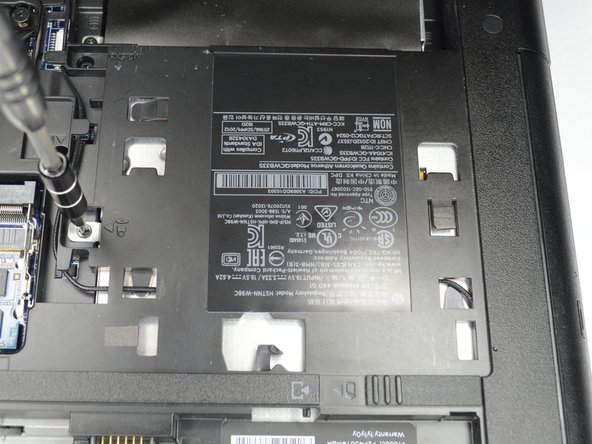
    • Remove the Philips PM2.5x6.0 screw that attaches the optical drive to the computer.

  7. HP ProBook 440 G1 Optical Drive Replacement: Schritt 7, Bild 1 von 2 HP ProBook 440 G1 Optical Drive Replacement: Schritt 7, Bild 2 von 2
    • Slowly remove the optical drive, by pulling it straight out of the slot.

Abschluss

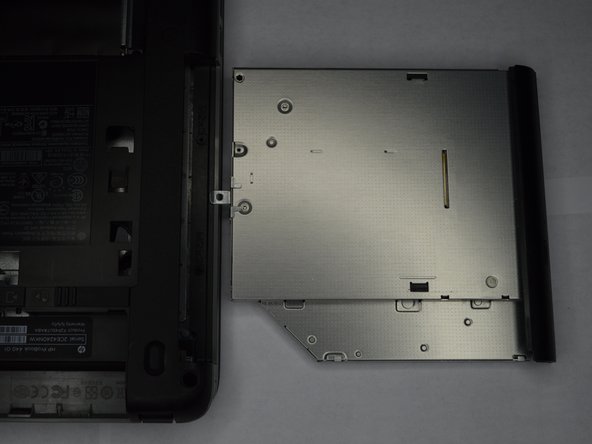
To reassemble your device, follow these instructions in reverse order.

Ein:e weitere:r Nutzer:in hat diese Anleitung absolviert.

0 Kommentare

Kommentar hinzufügen

Seitenaufrufe:

Letzte 24 Stunden: 0

Letzte 7 Tage: 6

Letzte 30 Tage: 9

Insgesamt: 595