Diese Version enthält möglicherweise inkorrekte Änderungen. Wechsle zur letzten geprüften Version.
Was du brauchst
-
Dieser Schritt ist noch nicht übersetzt. Hilf mit, ihn zu übersetzen!
-
Use plastic opening tool to pry back panel off.
-
-
Dieser Schritt ist noch nicht übersetzt. Hilf mit, ihn zu übersetzen!
-
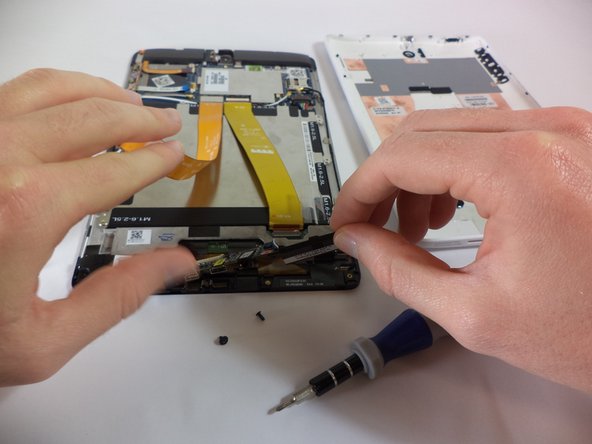
Remove the orange and yellow ribbon cables.
-
detach the screws along the IO board
-
-
-
Dieser Schritt ist noch nicht übersetzt. Hilf mit, ihn zu übersetzen!
-
Remove the IO board and the speakers circuit. Note that they are held together.
-
-
Dieser Schritt ist noch nicht übersetzt. Hilf mit, ihn zu übersetzen!
-
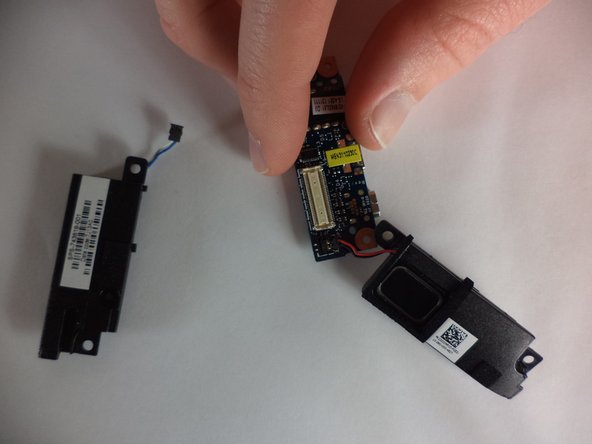
The tablet has two speakers. Each speaker is located to both sides of the IO board.
-
Detach the speakers from the cables that connect the speakers and the IO board. You will find more details in step 5 and 6.
-
-
Dieser Schritt ist noch nicht übersetzt. Hilf mit, ihn zu übersetzen!
-
To remove the cables that connect the speakers and the IO board, apply a subtle pressure to pull the cable out.
-
-
Dieser Schritt ist noch nicht übersetzt. Hilf mit, ihn zu übersetzen!
-
Once you detach the speakers from the IO board, you should have three pieces as shown.
-
You are ready to replace the speakers.
-


Rückgängig: Ich habe diese Anleitung nicht absolviert.
Ein:e weitere:r Nutzer:in hat diese Anleitung absolviert.
Team

USF Tampa, Team 9-4, Blackwell Fall 2014 Mitglied von USF Tampa, Team 9-4, Blackwell Fall 2014
USFT-BLACKWELL-F14S9G4
4 Mitglieder
10 Anleitungen geschrieben