Einleitung
If your Wi-Fi stops working, or you think that the Wi-Fi card is malfunctioning in your HP Spectre x360 13-4103dx, follow this guide to replace it.
Over time, the Wi-Fi card in your laptop may develop issues due to physical wear and tear or conflicts with other software programs.
This guide is dedicated to those with an average level of technical expertise. However, beginners should have no problem following these steps.
Before beginning the repair, make sure the laptop is completely powered off and unplugged from any power source. Work in a static-free environment to avoid damaging sensitive components. If possible, use an anti-static wrist strap to eliminate the risk of static electricity. Keep track of all screws and small parts by using a container or magnetic mat in order to stay organized during the process of dissembling.
Was du brauchst
-
-
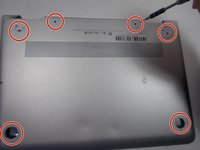
Use a Torx #5 screwdriver to remove the six 3.5 mm screws holding the back cover to the laptop.
-
-
-
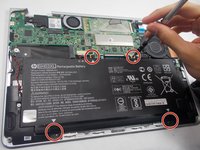
Use the Phillips #000 screwdriver to remove the four 3.5 mm screws holding the battery.
-
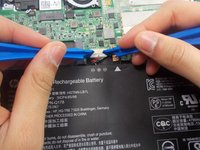
After removing the screws, detach the battery wire from the mother board with the iFixit opening tool.
-
Then, carefully lift the battery off with the iFixit opening tool.
-
-
-
-
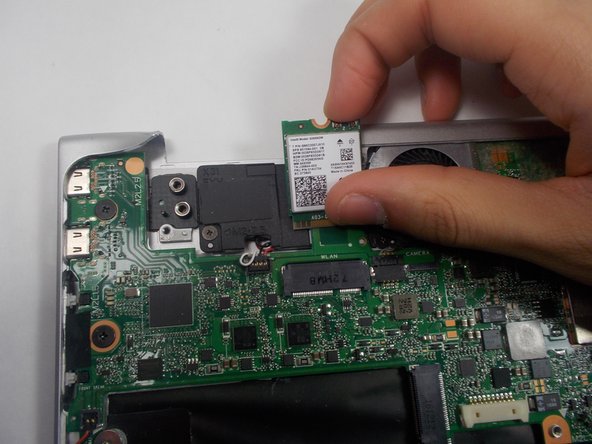
Use the Phillips #000 screwdriver to remove the screw holding the wifi card in place.
-
-
-
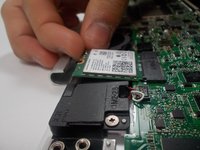
Once the screw is removed, hold the WiFi card by it's sides and raise it up whiling sliding it out from the slot.
-
-
-
Hold the replacement Wifi card by the edges and remove it out of the static-dissipative bag.
-
-
-
Align the notches on the Wifi card with the keys on the Wifi card slot.
-
Hold the card by the edges and slide the Wifi card into the Wifi Card slot.
-
-
-
Use the Phillips #000 screwdriver to attach the screw holding the Wifi card in place.
-


To reassemble your device, follow these instructions in reverse order.
To reassemble your device, follow these instructions in reverse order.
Team

UMass Dartmouth, Team S1-G6, Botvin Fall 2019 Mitglied von UMass Dartmouth, Team S1-G6, Botvin Fall 2019
UMASSD-BOTVIN-F19S1G6
3 Mitglieder
11 Anleitungen geschrieben