Einleitung
This guide will instruct you on how to remove and replace the Wifi Adapter. Replacement of the wifi adapter may be necessary if the device cannot connect to the internet.
Was du brauchst
-
-
Turn off and unplug the laptop.
-
Flip over the laptop so that the bottom backplate is exposed.
-
-
-
Use a T5 screwdriver to remove the six 3 mm screws that secure the backplate.
-
Use the same screwdriver to remove the two 7 mm screws.
-
-
-
-
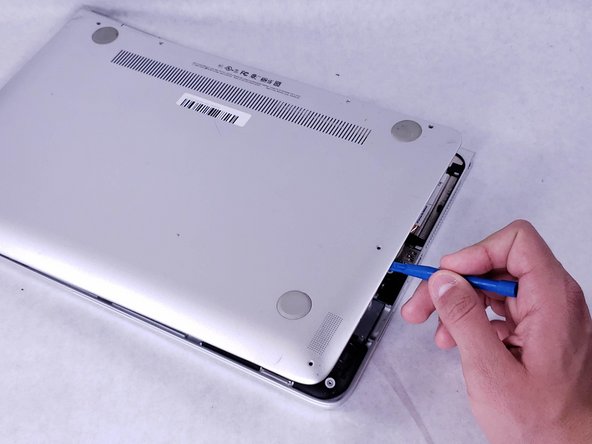
Insert an opening tool under the bottom cover at the screen hinges, and gently pry the cover free.
-
Carefully work your way around the cover's edges to pop it off completely.
-
-
-
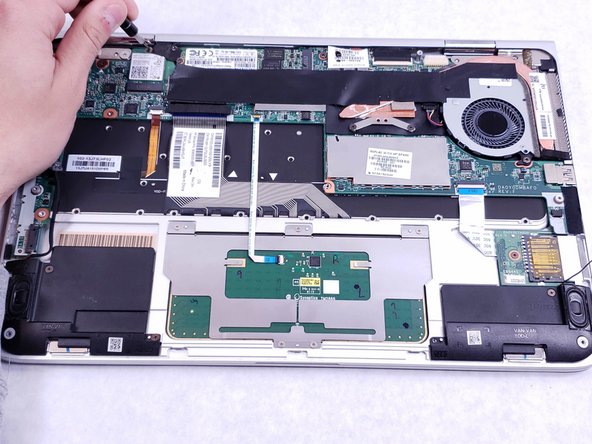
With the backplate removed, remove the four 3 mm screws securing the battery with a Phillips #1 screwdriver.
-
With the screws removed, disconnect the 3 wires connected to the battery.
-
-
-
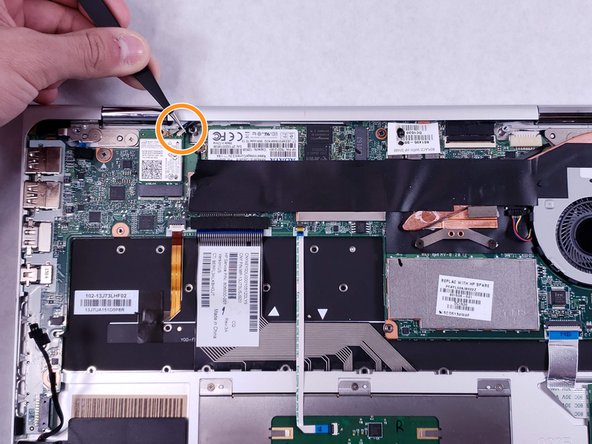
Using a Phillips#0 screwdriver, remove the 2 mm screw.
-
Located to the right of the screw, there are two wires connected to the adapter. Using tweezers, carefully remove the wires.
-
Now you can remove the adapter by pulling it from its socket.
-


To reassemble your device, follow these instructions in reverse order.
To reassemble your device, follow these instructions in reverse order.
Team

UMass Dartmouth, Team S2-G4, Simcock Spring 2019 Mitglied von UMass Dartmouth, Team S2-G4, Simcock Spring 2019
UMASSD-SIMCOCK-S19S2G4
3 Mitglieder
6 Anleitungen geschrieben