Diese Version enthält möglicherweise inkorrekte Änderungen. Wechsle zur letzten geprüften Version.
Was du brauchst
-
-
Erhitze den iOpener für dreißig Sekunden.
-
Im Verlauf der Reparatur kühlt sich der iOpener wieder ab. Erhitze ihn dann noch einmal für dreißig Sekunden.
-
-
-
Halte den iOpener an einem der flachen Enden und vermeide die heiße Mitte, während du ihn aus der Mikrowelle nimmst.
-
-
-
Fülle einen Topf oder eine tiefe Pfanne mit ausreichend Wasser, um den iOpener komplett damit bedecken zu können.
-
Erhitze das Wasser (ohne den iOpener) bis es kocht. Schalte die Wärmezufuhr (Platte) aus.
-
Lege den iOpener für etwa 2-3 Minuten in das heiße Wasser. Stelle sicher, dass der iOpener komplett mit Wasser bedeckt ist.
-
Nimm den iOpener mit einer Küchenzange aus dem Wasser heraus.
-
Trockne den iOpener gründlich mit einem Küchen- oder Handtuch ab.
-
Der iOpener kann jetzt verwendet werden. Solltest du den iOpener erneut erwärmen müssen, erhitze das Wasser nochmal bis zum Siedepunkt, schalte die Wärmezufuhr aus, und lege den iOpener wieder für 2-3 Minuten vollständig in das Wasser.
-
-
Dieser Schritt ist noch nicht übersetzt. Hilf mit, ihn zu übersetzen!
-
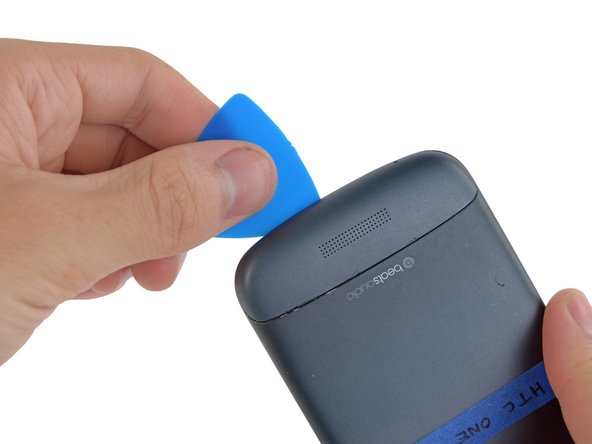
Handling it by the tag, place the heated iOpener across the bottom casing.
-
-
Dieser Schritt ist noch nicht übersetzt. Hilf mit, ihn zu übersetzen!
-
Gently place an opening pick in the corner of the gap between the bottom casing and rear case.
-
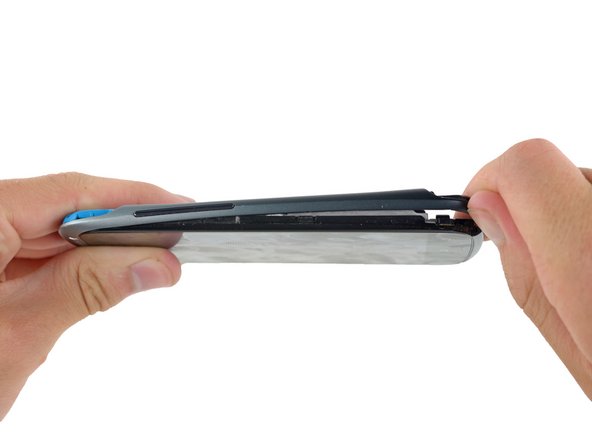
Slide the opening pick along the side of the casing, prying it away from the adhesive as you go.
-
-
Dieser Schritt ist noch nicht übersetzt. Hilf mit, ihn zu übersetzen!
-
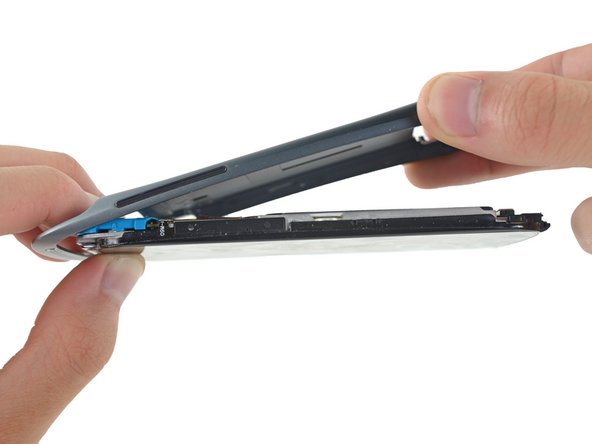
Use your fingers to pull the bottom casing off the rest of the phone.
-
-
Dieser Schritt ist noch nicht übersetzt. Hilf mit, ihn zu übersetzen!
-
Starting at the groove near the headphone jack, use a plastic opening tool to lift the top casing.
-
-
Dieser Schritt ist noch nicht übersetzt. Hilf mit, ihn zu übersetzen!
-
Use your fingers to pull the top casing off of the rest of the phone.
-
-
-
Dieser Schritt ist noch nicht übersetzt. Hilf mit, ihn zu übersetzen!
-
Remove the following screws holding the rear case to the rest of the phone:
-
Two 3.15 mm Phillips #00 screws
-
One 4.15 Torx T5 screw
-
One 4 mm Torx T5 screw
-
-
Dieser Schritt ist noch nicht übersetzt. Hilf mit, ihn zu übersetzen!
-
Place your fingers on either side of the phone and gently push up on the rear case.
-
-
Dieser Schritt ist noch nicht übersetzt. Hilf mit, ihn zu übersetzen!
-
Pull the rear case away from the rest of the phone with your hands.
-
-
Dieser Schritt ist noch nicht übersetzt. Hilf mit, ihn zu übersetzen!
-
Using the pointed end of a spudger, lift the battery cable and release the connector.
-
-
Dieser Schritt ist noch nicht übersetzt. Hilf mit, ihn zu übersetzen!
-
Switching to the flat end of the spudger, work your way underneath the battery and peel it away from the adhesive.
-
-
Dieser Schritt ist noch nicht übersetzt. Hilf mit, ihn zu übersetzen!
-
Remove the battery from the phone.
-
-
Dieser Schritt ist noch nicht übersetzt. Hilf mit, ihn zu übersetzen!
-
Remove the three 3.15mm Phillips #00 screws from the turquoise case.
-
-
Dieser Schritt ist noch nicht übersetzt. Hilf mit, ihn zu übersetzen!
-
Using a plastic opening tool, lift the turquoise case from the end near the headphone jack.
-
-
Dieser Schritt ist noch nicht übersetzt. Hilf mit, ihn zu übersetzen!
-
Remove the turquoise cover from the phone.
-
-
Dieser Schritt ist noch nicht übersetzt. Hilf mit, ihn zu übersetzen!
-
A camera filter is now free to move, so remove it using tweezers.
-
-
Dieser Schritt ist noch nicht übersetzt. Hilf mit, ihn zu übersetzen!
-
Use tweezers to lift the yellow polyimide tape that covers the ZIF connectors.
-
-
Dieser Schritt ist noch nicht übersetzt. Hilf mit, ihn zu übersetzen!
-
Use the pointed end of a spudger to lift the white tab on the largest ZIF connector opposite the USB connector.
-
-
Dieser Schritt ist noch nicht übersetzt. Hilf mit, ihn zu übersetzen!
-
Use the pointed edge of a spudger to work the ZIF cable out of its connector.
-
-
Dieser Schritt ist noch nicht übersetzt. Hilf mit, ihn zu übersetzen!
-
Repeat the procedure from steps 19 and 20 to remove the cables from the remaining ZIF connectors.
-
-
Dieser Schritt ist noch nicht übersetzt. Hilf mit, ihn zu übersetzen!
-
Using the pointed end of the spudger, pop the antenna cable from its connector on the motherboard.
-
-
Dieser Schritt ist noch nicht übersetzt. Hilf mit, ihn zu übersetzen!
-
Remove the 3.15 mm Phillips #00 screw from the motherboard.
-
-
Dieser Schritt ist noch nicht übersetzt. Hilf mit, ihn zu übersetzen!
-
Remove the motherboard from the rest of the phone.
-


Rückgängig: Ich habe diese Anleitung nicht absolviert.
11 weitere Nutzer:innen haben diese Anleitung absolviert.
Team

Cal Poly, Team 10-55, Amido Spring 2014 Mitglied von Cal Poly, Team 10-55, Amido Spring 2014
CPSU-AMIDO-S14S10G55
4 Mitglieder
31 Anleitungen geschrieben