Zum Hauptinhalt wechseln

HTC Rhyme Speaker Replacement

Was du brauchst

  1. HTC Rhyme Speaker Replacement, Speaker: Schritt 1, Bild 1 von 2 HTC Rhyme Speaker Replacement, Speaker: Schritt 1, Bild 2 von 2
    • Slide the bottom back casing off, pulling down.

  2. HTC Rhyme Speaker Replacement: Schritt 2, Bild 1 von 2 HTC Rhyme Speaker Replacement: Schritt 2, Bild 2 von 2
    • Using the plastic tool, pry underneath the top plastic cover.

  3. HTC Rhyme Speaker Replacement: Schritt 3, Bild 1 von 2 HTC Rhyme Speaker Replacement: Schritt 3, Bild 2 von 2
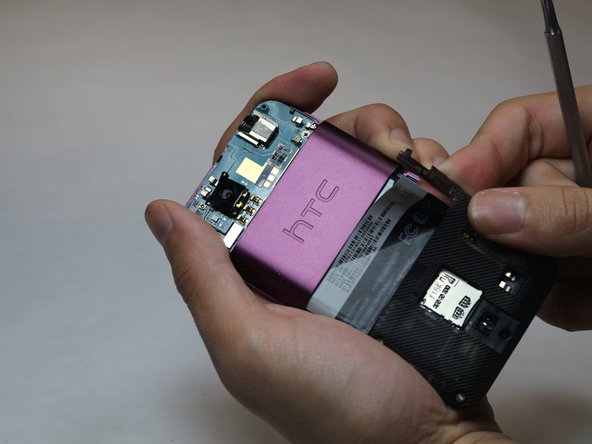
    • Using a metal spudger, pry up the plastic piece covering the motherboard, and remove the sticker.

  4. HTC Rhyme Speaker Replacement, Removing the Back Plastic Motherboard Cover: Schritt 4, Bild 1 von 2 HTC Rhyme Speaker Replacement, Removing the Back Plastic Motherboard Cover: Schritt 4, Bild 2 von 2
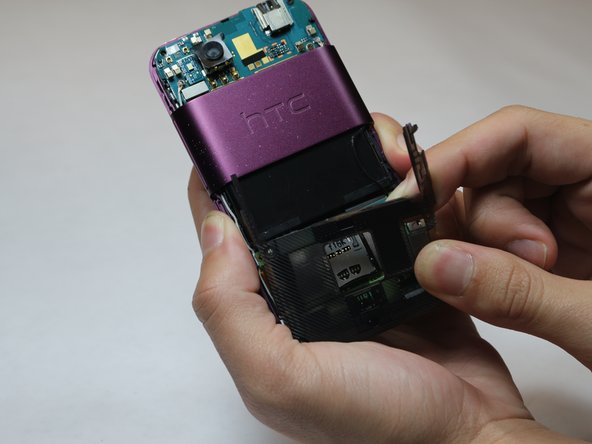
    • Use a Philip #0 screwdriver to remove the four screws of the plastic covering the motherboard.

  5. HTC Rhyme Speaker Replacement: Schritt 5, Bild 1 von 1
    • Using tweezers, remove the yellow ribbon by gently pulling on it.

  6. HTC Rhyme Speaker Replacement: Schritt 6, Bild 1 von 2 HTC Rhyme Speaker Replacement: Schritt 6, Bild 2 von 2
    • Using the plastic tweezers, gently lift the blue flaps up.

  7. HTC Rhyme Speaker Replacement: Schritt 7, Bild 1 von 2 HTC Rhyme Speaker Replacement: Schritt 7, Bild 2 von 2
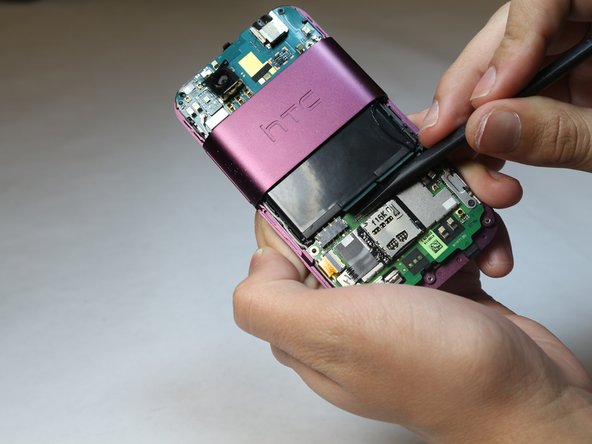
    • Using your thumb, push the flap up on the top.

    • Using your thumb, push the flap up on the bottom of the motherboard.

  8. HTC Rhyme Speaker Replacement, Unscrewing the Motherboard: Schritt 8, Bild 1 von 2 HTC Rhyme Speaker Replacement, Unscrewing the Motherboard: Schritt 8, Bild 2 von 2
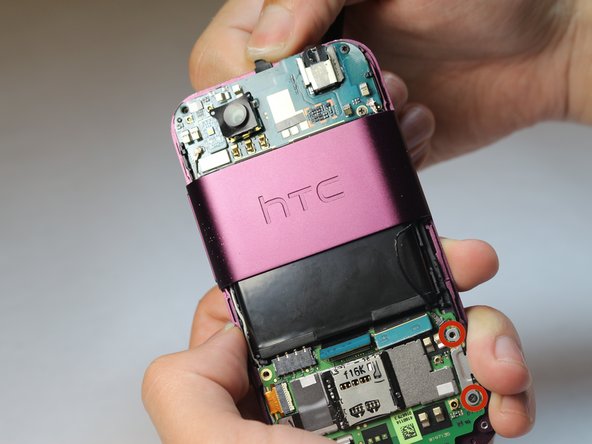
    • Using a Phillips #00 screwdriver, unscrew the four screws in each corner of the motherboard.

  9. HTC Rhyme Speaker Replacement, Removing the Motherboard: Schritt 9, Bild 1 von 1
    • Carefully remove the motherboard from the base of the phone.

  10. HTC Rhyme Speaker Replacement: Schritt 10, Bild 1 von 3 HTC Rhyme Speaker Replacement: Schritt 10, Bild 2 von 3 HTC Rhyme Speaker Replacement: Schritt 10, Bild 3 von 3
    • Gently push the base of the phone from the frame.

  11. HTC Rhyme Speaker Replacement, Battery Removal: Schritt 11, Bild 1 von 2 HTC Rhyme Speaker Replacement, Battery Removal: Schritt 11, Bild 2 von 2
    • Using the metal spudger, remove the battery from the base.

  12. HTC Rhyme Speaker Replacement, Locating and Replacing the Speaker: Schritt 12, Bild 1 von 2 HTC Rhyme Speaker Replacement, Locating and Replacing the Speaker: Schritt 12, Bild 2 von 2
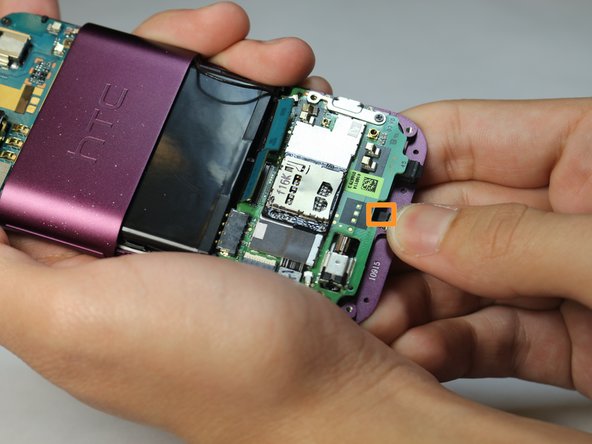
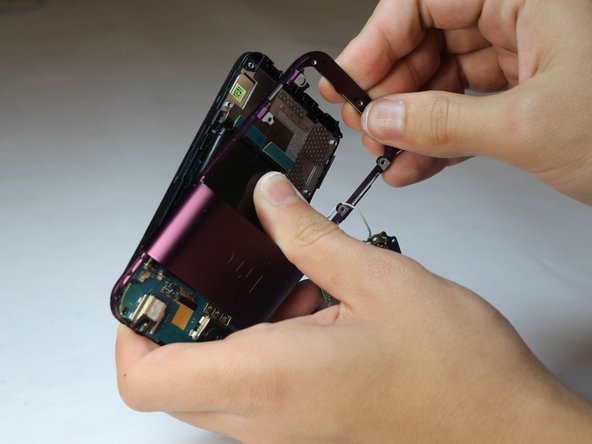
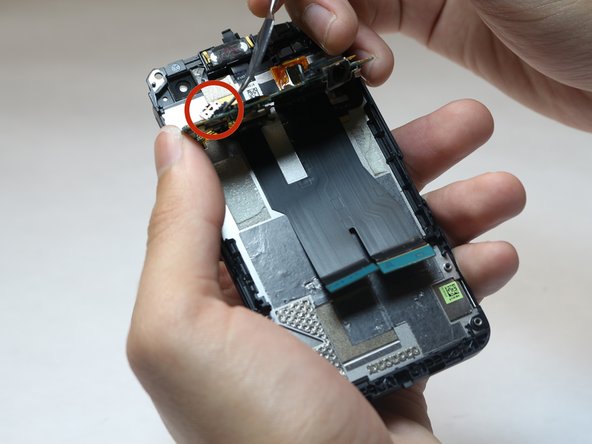
    • Using tweezers, lift the secondary motherboard from the base of the phone.

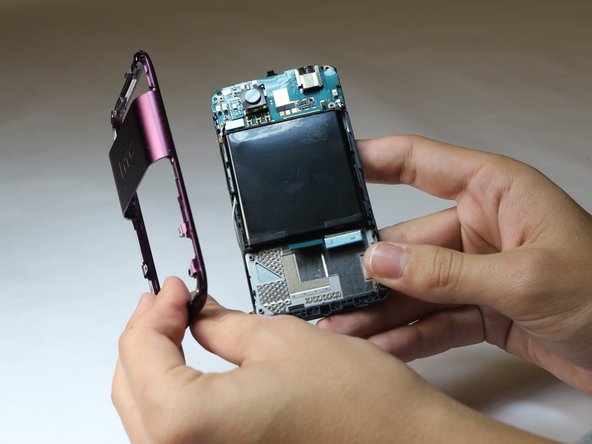
    • The speaker is located on the back of the board.

Abschluss

To reassemble your device, follow these instructions in reverse order.

Team

USF Tampa, Team 9-6, Leahy Fall 2014 Mitglied von USF Tampa, Team 9-6, Leahy Fall 2014

USFT-LEAHY-F14S9G6

3 Mitglieder

10 Anleitungen geschrieben

0 Kommentare

Kommentar hinzufügen

Seitenaufrufe:

Letzte 24 Stunden: 1

Letzte 7 Tage: 7

Letzte 30 Tage: 7

Insgesamt: 340