Zum Hauptinhalt wechseln

Hamilton Beach 70740 Power Cord Replacement

Archivierte Anleitung
Diese Anleitung wurde ausschließlich für historische Zwecke erhalten. Verwende die aktualisierte Version dieser Anleitung, um deine Reparatur durchzuführen.

Was du brauchst

  1. Achtung: Die Schritte 1-5 stammen von einer Anleitung, die derzeit bearbeitet wird.

    Hamilton Beach 70740 Power Cord Replacement, Base Removal: Schritt 1, Bild 1 von 3 Hamilton Beach 70740 Power Cord Replacement, Base Removal: Schritt 1, Bild 2 von 3 Hamilton Beach 70740 Power Cord Replacement, Base Removal: Schritt 1, Bild 3 von 3
    • Hold the food processor upside down and remove the two screws indicated with a screwdriver. Once unscrewed, remove the two rubber suction pads.

  2. Hamilton Beach 70740 Power Cord Replacement: Schritt 2, Bild 1 von 2 Hamilton Beach 70740 Power Cord Replacement: Schritt 2, Bild 2 von 2
    • Use a spudger to remove the 4 rubber base pads located at the corners of the device.

  3. Hamilton Beach 70740 Power Cord Replacement: Schritt 3, Bild 1 von 1
    • Unscrew all 4 screws that are located beneath the pads with a screwdriver and remove the plastic grey base.

  4. Hamilton Beach 70740 Power Cord Replacement: Schritt 4, Bild 1 von 1
    • Remove the screws indicated with a screw driver.

  5. Hamilton Beach 70740 Power Cord Replacement: Schritt 5, Bild 1 von 1
    • Remove the two screws behind the knob with a screwdriver.

  6. Hamilton Beach 70740 Power Cord Replacement, Motor/Cord: Schritt 6, Bild 1 von 1
    • Use a regular nylon spudger to remove the plastic caps at these locations with moderate pressure.

    • When working with electronics, it's important to choose a tool that's ESD-safe to avoid accidental damage to the device. The regular black nylon spudger or a plastic opening tool should be used whenever possible.

    • Apply pressure at the edge of the plastic cap circles. Apply stress elsewhere may damage the device.

    • Note that the plastic caps are glued

  7. Hamilton Beach 70740 Power Cord Replacement: Schritt 7, Bild 1 von 1
    • Remove the 4 screws located under the plastic caps with a screw driver.

  8. Hamilton Beach 70740 Power Cord Replacement: Schritt 8, Bild 1 von 2 Hamilton Beach 70740 Power Cord Replacement: Schritt 8, Bild 2 von 2
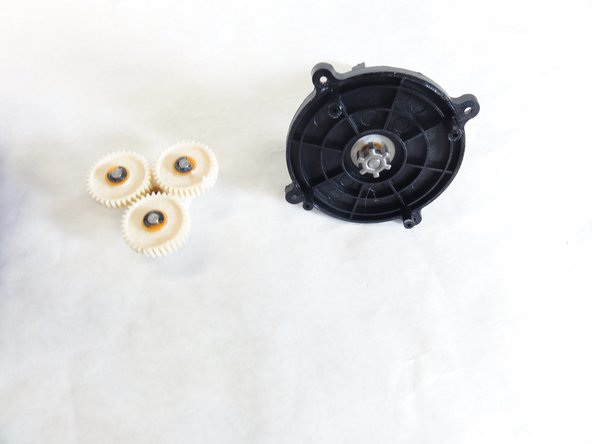
    • Lift and remove the plastic gears at the center of the device.

    • Remove any grease residue underneath the plastic gears.

  9. Hamilton Beach 70740 Power Cord Replacement: Schritt 9, Bild 1 von 2 Hamilton Beach 70740 Power Cord Replacement: Schritt 9, Bild 2 von 2
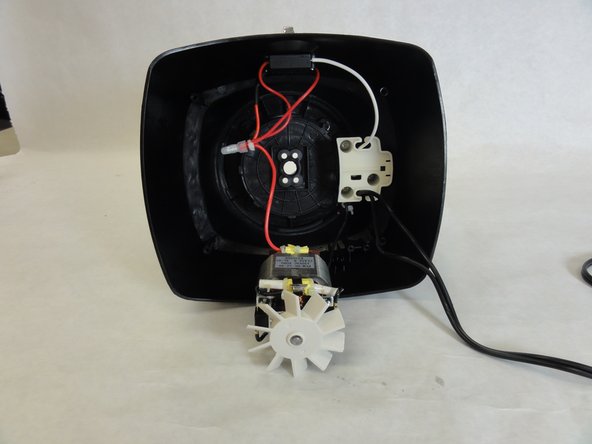
    • Remove the remaining screws to unhinge the motor located at the center of the device using a screw driver.

  10. Hamilton Beach 70740 Power Cord Replacement, Power Cord: Schritt 10, Bild 1 von 1
    • Solder the highlighted section of the power cord, and undo the wiring. Using soldering wire connect a new line with the soldering iron.

    • Learn more about soldering here.

  11. Hamilton Beach 70740 Power Cord Replacement: Schritt 11, Bild 1 von 1
    • Connect the other end of your power cord to the motor terminal.

Abschluss

To reassemble your device, follow these instructions in reverse order.

David Gedeon

Mitglied seit: 09/17/15

806 Reputation

6 Anleitungen geschrieben

Team

IUPUI, Team 1-1, Baechle Fall 2015 Mitglied von IUPUI, Team 1-1, Baechle Fall 2015

IUPUI-BAECHLE-F15S1G1

4 Mitglieder

8 Anleitungen geschrieben

0 Kommentare

Kommentar hinzufügen

Seitenaufrufe:

Letzte 24 Stunden: 0

Letzte 7 Tage: 0

Letzte 30 Tage: 0

Insgesamt: 345