Zum Hauptinhalt wechseln

Hannspree SN12E2 Speaker Replacement

Was du brauchst

  1. Hannspree SN12E2 Speaker Replacement, Battery: Schritt 1, Bild 1 von 1
    • Unplug and power off your laptop.

  2. Hannspree SN12E2 Speaker Replacement: Schritt 2, Bild 1 von 1
    • Close your laptop .

    • Place your laptop face down on a flat surface.

  3. Hannspree SN12E2 Speaker Replacement: Schritt 3, Bild 1 von 3 Hannspree SN12E2 Speaker Replacement: Schritt 3, Bild 2 von 3 Hannspree SN12E2 Speaker Replacement: Schritt 3, Bild 3 von 3
    • Unlatch the lock on the top right of your laptop first.

    • You will need to pull on the lock on the left side and remove the battery at the same time

    • The left lock is a spring lock and needs constant pressure applied in order to stay open.

  4. Hannspree SN12E2 Speaker Replacement, Touchpad Plane/Keyboard: Schritt 4, Bild 1 von 1
    • Remove all the 5mm PH0 screws on the back cover

  5. Hannspree SN12E2 Speaker Replacement: Schritt 5, Bild 1 von 3 Hannspree SN12E2 Speaker Replacement: Schritt 5, Bild 2 von 3 Hannspree SN12E2 Speaker Replacement: Schritt 5, Bild 3 von 3
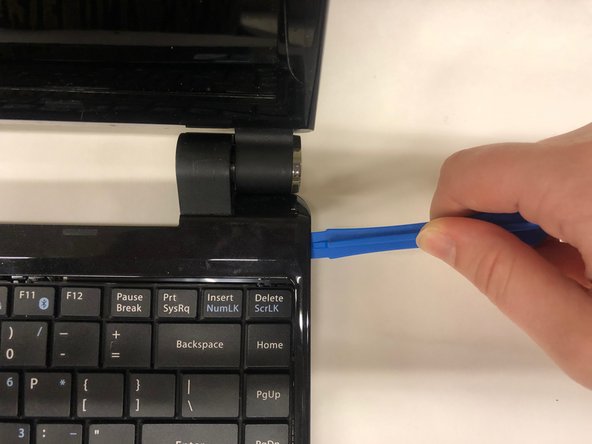
    • Gently pry the case apart starting at the lower right corner using the small spudger

    • Move around the case gently prying until the touchpad plane is free from the rest of the case

  6. Hannspree SN12E2 Speaker Replacement: Schritt 6, Bild 1 von 2 Hannspree SN12E2 Speaker Replacement: Schritt 6, Bild 2 von 2
    • Gently lift up on the touchpad portion of the touchpad plane

    • Unplug the ZIFF connector by pulling gently on the black retaining blade and removing the white flat flex cable

    • Pull the touchpad away from the rest of the case

  7. Hannspree SN12E2 Speaker Replacement: Schritt 7, Bild 1 von 1
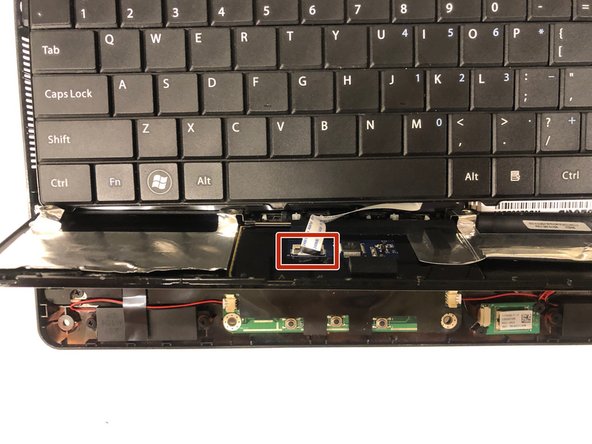
    • Gently lift up on the loose keyboard to expose the ZIFF connector.

    • Unplug the keyboard ZIFF following the same instructions as the touchpad ZIFF

  8. Hannspree SN12E2 Speaker Replacement, Speaker: Schritt 8, Bild 1 von 2 Hannspree SN12E2 Speaker Replacement, Speaker: Schritt 8, Bild 2 von 2
    • Remove the two screws on the speakers.

  9. Hannspree SN12E2 Speaker Replacement: Schritt 9, Bild 1 von 1
    • Gently remove the JST connector by pulling parallel to the housing .

    • When replacing the connectors ensure that they are oriented correctly. The housing is keyed to prevent the connectors from being plugged in backwards.

  10. Hannspree SN12E2 Speaker Replacement: Schritt 10, Bild 1 von 1
    • Repeat same steps for other speaker if necessary.

Abschluss

To reassemble your device, follow these instructions in reverse order.

Tim Chase

Mitglied seit: 03/25/19

360 Reputation

3 Anleitungen geschrieben

Team

UMass Dartmouth, Team S2-G2, Simcock Spring 2019 Mitglied von UMass Dartmouth, Team S2-G2, Simcock Spring 2019

UMASSD-SIMCOCK-S19S2G2

4 Mitglieder

9 Anleitungen geschrieben

0 Kommentare

Kommentar hinzufügen

Seitenaufrufe:

Letzte 24 Stunden: 0

Letzte 7 Tage: 3

Letzte 30 Tage: 16

Insgesamt: 139