Zum Hauptinhalt wechseln

Hasee Z7M-i78172D1 CPU Fan Replacement

Was du brauchst

  1. Hasee Z7M-i78172D1 CPU Fan Replacement, Rear Panel: Schritt 1, Bild 1 von 1
    • Use a #0 Phillips head screwdriver and unscrew the sixteen 7mm screws on the back of the device.

  2. Hasee Z7M-i78172D1 CPU Fan Replacement: Schritt 2, Bild 1 von 3 Hasee Z7M-i78172D1 CPU Fan Replacement: Schritt 2, Bild 2 von 3 Hasee Z7M-i78172D1 CPU Fan Replacement: Schritt 2, Bild 3 von 3
    • Use a plastic opening tool to take off the back plastic panel.

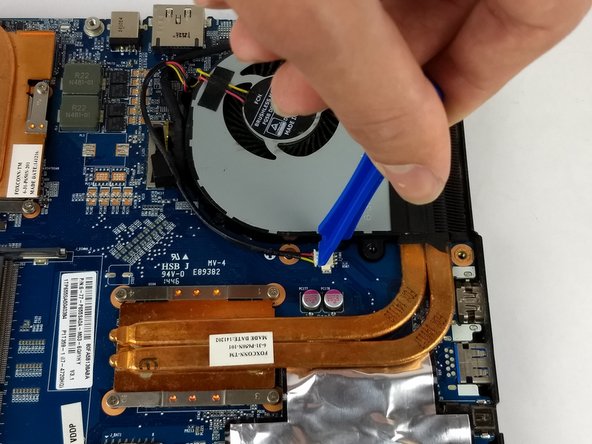
  3. Hasee Z7M-i78172D1 CPU Fan Replacement, CPU Fan: Schritt 3, Bild 1 von 3 Hasee Z7M-i78172D1 CPU Fan Replacement, CPU Fan: Schritt 3, Bild 2 von 3 Hasee Z7M-i78172D1 CPU Fan Replacement, CPU Fan: Schritt 3, Bild 3 von 3
    • To take out the CPU fan it is necessary to disconnect the CPU fan cable. Use a plastic opening tool to remove the cable.

  4. Hasee Z7M-i78172D1 CPU Fan Replacement: Schritt 4, Bild 1 von 1
    • Use a #0 Phillips head screwdriver to remove the two 7mm screws holding the fan to the motherboard.

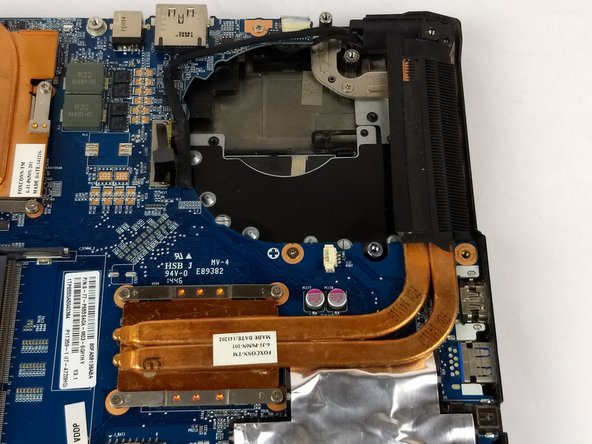
  5. Hasee Z7M-i78172D1 CPU Fan Replacement: Schritt 5, Bild 1 von 2 Hasee Z7M-i78172D1 CPU Fan Replacement: Schritt 5, Bild 2 von 2
    • Lift the CPU fan out and replace with the replacement fan.

Abschluss

To reassemble your device, follow these instructions in reverse order.

Eine weitere Person hat diese Anleitung absolviert.

Jake Decker

Mitglied seit: 02/14/18

311 Reputation

2 Anleitungen geschrieben

Team

USF Tampa, Team S6-G6, Eyestone Spring 2018 Mitglied von USF Tampa, Team S6-G6, Eyestone Spring 2018

USFT-EYESTONE-S18S6G6

3 Mitglieder

12 Anleitungen geschrieben

0 Kommentare

Kommentar hinzufügen

Seitenaufrufe:

Letzte 24 Stunden: 0

Letzte 7 Tage: 3

Letzte 30 Tage: 10

Insgesamt: 352