Zum Hauptinhalt wechseln

Was du brauchst

Dieser Teardown ist keine Reparaturanleitung. Um dein Hitachi KC30 Radio Alarm Clock zu reparieren, verwende unsere Fehlerbehebungsseite.

  1. Hitachi KC30 Radio Alarm Clock Teardown, Removing top cover 1: Schritt 1, Bild 1 von 2 Hitachi KC30 Radio Alarm Clock Teardown, Removing top cover 1: Schritt 1, Bild 2 von 2
    • Turn the clock upside down

    • Remove the 6 screws.

    • The two front screws are shorter and slimmer.

  2. Hitachi KC30 Radio Alarm Clock Teardown, Removing top cover 2: Schritt 2, Bild 1 von 3 Hitachi KC30 Radio Alarm Clock Teardown, Removing top cover 2: Schritt 2, Bild 2 von 3 Hitachi KC30 Radio Alarm Clock Teardown, Removing top cover 2: Schritt 2, Bild 3 von 3
    • With the help of a pry tool, pop the cover open.

    • Open it from the back towards the clock display.

    • Don't try to separate the cover as both the speaker and the motherboard is still connected!

  3. Hitachi KC30 Radio Alarm Clock Teardown, Removing top cover 3 / Speaker disconnect: Schritt 3, Bild 1 von 3 Hitachi KC30 Radio Alarm Clock Teardown, Removing top cover 3 / Speaker disconnect: Schritt 3, Bild 2 von 3 Hitachi KC30 Radio Alarm Clock Teardown, Removing top cover 3 / Speaker disconnect: Schritt 3, Bild 3 von 3
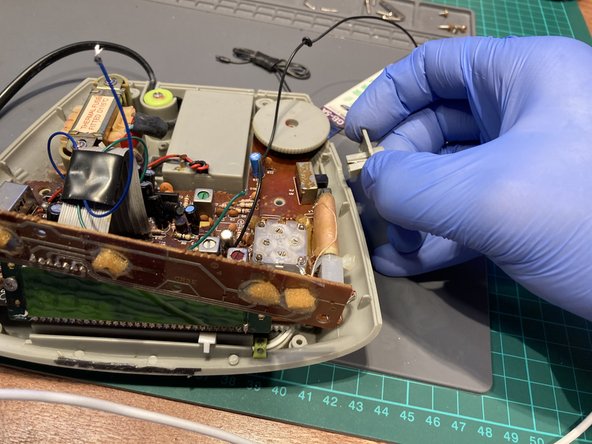
    • De-solder the speaker connections.

    • Unscrew the button panel from the top cover.

    • Pry out the button panel form the cover.

  4. Hitachi KC30 Radio Alarm Clock Teardown, Removing ALARM switch: Schritt 4, Bild 1 von 2 Hitachi KC30 Radio Alarm Clock Teardown, Removing ALARM switch: Schritt 4, Bild 2 von 2
    • Remove the ALARM ON/OFF button

  5. Hitachi KC30 Radio Alarm Clock Teardown, Removing FM/AM switch: Schritt 5, Bild 1 von 2 Hitachi KC30 Radio Alarm Clock Teardown, Removing FM/AM switch: Schritt 5, Bild 2 von 2
    • Remove the FM/AM selector knob

  6. Hitachi KC30 Radio Alarm Clock Teardown, Removing transformer: Schritt 6, Bild 1 von 2 Hitachi KC30 Radio Alarm Clock Teardown, Removing transformer: Schritt 6, Bild 2 von 2
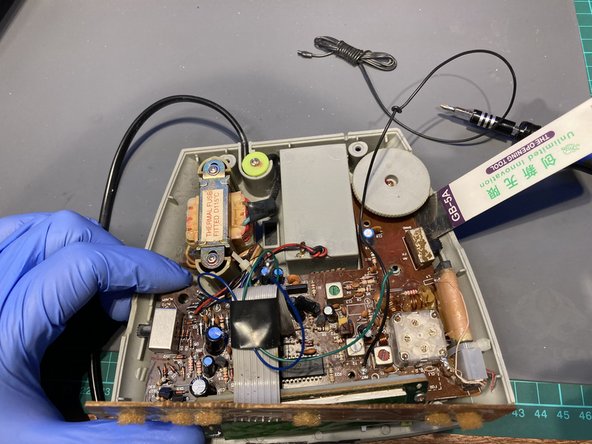
    • Unscrew the transformer securing screws

    • Pull it out of the socket

  7. Hitachi KC30 Radio Alarm Clock Teardown, Remove motherboard from case: Schritt 7, Bild 1 von 3 Hitachi KC30 Radio Alarm Clock Teardown, Remove motherboard from case: Schritt 7, Bild 2 von 3 Hitachi KC30 Radio Alarm Clock Teardown, Remove motherboard from case: Schritt 7, Bild 3 von 3
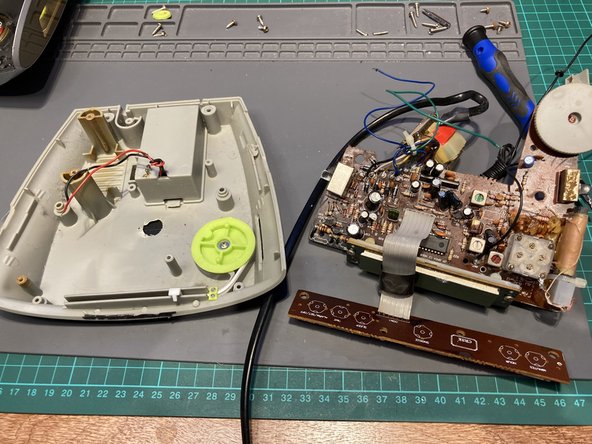
    • Remove the screws that secures the motherboard to the base.

    • Grab the motherboard on one side and pry it on the opposite side to release it from the base.

  8. Hitachi KC30 Radio Alarm Clock Teardown, Complete disassembly: Schritt 8, Bild 1 von 3 Hitachi KC30 Radio Alarm Clock Teardown, Complete disassembly: Schritt 8, Bild 2 von 3 Hitachi KC30 Radio Alarm Clock Teardown, Complete disassembly: Schritt 8, Bild 3 von 3
    • For complete disassembly de-solder the transformer.

    • ...and the button (control) board

    • Remember the labelling/wire colours

honakrisi

Mitglied seit: 01/28/20

3.328 Reputation

7 Anleitungen geschrieben

0 Kommentare

Kommentar hinzufügen

Seitenaufrufe:

Letzte 24 Stunden: 1

Letzte 7 Tage: 1

Letzte 30 Tage: 4

Insgesamt: 213