Zum Hauptinhalt wechseln

Honeywell HT900C Motor Replacement

Was du brauchst

  1. Honeywell HT900C Motor Replacement, Motor: Schritt 1, Bild 1 von 3 Honeywell HT900C Motor Replacement, Motor: Schritt 1, Bild 2 von 3 Honeywell HT900C Motor Replacement, Motor: Schritt 1, Bild 3 von 3
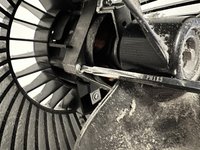
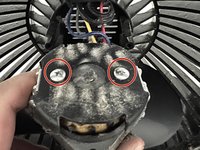
    • Remove the six 15 mm screws securing the fan's frame to its outer ring on the back using a Phillips #1 screwdriver.

    • Due to the small size of the screw holes, a long and thin screwdriver may be necessary.

  2. Honeywell HT900C Motor Replacement: Schritt 2, Bild 1 von 3 Honeywell HT900C Motor Replacement: Schritt 2, Bild 2 von 3 Honeywell HT900C Motor Replacement: Schritt 2, Bild 3 von 3
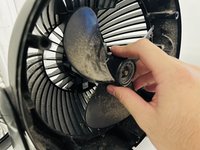
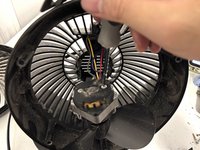
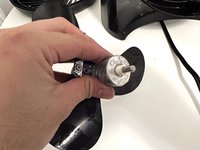
    • To gain access to the fan's inner workings, gently pull the blade cover away from the main body.

  3. Honeywell HT900C Motor Replacement: Schritt 3, Bild 1 von 2 Honeywell HT900C Motor Replacement: Schritt 3, Bild 2 von 2
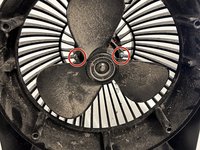
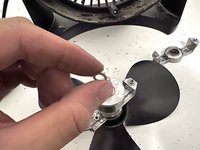
    • Remove the two 36 mm screws from the metal plate located behind the blades using a Phillips #1 screwdriver.

    • The screws can be hard to remove so you may need to twist the screwdriver harder and screws can be removed easily.

  4. Honeywell HT900C Motor Replacement: Schritt 4, Bild 1 von 3 Honeywell HT900C Motor Replacement: Schritt 4, Bild 2 von 3 Honeywell HT900C Motor Replacement: Schritt 4, Bild 3 von 3
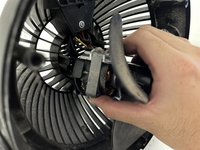
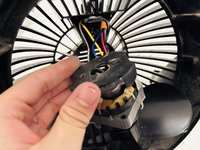
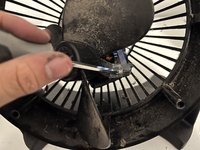
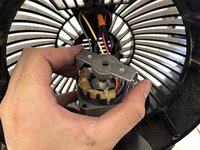
    • Carefully pull the motor it out of its resting position and tilt it forward to access the back of the motor.

  5. Honeywell HT900C Motor Replacement: Schritt 5, Bild 1 von 3 Honeywell HT900C Motor Replacement: Schritt 5, Bild 2 von 3 Honeywell HT900C Motor Replacement: Schritt 5, Bild 3 von 3
    • Remove two 10 mm screws from the motor's back using a Phillips #1 screwdriver.

  6. Honeywell HT900C Motor Replacement: Schritt 6, Bild 1 von 2 Honeywell HT900C Motor Replacement: Schritt 6, Bild 2 von 2
    • Remove the 20 mm screws beside the fan blade using a Phillips #1 screwdriver.

    • The screws are attached to two parts of the motor so it can easily fall off after removing the screws.

  7. Honeywell HT900C Motor Replacement: Schritt 7, Bild 1 von 1
    • Carefully remove the circular motor from the square holder.

    • The circular motor is still connected to the fan blades.

  8. Honeywell HT900C Motor Replacement: Schritt 8, Bild 1 von 2 Honeywell HT900C Motor Replacement: Schritt 8, Bild 2 von 2
    • Remove the metal washer from the axle.

  9. Honeywell HT900C Motor Replacement: Schritt 9, Bild 1 von 1
    • Replace the old motor with a new one, and you're done!

    • Using the lubricant to easily put the new motor back.

    • Always double-check that the screws are securely in place.

Abschluss

To reassemble your device, follow these instructions in reverse order.

Eine weitere Person hat diese Anleitung absolviert.

Duy Anh Nguyen

Mitglied seit: 09/17/22

169 Reputation

1 Anleitung geschrieben

Team

York University, Team B-10, Allen Fall 2022 Mitglied von York University, Team B-10, Allen Fall 2022

YORK-ALLEN-F22SBG10

3 Mitglieder

1 Anleitung geschrieben

0 Kommentare

Kommentar hinzufügen

Seitenaufrufe:

Letzte 24 Stunden: 2

Letzte 7 Tage: 9

Letzte 30 Tage: 22

Insgesamt: 929