Diese Version enthält möglicherweise inkorrekte Änderungen. Wechsle zur letzten geprüften Version.
Was du brauchst
-
Dieser Schritt ist noch nicht übersetzt. Hilf mit, ihn zu übersetzen!
-
Remove the lower brushroll from the bottom of the cleaner.
-
-
Dieser Schritt ist noch nicht übersetzt. Hilf mit, ihn zu übersetzen!
-
Use a long #2 Philips head to remove the 8 numbered screws on the bottom of the cleaner (They will also be indicated on the bottom of the vacuum).
-
-
Dieser Schritt ist noch nicht übersetzt. Hilf mit, ihn zu übersetzen!
-
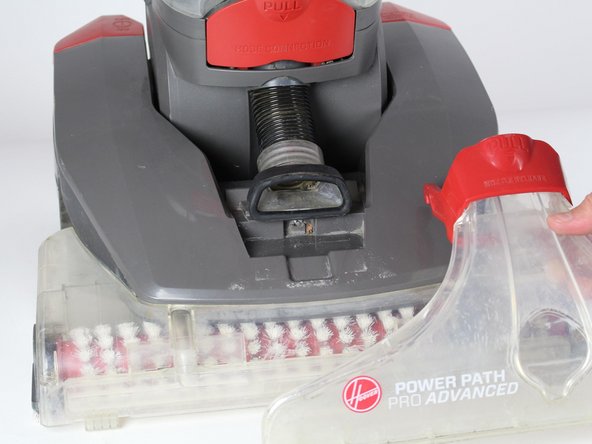
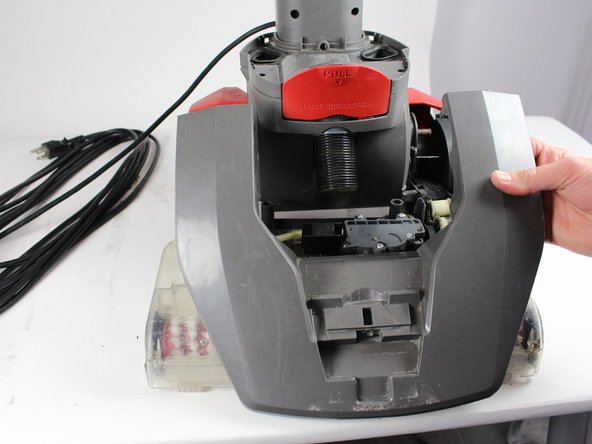
Pull the red handle to remove the front suction unit from the cleaner.
-
-
-
Dieser Schritt ist noch nicht übersetzt. Hilf mit, ihn zu übersetzen!
-
Unscrew the hose by using a Phillips #2 to detach it from the top cover of the cleaner.
-
-
Dieser Schritt ist noch nicht übersetzt. Hilf mit, ihn zu übersetzen!
-
Push down on the handle release button. Lift the edge of top cover connected to this button.
-
Repeat the above step for the "On/Off" button.
-
Pull entire top cover off.
-
-
Dieser Schritt ist noch nicht übersetzt. Hilf mit, ihn zu übersetzen!
-
Remove the "On/Off" cap by pulling it upwards with caution.
-
-
Dieser Schritt ist noch nicht übersetzt. Hilf mit, ihn zu übersetzen!
-
Use a long #2 Philips head to remove the two screws from the arched grey piece.
-
-
Dieser Schritt ist noch nicht übersetzt. Hilf mit, ihn zu übersetzen!
-
Pull out the red power the red power switch.
-


Rückgängig: Ich habe diese Anleitung nicht absolviert.
4 weitere Nutzer:innen haben diese Anleitung absolviert.
Team

Cal Poly, Team S16-G5, Banghart Winter 2018 Mitglied von Cal Poly, Team S16-G5, Banghart Winter 2018
CPSU-BANGHART-W18S16G5
5 Mitglieder
15 Anleitungen geschrieben
3 Kommentare
What is the part number?
Thanks so much!!