Zum Hauptinhalt wechseln

Hoover Presto 2-in-1 Cordless Stick Belt Replacement

Was du brauchst

  1. Hoover Presto 2-in-1 Cordless Stick Belt Replacement, Belt: Schritt 1, Bild 1 von 2 Hoover Presto 2-in-1 Cordless Stick Belt Replacement, Belt: Schritt 1, Bild 2 von 2
    • Press grey release button on stick vacuum to release vacuum head.

  2. Hoover Presto 2-in-1 Cordless Stick Belt Replacement: Schritt 2, Bild 1 von 3 Hoover Presto 2-in-1 Cordless Stick Belt Replacement: Schritt 2, Bild 2 von 3 Hoover Presto 2-in-1 Cordless Stick Belt Replacement: Schritt 2, Bild 3 von 3
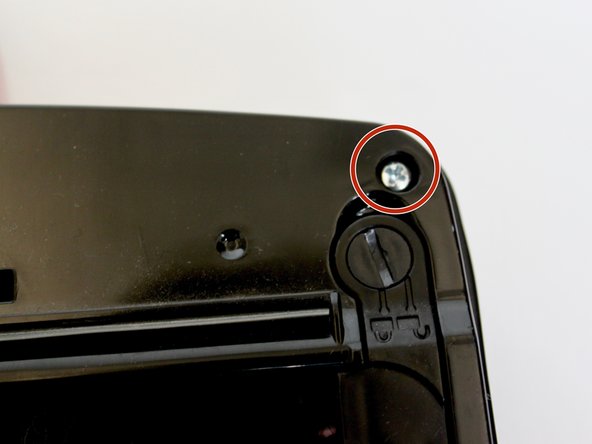
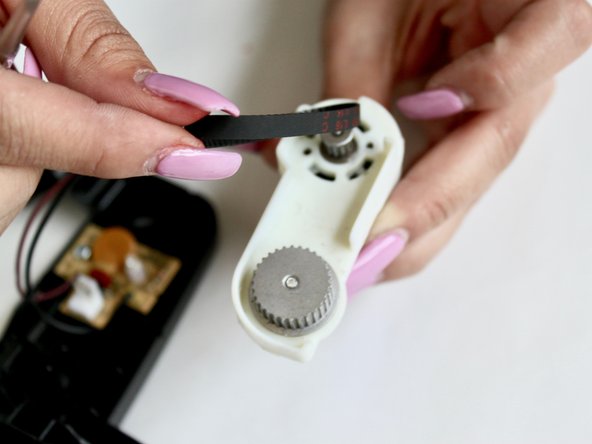
    • Locate the circular black turn switch, which is in the upper right corner of the backside of the vacuum head

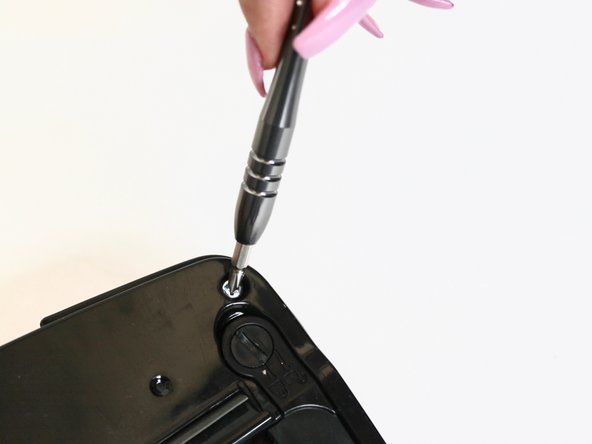
    • Using a metal spudger, place the tool in the indent of the circular turn switch and turn it from the left to the right or from the "locked" symbol to the "unlocked" symbol

  3. Hoover Presto 2-in-1 Cordless Stick Belt Replacement: Schritt 3, Bild 1 von 3 Hoover Presto 2-in-1 Cordless Stick Belt Replacement: Schritt 3, Bild 2 von 3 Hoover Presto 2-in-1 Cordless Stick Belt Replacement: Schritt 3, Bild 3 von 3
    • Flip the vacuum head over so that the wheels and screws are facing you.

    • Using a PH #1 screw driver, remove the four 15mm screws from each corner of the backside of the vacuum head.

  4. Hoover Presto 2-in-1 Cordless Stick Belt Replacement: Schritt 4, Bild 1 von 3 Hoover Presto 2-in-1 Cordless Stick Belt Replacement: Schritt 4, Bild 2 von 3 Hoover Presto 2-in-1 Cordless Stick Belt Replacement: Schritt 4, Bild 3 von 3
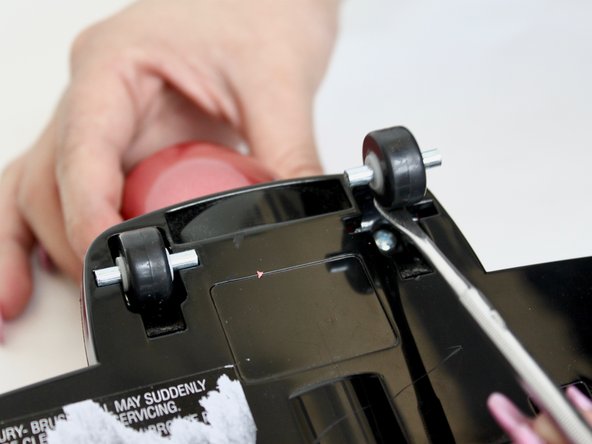
    • Locate the two wheels in the upper half of the vacuum head and remove them by sticking the metal spudger tool underneath the wheel and pushing it towards you until it pops out.

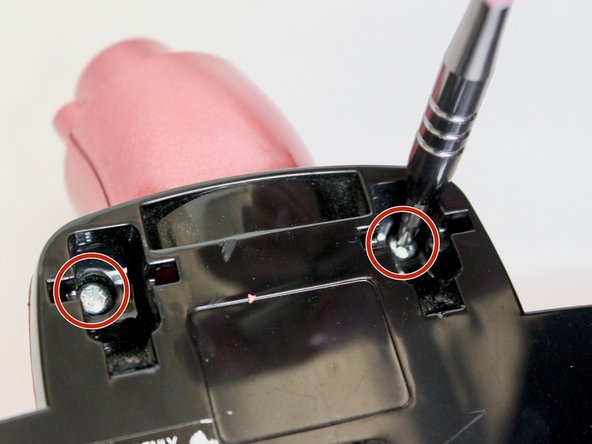
    • Remove the two 15mm screws located underneath the wheels with a PH #1 screw driver.

  5. Hoover Presto 2-in-1 Cordless Stick Belt Replacement: Schritt 5, Bild 1 von 3 Hoover Presto 2-in-1 Cordless Stick Belt Replacement: Schritt 5, Bild 2 von 3 Hoover Presto 2-in-1 Cordless Stick Belt Replacement: Schritt 5, Bild 3 von 3
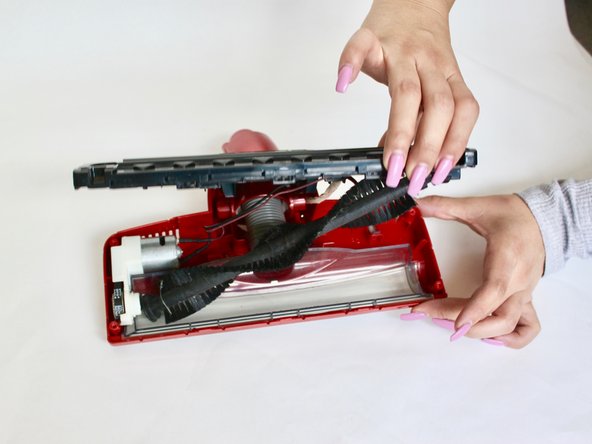
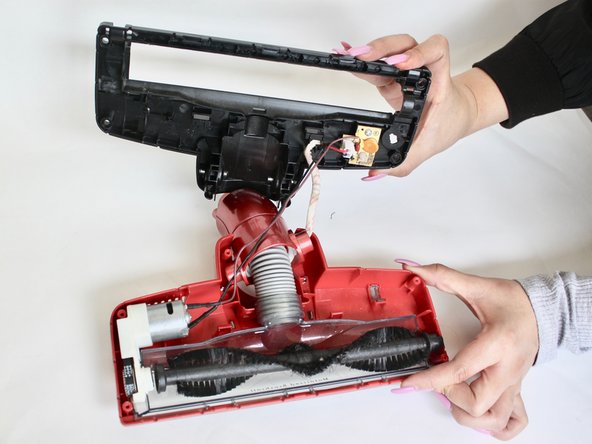
    • Using a firm grip, pull the two halves of the vacuum head away from each other until they are completely separated

  6. Hoover Presto 2-in-1 Cordless Stick Belt Replacement: Schritt 6, Bild 1 von 2 Hoover Presto 2-in-1 Cordless Stick Belt Replacement: Schritt 6, Bild 2 von 2
    • Remove the mechanism with your hands.

  7. Hoover Presto 2-in-1 Cordless Stick Belt Replacement: Schritt 7, Bild 1 von 2 Hoover Presto 2-in-1 Cordless Stick Belt Replacement: Schritt 7, Bild 2 von 2
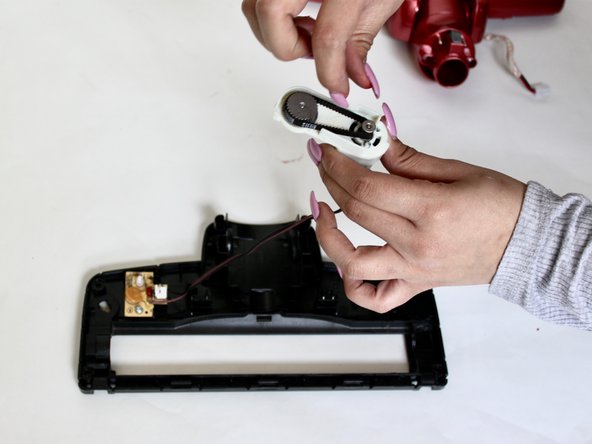
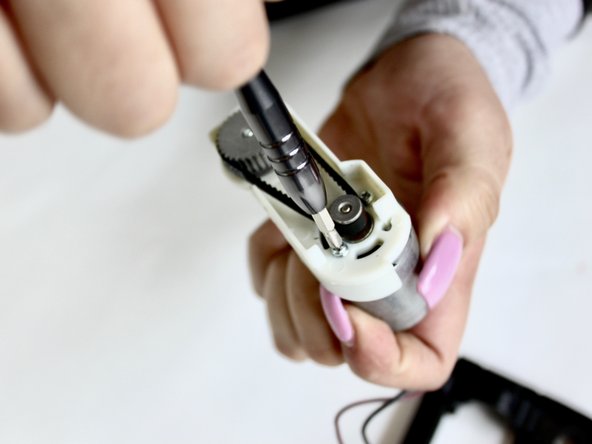
    • Remove the two 7mm screws located on either side of the roller with a PH #1 screw driver.

    • Removing these screws helps loosen the belt so that it is easier to take off the mechanism.

  8. Hoover Presto 2-in-1 Cordless Stick Belt Replacement: Schritt 8, Bild 1 von 3 Hoover Presto 2-in-1 Cordless Stick Belt Replacement: Schritt 8, Bild 2 von 3 Hoover Presto 2-in-1 Cordless Stick Belt Replacement: Schritt 8, Bild 3 von 3
    • Use a metal spudger to lift the belt away from the mechanism.

Abschluss

To reassemble your device, follow these instructions in reverse order.

Ein:e weitere:r Nutzer:in hat diese Anleitung absolviert.

katia zubieta

Mitglied seit: 09/11/17

437 Reputation

4 Anleitungen geschrieben

Team

CSU Fullerton, Team S2-G6, Bruce Fall 2017 Mitglied von CSU Fullerton, Team S2-G6, Bruce Fall 2017

CSUF-BRUCE-F17S2G6

3 Mitglieder

8 Anleitungen geschrieben

0 Kommentare

Kommentar hinzufügen

Seitenaufrufe:

Letzte 24 Stunden: 0

Letzte 7 Tage: 2

Letzte 30 Tage: 5

Insgesamt: 797