Einleitung
Replace your dirty or broken dust cup filter with these easy steps!
Was du brauchst
-
-
Press button on the top of the dust cup and pull back.
-
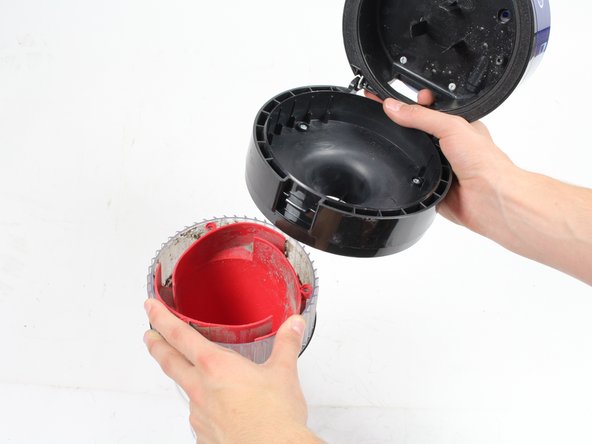
Remove dust cup from vacuum
-
-
-
-
Lift up on fabric flap to remove filter from vaccum
-
If you wish to clean the filter rather than replace it, it can be washed under a faucet.
-
-
-
Holding onto both the top handle and dust cup body, twist the two components apart following the instructions printed on the back.
-
-
-
Unscrew the three 4 cm Phillips #3 screws located inside the dust filter compartment to detach the dust filter system.
-


To reassemble your device, follow these instructions in reverse order.
To reassemble your device, follow these instructions in reverse order.
Rückgängig: Ich habe diese Anleitung nicht absolviert.
Ein:e weitere:r Nutzer:in hat diese Anleitung absolviert.
Team

Cal Poly, Team S11-G4, Banghart Winter 2018 Mitglied von Cal Poly, Team S11-G4, Banghart Winter 2018
CPSU-BANGHART-W18S11G4
5 Mitglieder
10 Anleitungen geschrieben