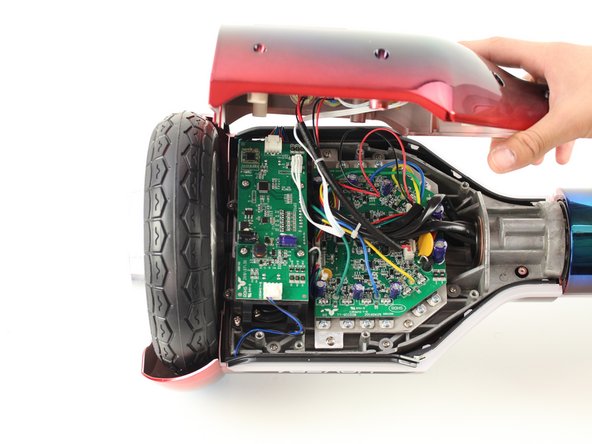
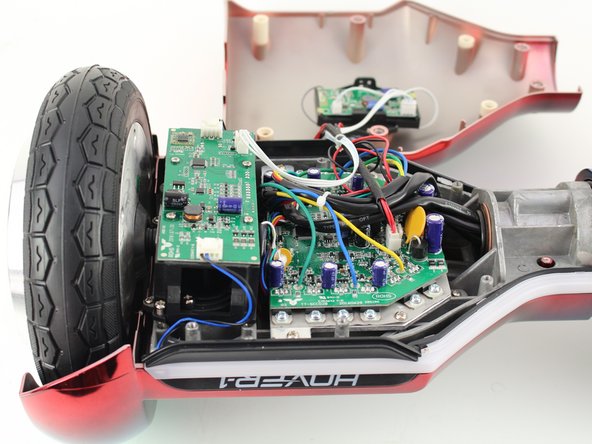
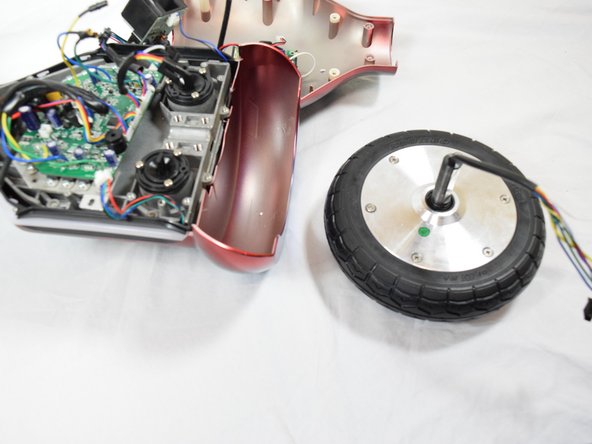
Zum Hauptinhalt wechseln

Hover-1 Horizon Wheel/Motor Replacement

Was du brauchst

  1. Hover-1 Horizon Wheel/Motor Replacement, Base Plate: Schritt 1, Bild 1 von 2 Hover-1 Horizon Wheel/Motor Replacement, Base Plate: Schritt 1, Bild 2 von 2
    • Remove the six 12mm Phillips #2 screws holding the base plate.

  2. Hover-1 Horizon Wheel/Motor Replacement: Schritt 2, Bild 1 von 2 Hover-1 Horizon Wheel/Motor Replacement: Schritt 2, Bild 2 von 2
    • Remove the two 11mm Phillips #1 screws that hold the base plate to the body.

  3. Hover-1 Horizon Wheel/Motor Replacement: Schritt 3, Bild 1 von 3 Hover-1 Horizon Wheel/Motor Replacement: Schritt 3, Bild 2 von 3 Hover-1 Horizon Wheel/Motor Replacement: Schritt 3, Bild 3 von 3
    • Remove the base plate by lifting it up.

    • The base plate is connected to the body with wires. The wires are long enough to set the base plate to the side.

  4. Hover-1 Horizon Wheel/Motor Replacement, Left Gyroscope Sensor Board: Schritt 4, Bild 1 von 3 Hover-1 Horizon Wheel/Motor Replacement, Left Gyroscope Sensor Board: Schritt 4, Bild 2 von 3 Hover-1 Horizon Wheel/Motor Replacement, Left Gyroscope Sensor Board: Schritt 4, Bild 3 von 3
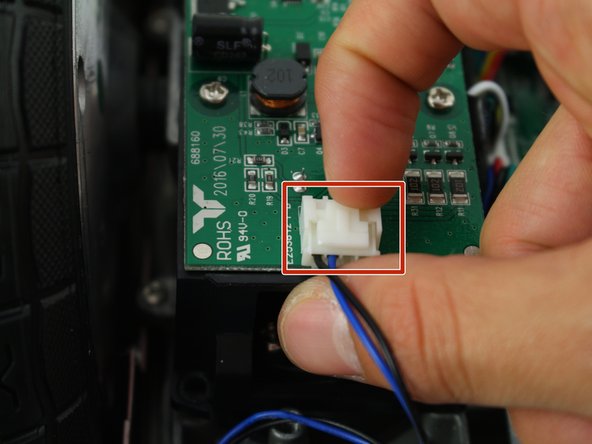
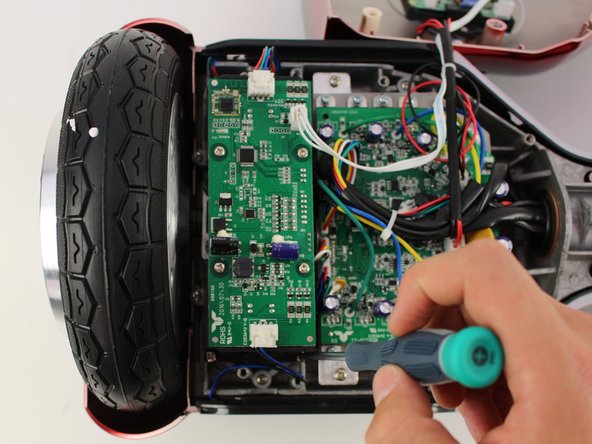
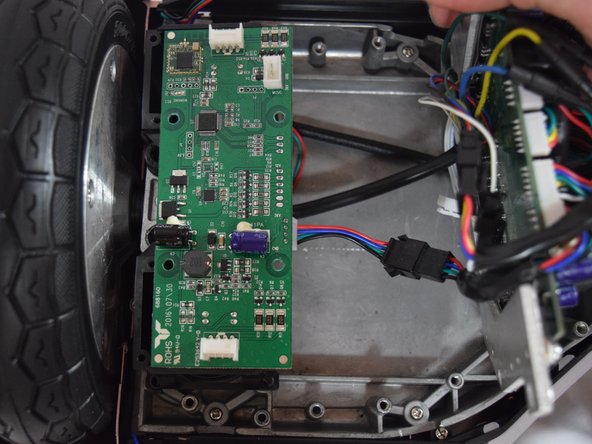
    • Remove the two connectors on either side of the board by lifting the tab and pulling out.

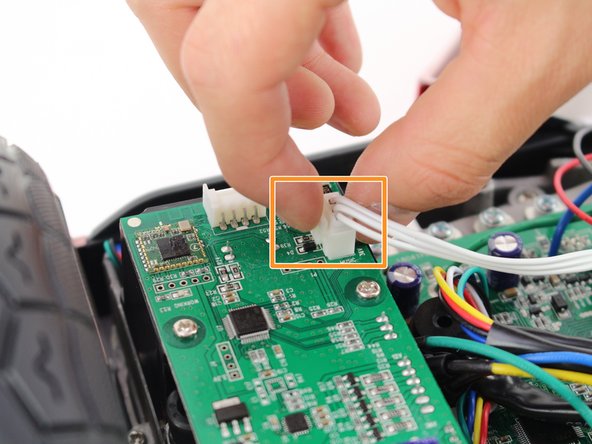
    • Remove the connector in the middle of the board by squeezing the tab and pulling up.

  5. Hover-1 Horizon Wheel/Motor Replacement: Schritt 5, Bild 1 von 2 Hover-1 Horizon Wheel/Motor Replacement: Schritt 5, Bild 2 von 2
    • Remove the four 11mm Phillips #1 screws that hold the cover on.

  6. Hover-1 Horizon Wheel/Motor Replacement: Schritt 6, Bild 1 von 3 Hover-1 Horizon Wheel/Motor Replacement: Schritt 6, Bild 2 von 3 Hover-1 Horizon Wheel/Motor Replacement: Schritt 6, Bild 3 von 3
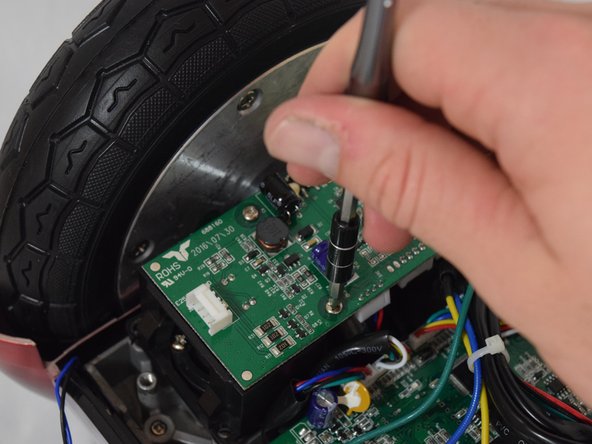
    • Remove the four 11mm Phillips #1 screws that attach the gyroscope board to the mount.

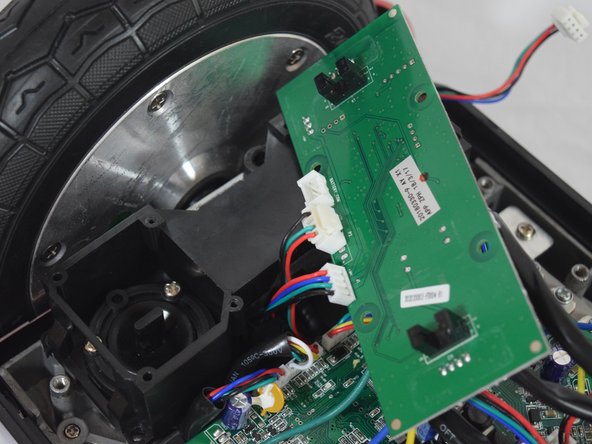
    • Lift the board to reveal the connections on the bottom.

  7. Hover-1 Horizon Wheel/Motor Replacement: Schritt 7, Bild 1 von 2 Hover-1 Horizon Wheel/Motor Replacement: Schritt 7, Bild 2 von 2
    • Remove the middle connector by squeezing the top of the tab and pulling up.

  8. Hover-1 Horizon Wheel/Motor Replacement: Schritt 8, Bild 1 von 3 Hover-1 Horizon Wheel/Motor Replacement: Schritt 8, Bild 2 von 3 Hover-1 Horizon Wheel/Motor Replacement: Schritt 8, Bild 3 von 3
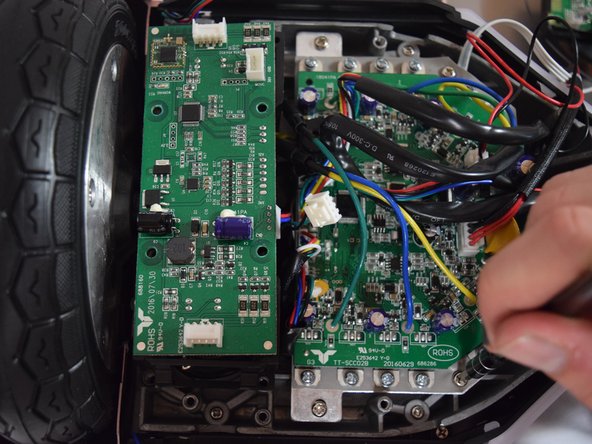
    • Remove the four 12mm Phillips #2 screws that hold the motherboard to the base.

    • Pull the motherboard away from the gyroscope by grabbing it with two hands and pulling it to the right .

  9. Hover-1 Horizon Wheel/Motor Replacement: Schritt 9, Bild 1 von 3 Hover-1 Horizon Wheel/Motor Replacement: Schritt 9, Bild 2 von 3 Hover-1 Horizon Wheel/Motor Replacement: Schritt 9, Bild 3 von 3
    • Unclip the black connector by squeezing both sides and pulling them apart.

  10. Hover-1 Horizon Wheel/Motor Replacement, Wheel/Motor: Schritt 10, Bild 1 von 3 Hover-1 Horizon Wheel/Motor Replacement, Wheel/Motor: Schritt 10, Bild 2 von 3 Hover-1 Horizon Wheel/Motor Replacement, Wheel/Motor: Schritt 10, Bild 3 von 3
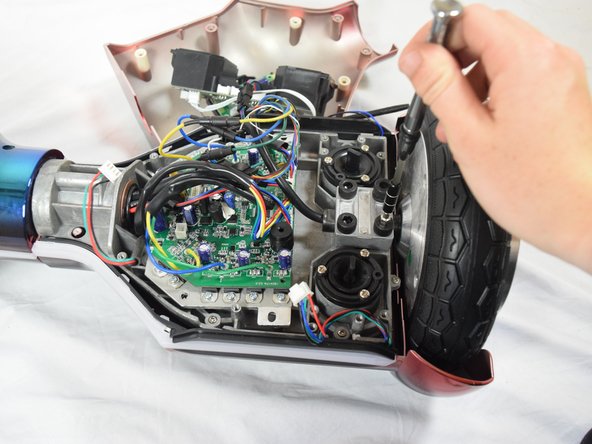
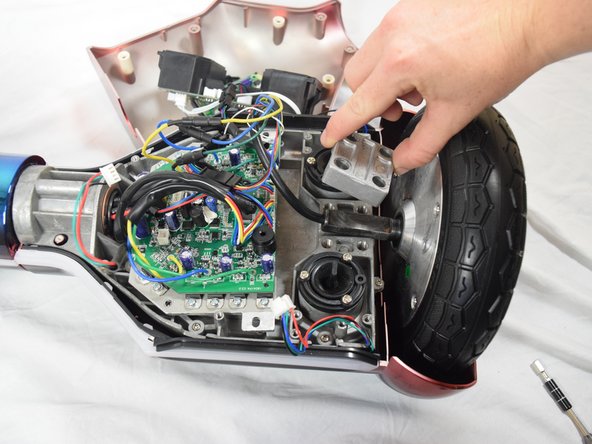
    • Remove the four 30mm Hex #6 screws.

    • Lift away the silver bracket and set it to the side.

  11. Hover-1 Horizon Wheel/Motor Replacement: Schritt 11, Bild 1 von 3 Hover-1 Horizon Wheel/Motor Replacement: Schritt 11, Bild 2 von 3 Hover-1 Horizon Wheel/Motor Replacement: Schritt 11, Bild 3 von 3
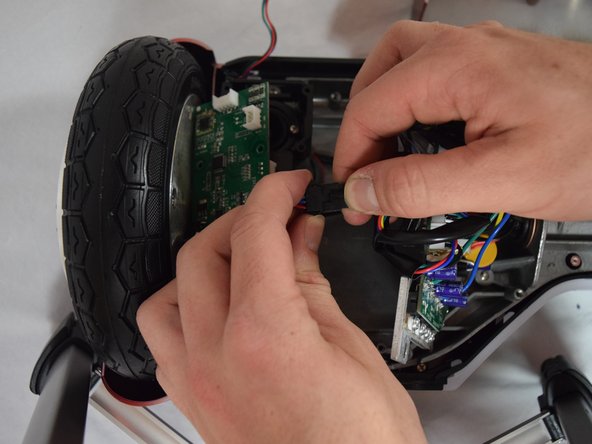
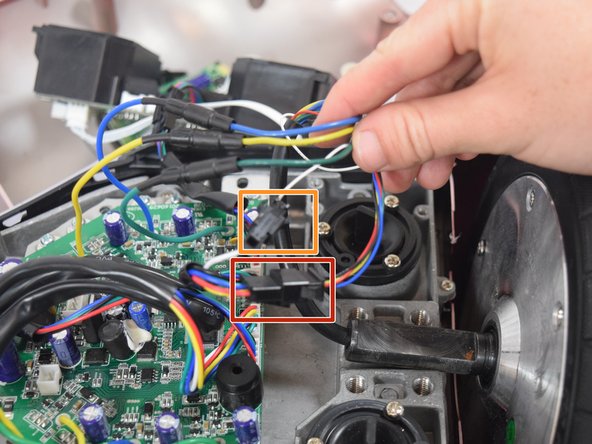
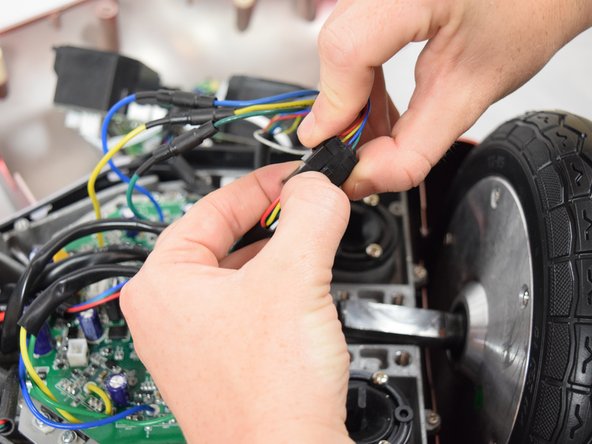
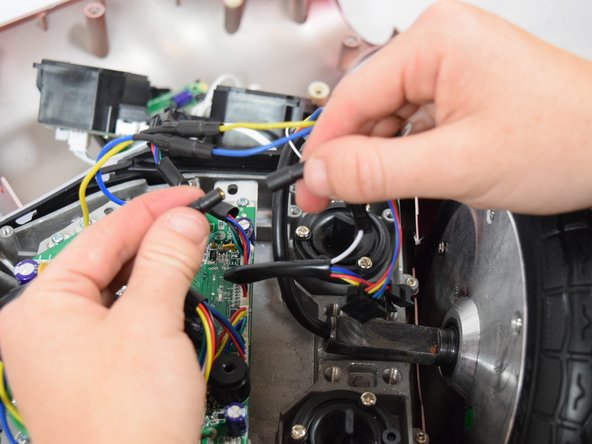
    • Disconnect the first clip by squeezing the latch that hold the clips together while pulling apart.

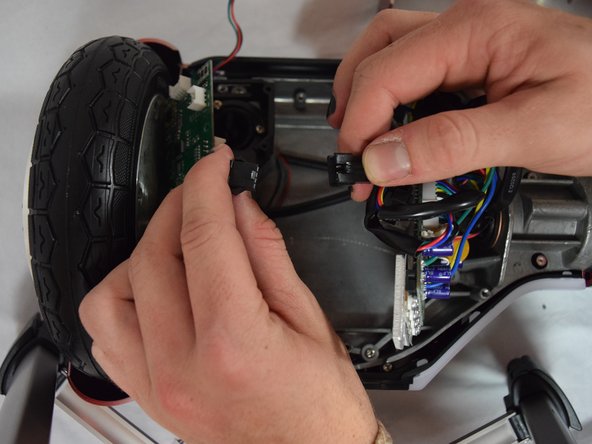
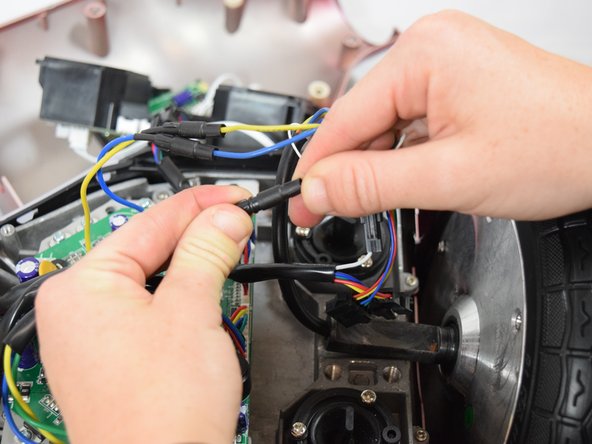
    • Disconnect the second clip by squeezing the tab while pulling the clip apart.

  12. Hover-1 Horizon Wheel/Motor Replacement: Schritt 12, Bild 1 von 3 Hover-1 Horizon Wheel/Motor Replacement: Schritt 12, Bild 2 von 3 Hover-1 Horizon Wheel/Motor Replacement: Schritt 12, Bild 3 von 3
    • Detach the remaining three connections by pulling them apart.

  13. Hover-1 Horizon Wheel/Motor Replacement: Schritt 13, Bild 1 von 2 Hover-1 Horizon Wheel/Motor Replacement: Schritt 13, Bild 2 von 2
    • Remove the wheel by lifting it away from the base with both hands.

Abschluss

To reassemble your device, follow these instructions in reverse order.

Ein:e weitere:r Nutzer:in hat diese Anleitung absolviert.

Casey Winans

Mitglied seit: 10/08/18

324 Reputation

2 Anleitungen geschrieben

Team

Cal Poly, Team S13-G6, White Fall 2018 Mitglied von Cal Poly, Team S13-G6, White Fall 2018

CPSU-WHITE-F18S13G6

4 Mitglieder

6 Anleitungen geschrieben

0 Kommentare

Kommentar hinzufügen

Seitenaufrufe:

Letzte 24 Stunden: 0

Letzte 7 Tage: 0

Letzte 30 Tage: 3

Insgesamt: 491