Einleitung
This guide for the Hover-1 Maverick guides users in replacing the motherboard in their device. The motherboard is crucial within the hoverboard. It controls all functions and acts as a medium for communication between parts in the device. Symptoms of having a faulty motherboard include the device being unable to balance, unable to hold a charge, has flashing lights, or has trouble powering on. Users need to disconnect the battery and the wires in order to replace the motherboard.
Was du brauchst
-
-
Remove the twenty 15mm Phillips #1 screws from the shell of the hoverboard.
-
Open the shell.
-
-
-
Disconnect the battery to prevent any electrical currents from coming through the wires.
-
-
-
-
Remove the four 8mm Phillips #1 screws.
-
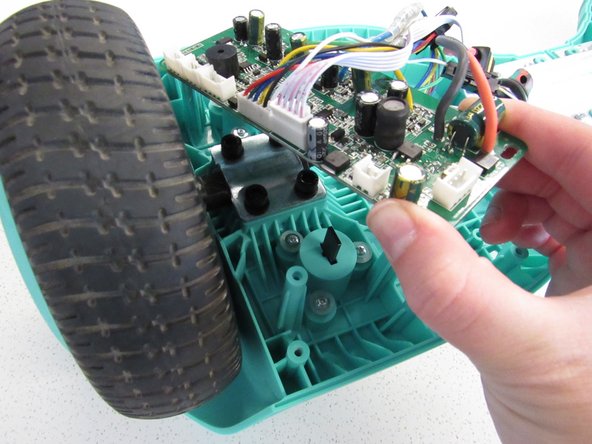
Remove the motherboard from the device.
-
Repeat for the other motherboard.
-


To reassemble your device, follow these instructions in reverse order.
To reassemble your device, follow these instructions in reverse order.
Rückgängig: Ich habe diese Anleitung nicht absolviert.
2 weitere Nutzer:innen haben diese Anleitung absolviert.

Team

Cal Poly, Team S7-G2, Paton Spring 2020 Mitglied von Cal Poly, Team S7-G2, Paton Spring 2020
CPSU-PATON-S20S7G2
3 Mitglieder
5 Anleitungen geschrieben