Zum Hauptinhalt wechseln

Diese Anleitung enthält neuere Änderungen. Wechsel zur neuesten unüberprüften Version.

Hover-1 Titan Battery Replacement

Was du brauchst

  1. Hover-1 Titan Battery Replacement, Bottom Right Panel: Schritt 1, Bild 1 von 2 Hover-1 Titan Battery Replacement, Bottom Right Panel: Schritt 1, Bild 2 von 2
    • Flip the hoverboard so the bottom is facing up.

    • The right side is the side that has the power button. There is also an "R" on the metal plate underneath the battery.

  2. Hover-1 Titan Battery Replacement: Schritt 2, Bild 1 von 2 Hover-1 Titan Battery Replacement: Schritt 2, Bild 2 von 2
    • Using a Phillips #1 screwdriver, remove the two 14 mm screws closest to the center of the hoverboard.

    • Using a Phillips #1 screwdriver, remove the four 12 mm screws located in the middle of the panel.

    • Using a Phillips #1 screwdriver, remove the two 15 mm screws located closest to the wheel.

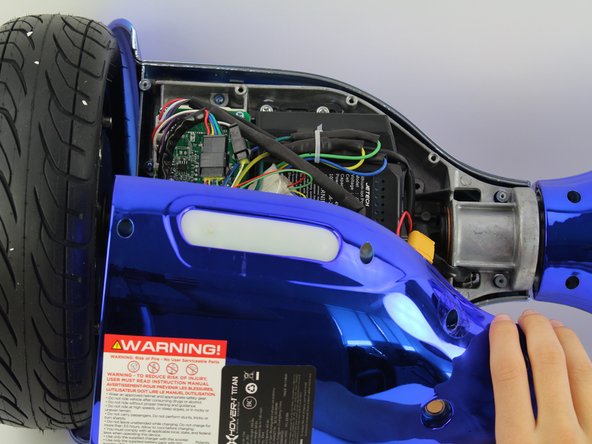
  3. Hover-1 Titan Battery Replacement: Schritt 3, Bild 1 von 3 Hover-1 Titan Battery Replacement: Schritt 3, Bild 2 von 3 Hover-1 Titan Battery Replacement: Schritt 3, Bild 3 von 3
    • Grip the bottom right panel and lift to remove it.

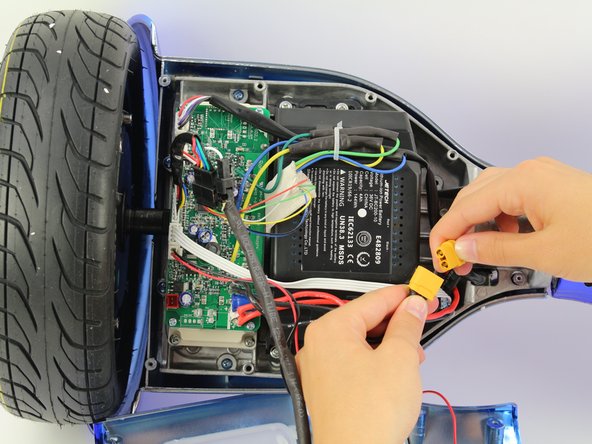
  4. Hover-1 Titan Battery Replacement, Battery: Schritt 4, Bild 1 von 2 Hover-1 Titan Battery Replacement, Battery: Schritt 4, Bild 2 von 2
    • Unplug the battery from the gyroscope/motherboard by holding the yellow connector and pulling apart.

  5. Hover-1 Titan Battery Replacement: Schritt 5, Bild 1 von 2 Hover-1 Titan Battery Replacement: Schritt 5, Bild 2 von 2
    • Remove the bundle of wires from the clip on the top of the battery.

  6. Hover-1 Titan Battery Replacement: Schritt 6, Bild 1 von 2 Hover-1 Titan Battery Replacement: Schritt 6, Bild 2 von 2
    • Using a Phillips #1 screwdriver, remove the four 14 mm screws that hold the battery on the device.

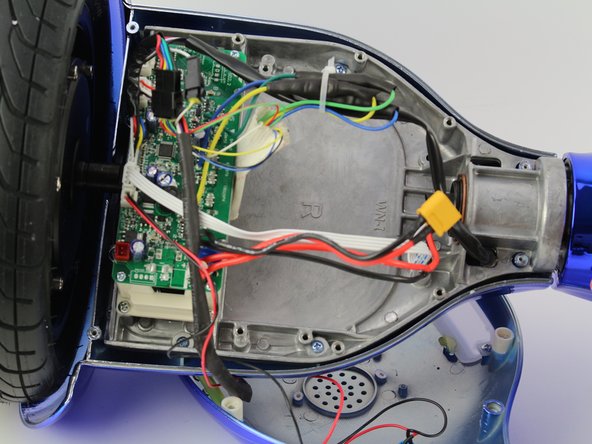
  7. Hover-1 Titan Battery Replacement: Schritt 7, Bild 1 von 3 Hover-1 Titan Battery Replacement: Schritt 7, Bild 2 von 3 Hover-1 Titan Battery Replacement: Schritt 7, Bild 3 von 3
    • Remove the battery out of the hoverboard by lifting the battery then sliding it out from under the wires.

Abschluss

To reassemble your device, follow these instructions in reverse order.

Ein:e weitere:r Nutzer:in hat diese Anleitung absolviert.

Jessica Ouyang

Mitglied seit: 10/08/18

619 Reputation

4 Anleitungen geschrieben

Team

Cal Poly, Team S15-G4, White Fall 2018 Mitglied von Cal Poly, Team S15-G4, White Fall 2018

CPSU-WHITE-F18S15G4

4 Mitglieder

10 Anleitungen geschrieben

0 Kommentare

Kommentar hinzufügen

Seitenaufrufe:

Letzte 24 Stunden: 2

Letzte 7 Tage: 12

Letzte 30 Tage: 38

Insgesamt: 1,945