Einleitung
A broken light on a Hover-1 XLS bike is a safety hazard, especially if you use the bike when dark. Do not ride the bike with a broken tail light.
Was du brauchst
-
-
Remove the seat by removing the six 16mm screws with a Phillips #2 screwdriver.
-
-
-
Disconnect the wires by pushing the levers on either side of the connector and on top.
-
Remove the seat from the bike.
-
-
-
-
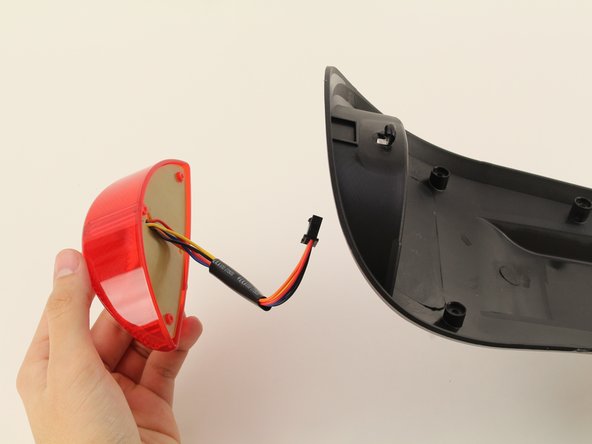
Use a Phillips #2 screwdriver to remove the four 10mm screws on the bottom of the back seat.
-
-
-
Pull the light from behind the bottom of the seat frame. Pull the wiring all the way through.
-


To reassemble your device, follow these instructions in reverse order.
To reassemble your device, follow these instructions in reverse order.
Rückgängig: Ich habe diese Anleitung nicht absolviert.
Ein:e weitere:r Nutzer:in hat diese Anleitung absolviert.
Team

Cal Poly, Team S1-G2, White Winter 2019 Mitglied von Cal Poly, Team S1-G2, White Winter 2019
CPSU-WHITE-W19S1G2
3 Mitglieder
6 Anleitungen geschrieben