Zum Hauptinhalt wechseln

How to Clean the Condenser Coils in your WRS315SDHW Refrigerator

Was du brauchst

  1. How to Clean the Condenser Coils in your WRS315SDHW Refrigerator, Safety precautions: Schritt 1, Bild 1 von 1
    • Before you begin your repair, perform the following:

    • Turn off your main water supply

    • Unplug your device

  2. How to Clean the Condenser Coils in your WRS315SDHW Refrigerator, Unfasten the rear panel: Schritt 2, Bild 1 von 3 How to Clean the Condenser Coils in your WRS315SDHW Refrigerator, Unfasten the rear panel: Schritt 2, Bild 2 von 3 How to Clean the Condenser Coils in your WRS315SDHW Refrigerator, Unfasten the rear panel: Schritt 2, Bild 3 von 3
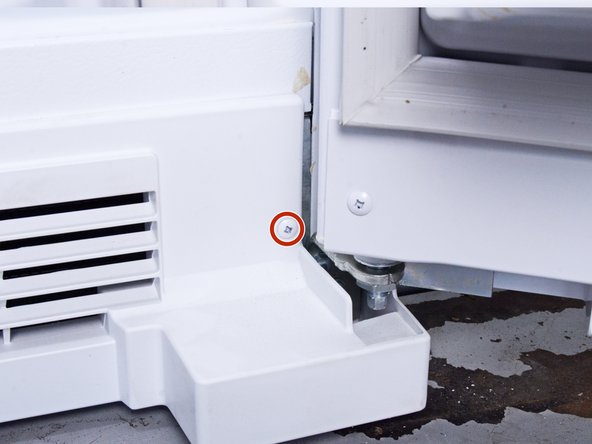
    • Use a 1/4 inch socket wrench, or a flathead screwdriver, to remove the seven 16.2 mm-long screws securing the rear panel.

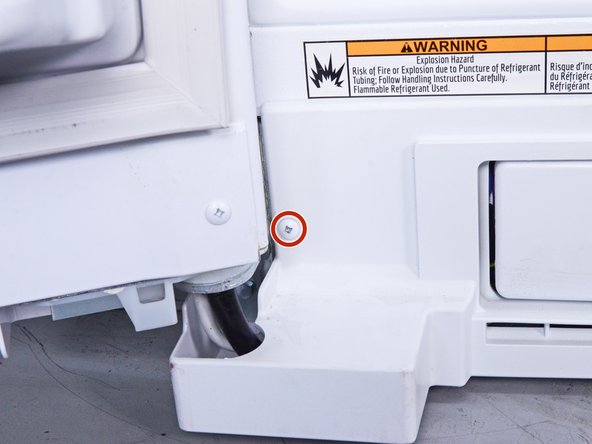
    • Use a 1/4 inch socket wrench to loosen the screw securing the water hose enough for the rear panel to freely move.

  3. How to Clean the Condenser Coils in your WRS315SDHW Refrigerator, Remove the rear panel: Schritt 3, Bild 1 von 3 How to Clean the Condenser Coils in your WRS315SDHW Refrigerator, Remove the rear panel: Schritt 3, Bild 2 von 3 How to Clean the Condenser Coils in your WRS315SDHW Refrigerator, Remove the rear panel: Schritt 3, Bild 3 von 3
    • Pull the rear panel off the chassis to remove it.

  4. How to Clean the Condenser Coils in your WRS315SDHW Refrigerator, Open the doors: Schritt 4, Bild 1 von 3 How to Clean the Condenser Coils in your WRS315SDHW Refrigerator, Open the doors: Schritt 4, Bild 2 von 3 How to Clean the Condenser Coils in your WRS315SDHW Refrigerator, Open the doors: Schritt 4, Bild 3 von 3
    • Depending on your repair, open one or both doors.

  5. How to Clean the Condenser Coils in your WRS315SDHW Refrigerator, Unfasten the front panel: Schritt 5, Bild 1 von 3 How to Clean the Condenser Coils in your WRS315SDHW Refrigerator, Unfasten the front panel: Schritt 5, Bild 2 von 3 How to Clean the Condenser Coils in your WRS315SDHW Refrigerator, Unfasten the front panel: Schritt 5, Bild 3 von 3
    • Use a Phillips driver to remove the two 15.2 mm-long screws securing the front panel.

  6. How to Clean the Condenser Coils in your WRS315SDHW Refrigerator, Remove the front panel: Schritt 6, Bild 1 von 3 How to Clean the Condenser Coils in your WRS315SDHW Refrigerator, Remove the front panel: Schritt 6, Bild 2 von 3 How to Clean the Condenser Coils in your WRS315SDHW Refrigerator, Remove the front panel: Schritt 6, Bild 3 von 3
    • Pull the front panel straight off the chassis and remove it.

    • You may have to slightly open the water filter door to remove the front panel completely.

  7. How to Clean the Condenser Coils in your WRS315SDHW Refrigerator, Vacuum the condenser coils: Schritt 7, Bild 1 von 2 How to Clean the Condenser Coils in your WRS315SDHW Refrigerator, Vacuum the condenser coils: Schritt 7, Bild 2 von 2
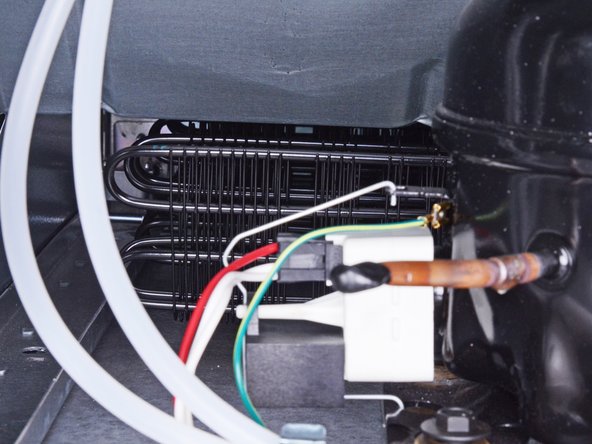
    • Vacuum or brush any dust or debris clinging to the black condenser coils.

Abschluss

To reassemble your device, follow these instructions in reverse order.

Repair didn’t go as planned? Ask our Answers community for help.

nicO

Mitglied seit: 04/14/15

15.885 Reputation

88 Anleitungen geschrieben

Team

Global Fixers Mitglied von Global Fixers

Community

33 Mitglieder

546 Anleitungen geschrieben

0 Kommentare

Kommentar hinzufügen

Seitenaufrufe:

Letzte 24 Stunden: 0

Letzte 7 Tage: 2

Letzte 30 Tage: 5

Insgesamt: 77