Zum Hauptinhalt wechseln

How to Fix a Samsung Galaxy S10 Plus That Does Not Turn On/Power On

Einführungsvideo

  1. How to Fix a Samsung Galaxy S10 Plus That Does Not Turn On/Power On, Power Integrated Circuit (IC): Schritt 1, Bild 1 von 3 How to Fix a Samsung Galaxy S10 Plus That Does Not Turn On/Power On, Power Integrated Circuit (IC): Schritt 1, Bild 2 von 3 How to Fix a Samsung Galaxy S10 Plus That Does Not Turn On/Power On, Power Integrated Circuit (IC): Schritt 1, Bild 3 von 3
    • Check the state of the motherboard. Both the power integrated circuit (IC) and camera IC have been soldered before.

    • Install the motherboard to test it. Connect the display and the power cable. The motherboard shows a current leakage of 52 mA.

    • Press the power button. Here, the reading has not changed. Therefore, the main power supply line of the motherboard may be faulty.

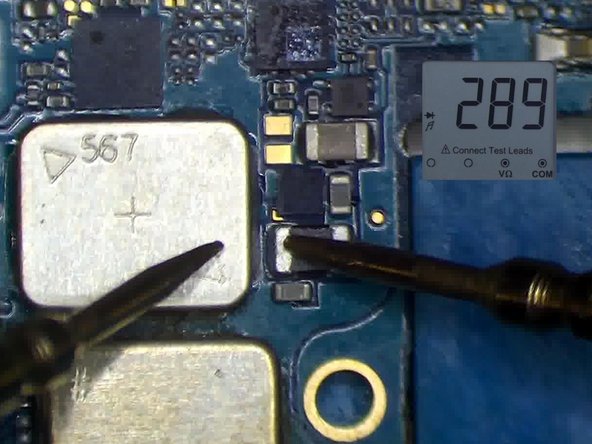
    • Measure several power supply lines of the motherboard using the multimeter's diode mode. Inductor L5039 is shorted to the ground.

  2. How to Fix a Samsung Galaxy S10 Plus That Does Not Turn On/Power On: Schritt 2, Bild 1 von 2 How to Fix a Samsung Galaxy S10 Plus That Does Not Turn On/Power On: Schritt 2, Bild 2 von 2
    • Open the schematic. It shows that L5039 is directly connected both to the main power supply line VBAT, and to the power IC U8031.

  3. How to Fix a Samsung Galaxy S10 Plus That Does Not Turn On/Power On: Schritt 3, Bild 1 von 2 How to Fix a Samsung Galaxy S10 Plus That Does Not Turn On/Power On: Schritt 3, Bild 2 von 2
    • Since power IC U8031 has been soldered previously, we need to verify if it is faulty as a result.

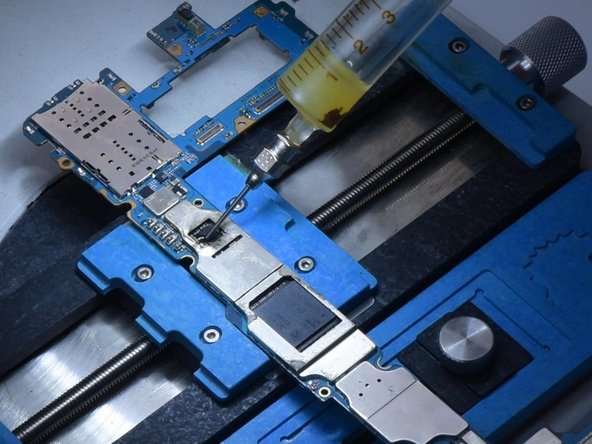
    • Attach the motherboard to the holder, applying some paste flux to the power IC.

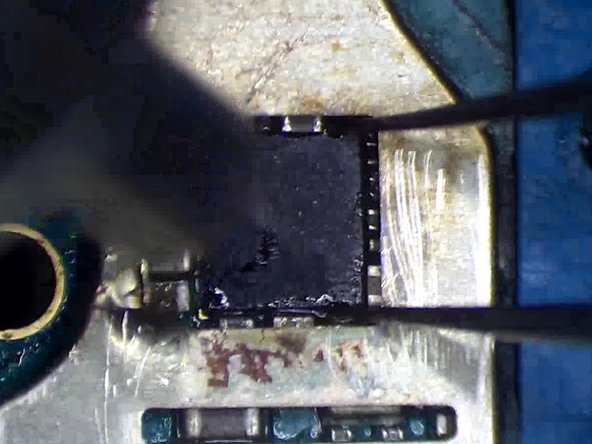
    • Heat with a hot air gun set at 340°C and airflow 3 to remove the IC.

  4. How to Fix a Samsung Galaxy S10 Plus That Does Not Turn On/Power On: Schritt 4, Bild 1 von 3 How to Fix a Samsung Galaxy S10 Plus That Does Not Turn On/Power On: Schritt 4, Bild 2 von 3 How to Fix a Samsung Galaxy S10 Plus That Does Not Turn On/Power On: Schritt 4, Bild 3 von 3
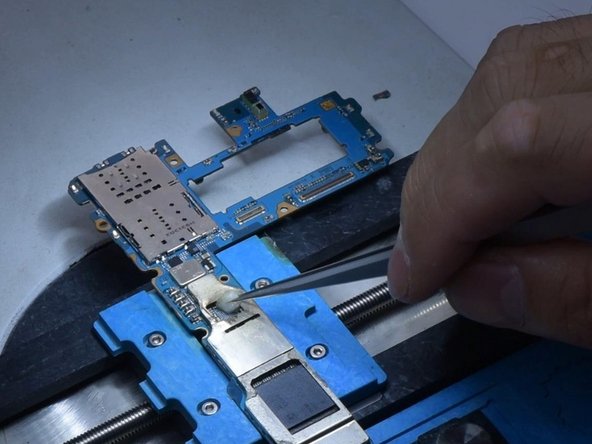
    • Clean the bonding pad with solder wick.

    • Measure the inductor L5039 using the multimeter's diode mode.

    • Here, the diode value is 289, which is normal. Therefore, we can conclude that the power IC fault has resulted in the short circuit of the main power supply line.

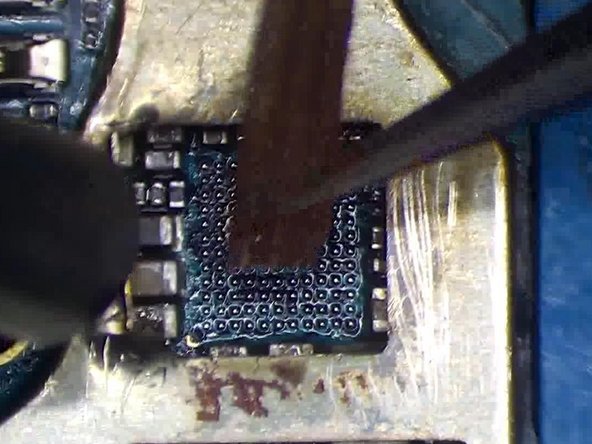
    • Clean the bonding pad with PCB cleaner and apply some paste flux.

  5. How to Fix a Samsung Galaxy S10 Plus That Does Not Turn On/Power On: Schritt 5, Bild 1 von 3 How to Fix a Samsung Galaxy S10 Plus That Does Not Turn On/Power On: Schritt 5, Bild 2 von 3 How to Fix a Samsung Galaxy S10 Plus That Does Not Turn On/Power On: Schritt 5, Bild 3 von 3
    In diesem Schritt verwendetes Werkzeug:
    Tweezers
    $4.99
    Kaufen
    • Align the new IC. Solder it with a hot air gun set to 340°C and airflow 2. Once the motherboard has cooled, connect the power cable.

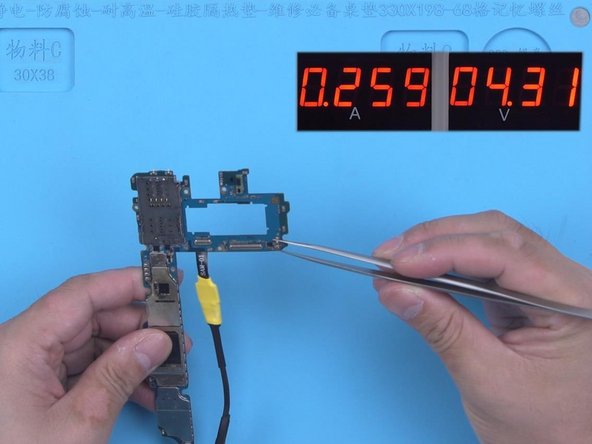
    • Trigger the boot-up with tweezers. The boot current returns to normal.

    • Install the motherboard. The phone turns on normally. The fault has been cleared.

Abschluss

To reassemble your device, follow these instructions in reverse order.

3 weitere Personen haben diese Anleitung absolviert.

REWA

Mitglied seit: 11/24/20

14.615 Reputation

52 Anleitungen geschrieben

Ein Kommentar

sir. in step 4. i remove IC U8031 and Clean the bonding pad with Solder Wick.but when i Measure the inductor L5039 with diode mode of the multimeter. The diode value is shorted to the ground. How i fix it? thank i’m from Thailand

fazz_up - Antwort

Kommentar hinzufügen

Seitenaufrufe:

Letzte 24 Stunden: 2

Letzte 7 Tage: 13

Letzte 30 Tage: 32

Insgesamt: 4,230