Einleitung
If you need to repair the buttons on your Logitech Pebble M350/M355 mouse, follow this guide. This guide will show you how to disassemble the mouse to reach the scroll wheel and buttons and apply a small amount of lubricant to them.
Many users of this mouse have encountered a problem where the buttons eventually stop working. Since this isn't ideal for a device you use every day, the purpose of our guide is to provide a simple solution for this common problem.
Was du brauchst
-
-
Use your hands to remove the magnetic top panel of the mouse.
-
-
-
Remove the USB adaptor in the small rectangular hole on the lower right corner.
-
Remove the battery.
-
-
-
-
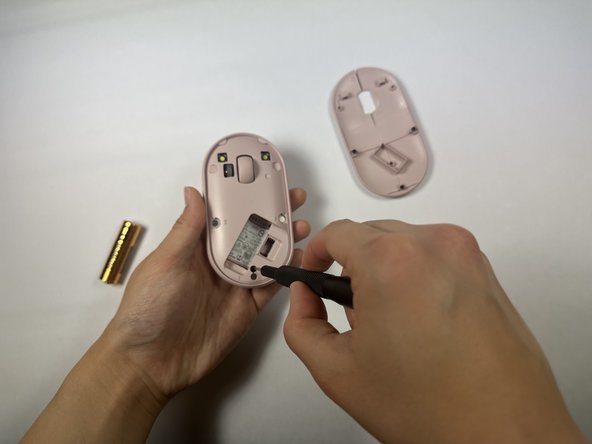
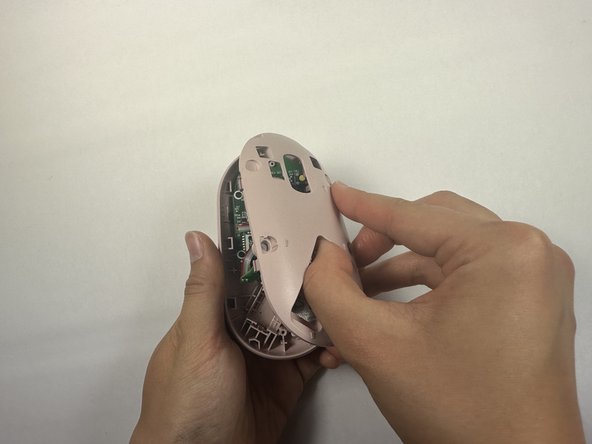
Use a Phillips #000 screwdriver to remove one screw holding the inner panel in place.
-
-
-
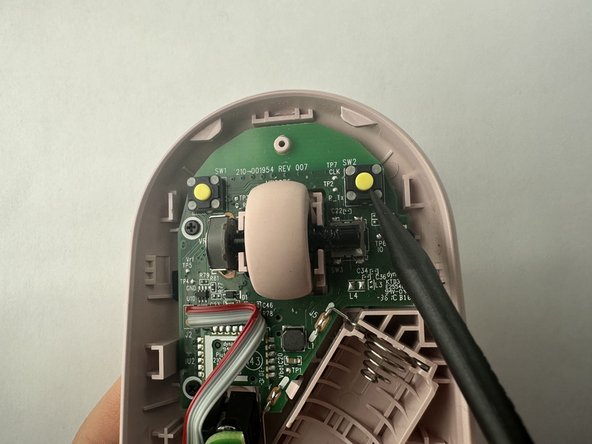
Gently wipe the metal axle where the scroll wheel is mounted with a small amount of 3-in-1 oil.
-
Repeat for the left and right click buttons.
-


To reassemble your device, follow these instructions in reverse order.
Rückgängig: Ich habe diese Anleitung nicht absolviert.
4 weitere Personen haben diese Anleitung absolviert.

Team

UC Davis, Team 2-6, Morris Spring 2023 Mitglied von UC Davis, Team 2-6, Morris Spring 2023
UCD-MORRIS-S23S2G6
3 Mitglieder
1 Anleitung geschrieben
5 Kommentare zur Anleitung
I didn't even disassemble (unscrew) my pebble. Just applied a drop of mineral oil to the button and it did help a lot! Thanks!
Hi Emma, Is it fine to use the spray version of wd40 if not what is the difference?
Best
Hakan
I'm finding the issue with my new Pebble isn't so much that the buttons don't work. It's that they are unreliable because if you don't press near dead center on the button, it doesn't actuate enough to press the microswitch. I feel like this is a design flaw, but maybe this guide will help. On the plus side, at least they built it where it's easy to take apart.