Einleitung
Cracked tile can be unsightly and can lead to larger foundation issues in the long run, but replacing a broken tile can be a simple and straightforward fix. After finding matching tile and grout, the replacement will be all but unnoticeable.
Was du brauchst
-
-
Use a painter's tool or putty knife to remove the grout from around the cracked tile.
-
Using an edge or corner of your painter's tool or putty knife, scrape the grout along the perimeter of the broken tile.
-
-
-
Use the painter's tool or putty knife to pry up the broken tile.
-
If the tile does not lift, place an old rag over the tile and use the hammer to break the tile into smaller pieces.
-
-
-
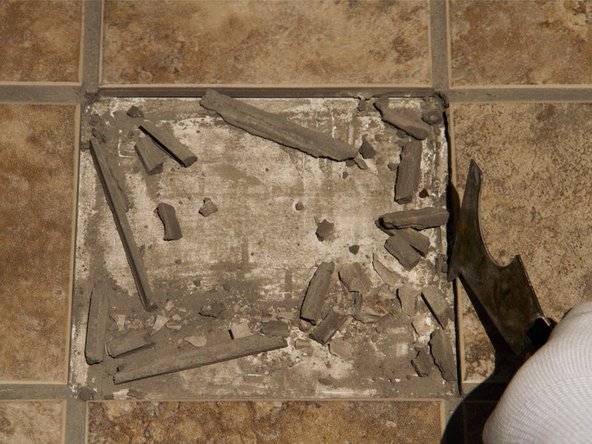
Remove the broken pieces of tile, using gloved hands for large pieces or a broom for smaller shards.
-
Using the painter's tool or putty knife, scrape the grout from the edges of tile and any adhesive from under the tile.
-
-
-
-
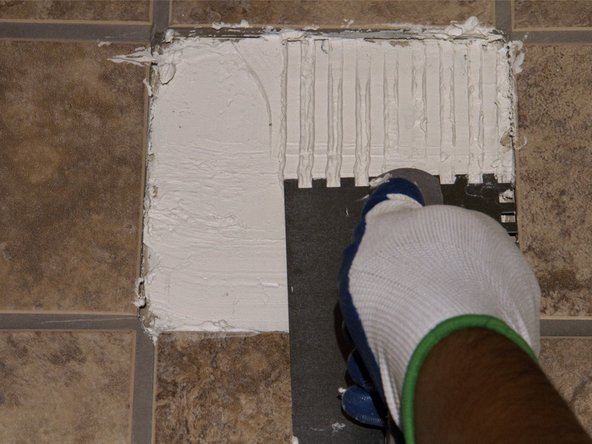
Apply new adhesive using the trowel, making sure the adhesive is spread evenly.
-
Drag the toothed end of the trowel across the adhesive to create even rows.
-
-
-
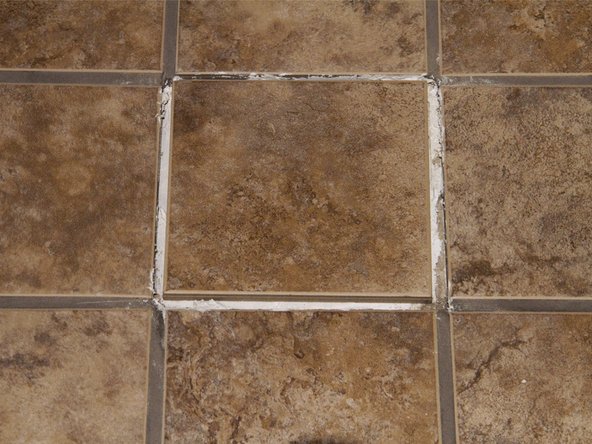
Place the new tile down in the center of the empty space.
-
If available, use tile spacers to ensure proper placement.
-
Allow the adhesive to dry based on the instructions provided on the product.
-
-
-
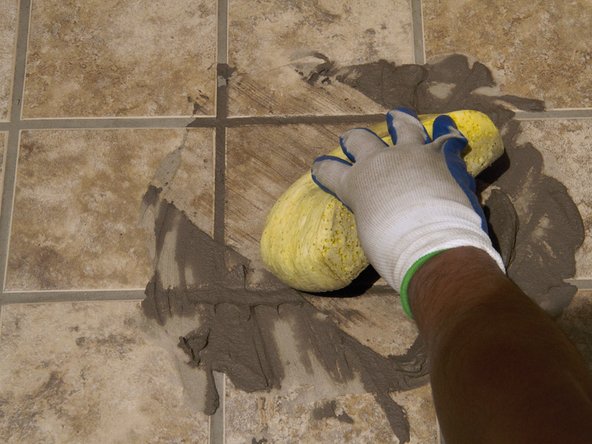
After the adhesive has dried, add water to a small amount of grout until it's the consistency of toothpaste.
-
Fill in the area around the new tile, making sure the new grout matches the height of the surrounding grout.
-
Use a moist sponge to wipe diagonally across the tile, cleaning off excess grout after each wipe.
-
-
-
If any bubbles or gaps form in the grout while removing excess, add more grout and repeat the cleaning process.
-
Wait and allow grout to dry for several hours.
-


Allow the grout to dry and then resume normal use.
Allow the grout to dry and then resume normal use.
Rückgängig: Ich habe diese Anleitung nicht absolviert.
9 weitere Personen haben diese Anleitung absolviert.
Team

Texas Tech, Team 26-7, Rauch Spring 2016 Mitglied von Texas Tech, Team 26-7, Rauch Spring 2016
TTU-RAUCH-S16S26G7
3 Mitglieder
2 Anleitungen geschrieben