Einleitung
Rear light bulbs often go out on cars. The rear light bulbs are often hidden behind a rear tail light cover. This document provides guidance on how to remove the tail light cover and then provides guidance on how to remove and replace the associated rear tail light bulbs for 2011 to 2015 Ford Explorers.
Was du brauchst
-
-
Locate the two plastic screw covers that are adjacent to the rear light covers.
-
-
-
Once covers are removed, there will be an 8 mm hex head screw located beneath each cover.
-
-
-
-
Using an 8 mm Deep Socket Wrench, remove both of the 20 mm (length) hex-head screws.
-
-
-
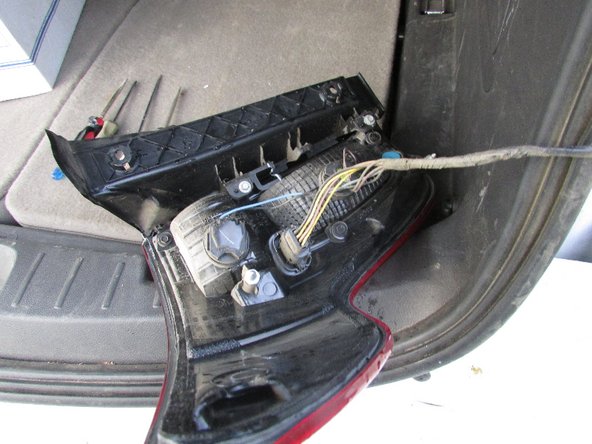
Once removed, the bulb sockets will be located on the inside portion of the tail light cover.
-
-
-
Turn the bulb socket about one quarter turn in a counterclockwise direction.
-
After it is turned, gently pull and remove the bulb socket from the tail light cover.
-


To reassemble your device, follow these instructions in reverse order.
To reassemble your device, follow these instructions in reverse order.
Rückgängig: Ich habe diese Anleitung nicht absolviert.
8 weitere Personen haben diese Anleitung absolviert.
Team

Cal Poly, Team 14-4, Green Fall 2015 Mitglied von Cal Poly, Team 14-4, Green Fall 2015
CPSU-GREEN-F15S14G4
5 Mitglieder
16 Anleitungen geschrieben
Ein Kommentar
That's not the tail lights that is the turn signal and back up lights.