Einleitung
Replacing your wiper arms is necessary if you have experienced windshield streaks even after replacing your wiper blades. Furthermore, it's a good idea to replace your wiper arms if they have been exposed to harsh weather for a significant amount of time. This guide will take you step by step through the process of removing your wiper arm and replacing it with a new one.
Was du brauchst
-
-
Take the tip of your flathead screwdriver, and wedge it underneath the wiper cap.
-
Firmly pry the wiper cap upwards until it's completely off.
-
-
-
Place the head of your ratchet on the exposed nut.
-
Loosen the nut by turning your ratchet counter clockwise.
-
-
-
-
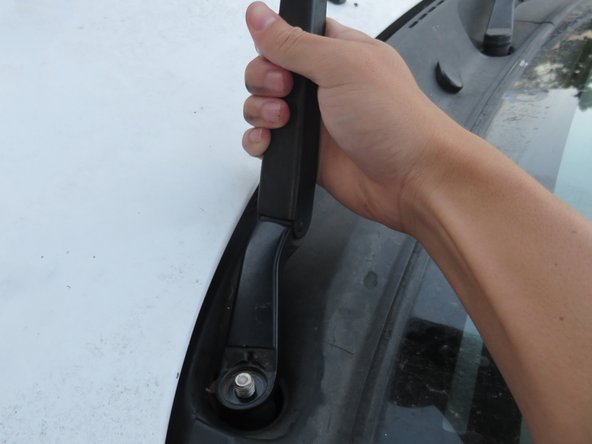
Firmly grip the lower end of the wiper arm.
-
Pull it towards you, so that the wiper arm is extended in the upward position.
-
-
-
While holding the lower end of the wiper arm, tug the wiper arm upwards until completely detached.
-
-
-
Have your new wiper arm extended in the upward position (just how your old wiper arm was extended at the end of Step 4).
-
Take your wiper arm, and center its hole on the exposed metal threading.
-
-
-
Once the wiper arm has been placed onto the metal threading, firmly grip the lower end of the wiper arm.
-
Slowly push the wiper arm downwards and away from you, so that it's flat with the windshield.
-
-
-
Place the same nut from earlier onto the exposed threaded metal.
-
Place the head of your ratchet onto the nut.
-
Tighten the nut by turning your ratchet clockwise, until it can no longer be tightened.
-
-
-
Firmly press the wiper cap upon the exposed nut.
-
Once the wiper cap is secure, you may repeat steps 1-9 to the other wiper arm.
-


Once you have replaced one of your wiper arms, repeat the same process for the remaining wiper arm.
Once you have replaced one of your wiper arms, repeat the same process for the remaining wiper arm.
Rückgängig: Ich habe diese Anleitung nicht absolviert.
4 weitere Nutzer:innen haben diese Anleitung absolviert.
Team

Cal Poly, Team 15-2, Green Fall 2015 Mitglied von Cal Poly, Team 15-2, Green Fall 2015
CPSU-GREEN-F15S15G2
4 Mitglieder
4 Anleitungen geschrieben