Zum Hauptinhalt wechseln

How to Stabilize the Stem of a Longwise ES06 E-Scooter

Was du brauchst

  1. How to Stabilize the Stem of a Longwise ES06 E-Scooter, How to Stabilize the Stem of a Longwise ES06 E-Scooter: Schritt 1, Bild 1 von 2 How to Stabilize the Stem of a Longwise ES06 E-Scooter, How to Stabilize the Stem of a Longwise ES06 E-Scooter: Schritt 1, Bild 2 von 2
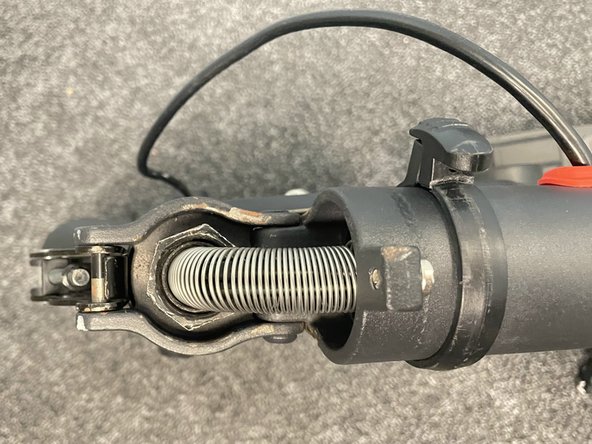
    • Power off your E-Scooter and make sure it is not charging.

  2. How to Stabilize the Stem of a Longwise ES06 E-Scooter: Schritt 2, Bild 1 von 2 How to Stabilize the Stem of a Longwise ES06 E-Scooter: Schritt 2, Bild 2 von 2
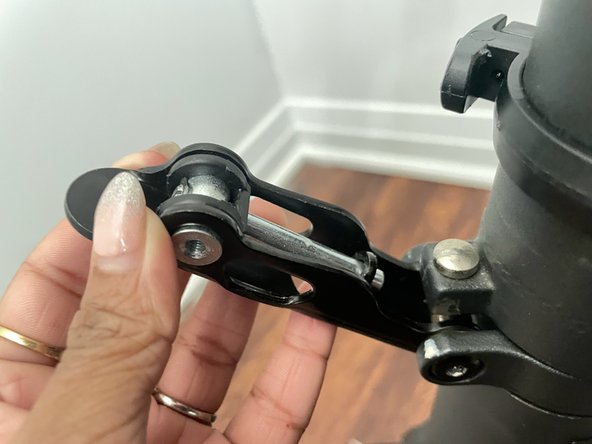
    • Slide the locking clip out from the base of the stem.

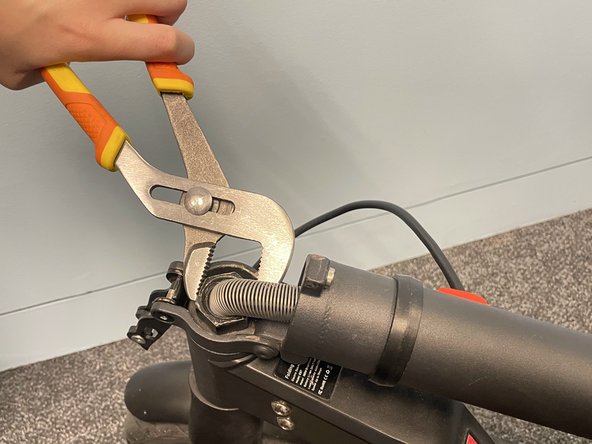
    • Unlock the clamp on the stem.

  3. How to Stabilize the Stem of a Longwise ES06 E-Scooter: Schritt 3, Bild 1 von 2 How to Stabilize the Stem of a Longwise ES06 E-Scooter: Schritt 3, Bild 2 von 2
    • Gently lower the stem onto the back wheel and keep it stable.

  4. How to Stabilize the Stem of a Longwise ES06 E-Scooter: Schritt 4, Bild 1 von 3 How to Stabilize the Stem of a Longwise ES06 E-Scooter: Schritt 4, Bild 2 von 3 How to Stabilize the Stem of a Longwise ES06 E-Scooter: Schritt 4, Bild 3 von 3
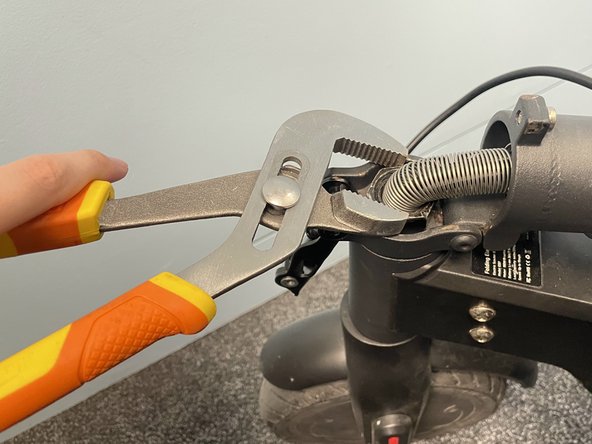
    • Using an adjustable wrench, carefully tighten the bolt at the base of the stem.

    • This will make the stem stable.

    • Do not use the wrench on the spring between the stem and the bolt as it may damage the wires beneath.

  5. How to Stabilize the Stem of a Longwise ES06 E-Scooter: Schritt 5, Bild 1 von 3 How to Stabilize the Stem of a Longwise ES06 E-Scooter: Schritt 5, Bild 2 von 3 How to Stabilize the Stem of a Longwise ES06 E-Scooter: Schritt 5, Bild 3 von 3
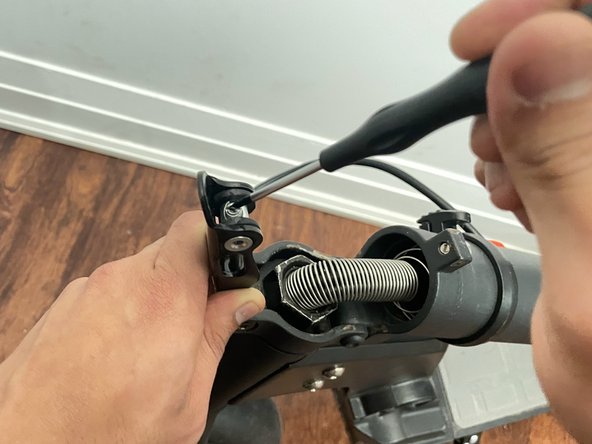
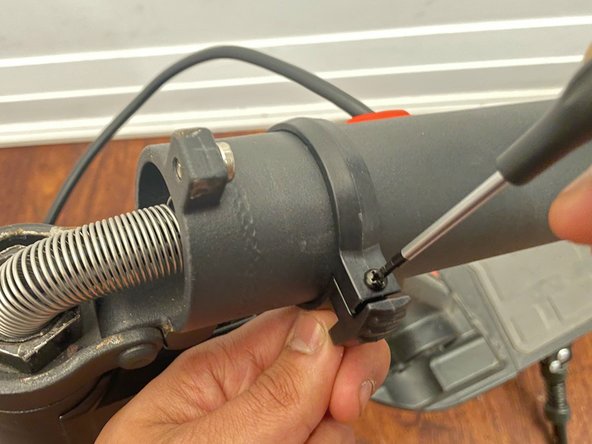
    • Using a slotted/flathead screwdriver, carefully tighten the screw on the clamp.

    • This will prevent the clamp from popping open.

  6. How to Stabilize the Stem of a Longwise ES06 E-Scooter: Schritt 6, Bild 1 von 2 How to Stabilize the Stem of a Longwise ES06 E-Scooter: Schritt 6, Bild 2 von 2
    • Use a Phillips #0 to tighten the screw on the locking clip.

    • This helps the clamp to stay in place and prevent it from popping open.

Abschluss

To reassemble your device, follow these instructions in reverse order.

Maithili Admane

Mitglied seit: 09/24/22

133 Reputation

1 Anleitung geschrieben

Team

York University, Team B-3, Allen Fall 2022 Mitglied von York University, Team B-3, Allen Fall 2022

YORK-ALLEN-F22SBG3

2 Mitglieder

1 Anleitung geschrieben

0 Kommentare

Kommentar hinzufügen

Seitenaufrufe:

Letzte 24 Stunden: 2

Letzte 7 Tage: 12

Letzte 30 Tage: 40

Insgesamt: 574