Einleitung
To repair the wing of a foam glider there are 3 things that are required; (1) 3/4 inch wooden dowel, (2) Wood snips, and (3) Gorilla White Gorilla Glue. The wood snips cut the wooden dowel at a length where it can internally stabilize the structure of the wing. Gorilla White Gorilla Glue is an inexpensive adhesive that will glue the dowels to the inside of the wing without eating through the foam. Other glues are known to eat through foam and will not allow your repair to be complete.
Was du brauchst
-
-
To begin this repair, carefully remove the damaged wing from the body of the plane.
-
Interior of the damaged wing
-
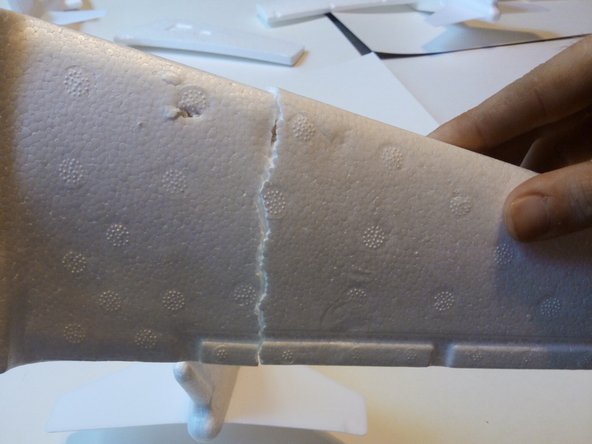
Exterior of the damaged wing
-
-
-
After you have made your 6 inch mark, use a pair of wood snips to cut the dowel cleanly at 6 inches.
-
-
-
Push the dowel piece about 2 to 3 inches into the inside the interior part of the damaged wing (see step 1).
-
-
-
Once the the dowel piece has been pushed into the interior part of the wing, make a mark where the wood and foam meet.
-
-
-
-
Slide the exterior part of the wing towards the interior part of the wing and dowel, creating a hole in both parts of the wing.
-
-
-
Repeat steps 5 through 7 to insert the second dowel piece into the lower half of the wing.
-
-
-
Make the same cut that was made in step 8 to your second dowel.
-
First dowel
-
Second dowel
-
-
-
Follow the same method as step 9 and create a hole in the exterior section of the damaged wing.
-
-
-
Remove the dowels from the wing.
-
Apply a Gorilla White Gorilla Glue pen to the inside of the holes and the area in-between them.
-
-
-
Insert the dowels back into the holes and bring both parts of the wing back together.
-
-
-
Go outside and fly your plane to test your repair. If it flies, you have a structurally repaired wing!
-


To reassemble your device, follow these instructions in reverse order.
To reassemble your device, follow these instructions in reverse order.

Team

Arkansas State University, Team S1-G13, Chamberlain Summer 2017 Mitglied von Arkansas State University, Team S1-G13, Chamberlain Summer 2017
ARSU-CHAMBERLAIN-SU17S1G13
1 Mitglied
1 Anleitung geschrieben