Einleitung
Belkin lightning charger cables are a popular choice for those who need to charge their Apple devices. However, over time, these cables can become damaged and develop breaks or frays. A break in the cable can be frustrating and may even prevent you from being able to charge your device. While soldering is a common method for repairing damaged cables, not everyone has the necessary tools or experience to do so. Fortunately, there are alternative methods to fix a break in a Belkin lightning charger cable without soldering. In this guide, we will explore some simple and effective techniques for repairing your cable and restoring it to working order. Whether you are looking to save money on a replacement cable or simply want to learn some basic cable repair skills, this guide is for you.
Please note that this isn't actually a repair and more of a "Quick Fix". As opposed to crimping the cable or soldering it this fix will not provide much structural support, so you may simply pull your cable apart if you pull too hard on it.
Was du brauchst
-
-
Locate the damaged area on the charger.
-
-
-
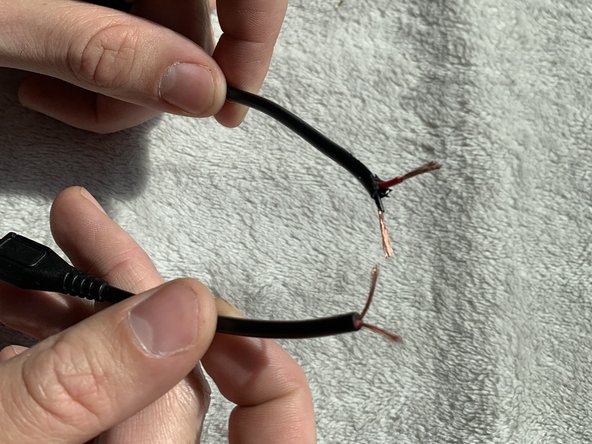
Cut out the part where the wire is broken using a pair of wire cutters.
-
-
-
Strip off about 3cm of the black insulation with the wire strippers to expose the red and black wire on both parts of the cable.
-
-
-
Slide about 1.75 of Heat-shrink tubing on a black and red wire each.
-
Slide about 5cm of Heat-shrink tubing on a charger cable.
-
-
-
-
Strip off about 1cm of the insulation of each of the wires with the wire strippers.
-
You can use your flush cutters as an improvised wire stripper by cutting just enough so that you don't damage the copper strands inside and pulling the insulation off.
-
-
-
Move the small heat shrinking tubes up to cover the exposed parts of the wires.
-
-
-
Evenly heat the tubing with a heat gun. Make sure the tube is properly shrinking.
-
-
-
Move the large heat shrinking tube up to cover the wires.
-
-
-
Evenly heat the tubing with a heat gun. Make sure the tube is properly shrinking.
-


Happy fixing!
Happy fixing!

Team

Eastern Washington University, Team S25-G1, Crane Spring 2019 Mitglied von Eastern Washington University, Team S25-G1, Crane Spring 2019
EWU-CRANE-S19S25G1
4 Mitglieder
3 Anleitungen geschrieben