Einleitung
If your Texas Instruments Calculator(model TI-30XIIS) buttons are sticky/stuck. Most likely, the calculator's keyboard membrane and sensor are dirty and require cleaning.
Keeping buttons from sticking and removing the sticking is easy and simple with a little cleaning. Fixing the issue at the source saves money and unnecessary tech waste rather than getting rid of a difficult-to-use calculator.
Although in step 6 we will be removing the circuit board, it does not require any soldering since we will not be disconnecting any connected wires from the calculator.
Make sure to turn off the calculator before beginning.
Was du brauchst
-
-
Use the #0 Phillips screwdriver to remove the 4 screws at the back of the calculator
-
-
-
Use a Flat Head Screwdriver or a thin strong object like a card to separate the front and the back of the case.
-
Separate it carefully to not break the 8 clips.
-
-
-
Use a pointed tool to push the battery out of its terminal until it is out far enough to remove with your fingers.
-
-
-
-
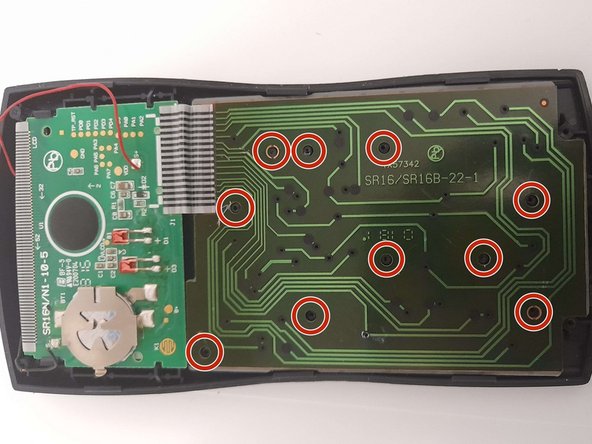
Using a knife, Razor, or other perscion cuting tool, remove the top of the 10 plastic rivets that connect the keyboard sensor to the front case.
-
-
-
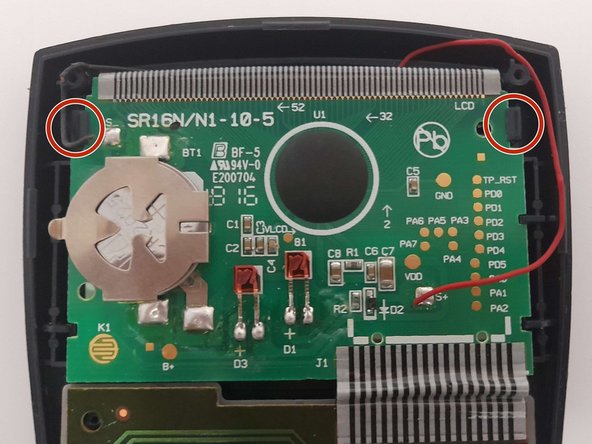
Remove the circuit board, keyboard sensor, and keyboard membrane from the front case.
-
-
-
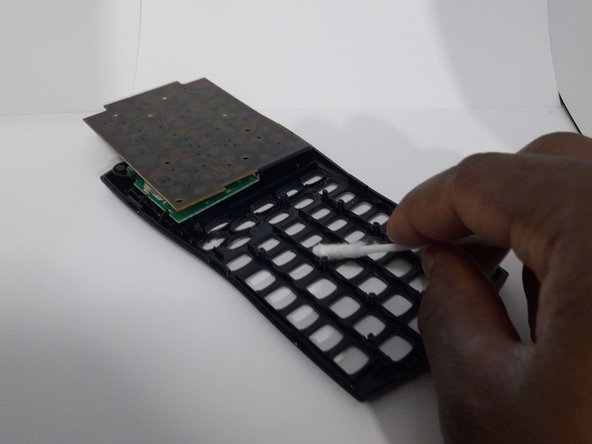
Use rubbing alcohol to wipe down both parts using q-tips or any other cleaning cloth.
-
-
-
Using q-tips, remove the keys and clean the keyhole and the keys to ensuring that they are residue-free. When done, return all the keys to their original position.
-


To reassemble your device, follow these instructions in reverse order.
To reassemble your device, follow these instructions in reverse order.
Team

York University, Team P-9, Allen Winter 2023 Mitglied von York University, Team P-9, Allen Winter 2023
YORK-ALLEN-W23SPG9
1 Mitglied
1 Anleitung geschrieben