Diese Anleitung enthält neuere Änderungen. Wechsel zur neuesten unüberprüften Version.
Einleitung
Replace your phone's damaged front or rear camera to improve your photographs. Replacing the front and rear cameras follow the same series of steps.
Was du brauchst
-
-
Pull and twist the pin near the bottom left-side of the phone to remove it from the headphone jack.
-
-
-
Insert the pin into the SIM card opening located on the right-side of the phone.
-
Gently push in until the SIM card clicks, and then pull the pin and SIM card out.
-
Repeat this process for the additional SIM card.
-
-
-
Firmly push down on the black plastic covering at the bottom of the phone, and pull down.
-
-
-
Rotate the phone 180 degrees so that the bottom of the phone is now facing up.
-
Firmly push up on the back panel with your thumbs.
-
Lift up the back panel from the top right corner and gently pull it away from the phone.
-
-
-
Remove the following screws securing the logic board to the main frame:
-
Five 2mm Phillips #000 screws
-
Two 2.5mm Phillips #000 screws
-
-
-
Push down the yellow plastic lining at the top of the battery and remove the two 2.5mm Phillips #000 screws.
-
-
-
-
Use the flat end of a spudger to gently snap open the first clip located on the the right arm of the retaining plate.
-
Use the flat end of a spudger to gently snap the second clip located on the left arm of the retaining plate.
-
Use the flat end of a spudger to gently lift the upper retaining plate from the phone.
-
-
-
Use the pointy end of a spudger to pry the antenna connector off of its socket.
-
-
-
Use the pointy end of a spudger to gently pry the following connectors out of their sockets:
-
silver LCD cable connector
-
silver Headphone jack cable connector
-
-
-
Use the pointy end of a spudger to gently pry the following connectors out of their sockets.
-
Sliver Micro-USB cable connector
-
Copper battery cable connector
-
-
-
Remove the two 2mm Phillips #000 screws securing the copper flex cable to the silver metal tab.
-
-
-
Wedge the flat end of a spudger underneath the bottom left of the metal tab.
-
Run the spudger along the bottom edge of the metal tab and gently pry upward.
-
-
-
Use the pointy end of a spudger to wedge underneath the black circular vibrator motor near the bottom right of the phone.
-
Slowly lift up to separate the black circular vibrator motor from the adhesive.
-
-
-
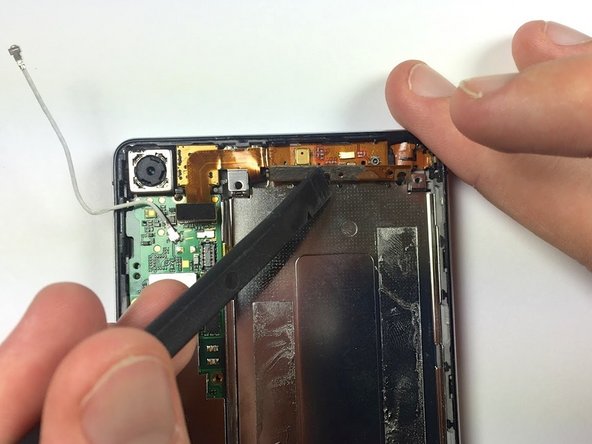
Hold down the bottom left corner of the motherboard and slowly lift the right side out of the main frame.
-
Gently wiggle the logic board to release it from the phone.
-
-
-
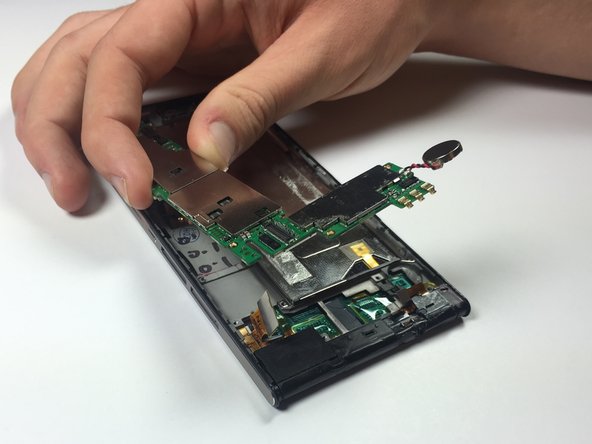
Flip over the motherboard to access the camera connector sockets.
-
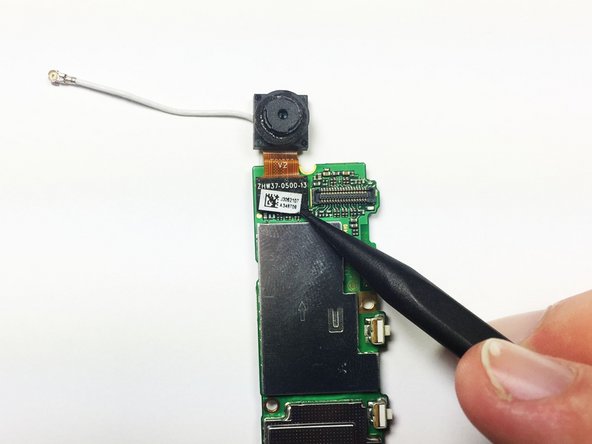
Use the pointy end of a spudger to gently pop up off the rear camera from the bottom right corner.
-
Use the pointy end of a spudger to gently pop up off the front camera from the bottom right corner.
-


To reassemble your device, follow these instructions in reverse order.
To reassemble your device, follow these instructions in reverse order.
Rückgängig: Ich habe diese Anleitung nicht absolviert.
3 weitere Nutzer:innen haben diese Anleitung absolviert.
Team

Cal Poly, Team 4-44, Amido Fall 2014 Mitglied von Cal Poly, Team 4-44, Amido Fall 2014
CPSU-AMIDO-F14S4G44
5 Mitglieder
11 Anleitungen geschrieben