Einleitung
I will show how to replace the screen assembly on Honor 4x, and the basic tips on LOCA gluing, but will probably make a better guide on it later.
Was du brauchst
-
-
It is recommended to always replace the whole display assembly, since the parts are cheap and the result better.
-
-
-
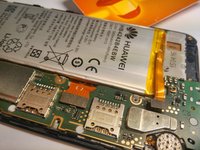
After removing the back cover, SIM-card(s) and the SD-card, proceed to unscrew all 17 screws.
-
Removing these two warranty stickers will obviously void your warranty
-
Identical 16 Phillips screws
-
1 Torx screw. Use a T5 Torx screwdriver.
-
After removing the screws, insert a prying tool of your choice (preferably plastic) between the back cover and the front panel and pry the back cover loose.
-
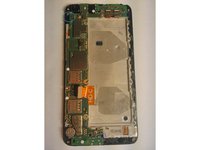
Move around the phone with the spudger. You will hear clicks as you proceed detacting the clips around the phone. Four different parts should come off relatively easily. Once done, you will have the motherboard exposed.
-
-
-
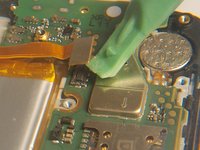
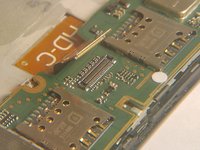
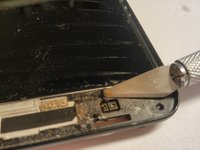
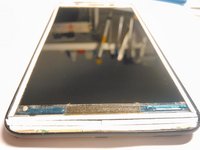
Disconnect the three flex cables marked red in the picture
-
These three points mark the plastic clips holding down the motherboard.
-
Marked in green is the point where you should release the motherboard first.
-
-
-
-
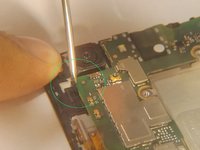
By carefully prying with a flathead screwdriver, you can now release the motherboard and lift it upwards to the left.
-
-
-
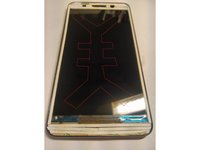
The next step will depend on your replacement part.
-
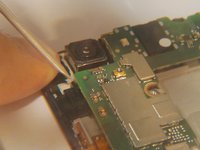
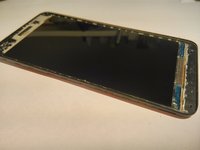
If you have the screen assembly with frame, just inspect the parts: remove and attach any parts missing from the new part, for example the vibration module is to be pried up with a spudger and glued onto the new part.
-
If you have the LCD-Digitizer assembly, you will need to remove the old screen from the frame. This can be done by heating up the screen, and with the help of a suction cup and a razor blade, the screen should come off easily. The frame is then to be cleaned with isopropyl alcohol to remove all old double-sided tape.
-
Then proceed to apply new layers of double-sided tape and set the screen in place. Mind the cable routing.
-
-
-
To save 20 bucks and spend up to almost 2 hours extra, you can replace just the front glass-digitizer.
-
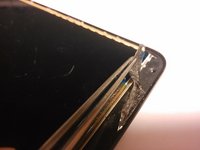
First, heat up the glass so hot it is not possible to hold your hand on it for long. (80 - 100degrees celcius) A hot air gun or a heat plate is required.
-
Insert a razor blade in between the glass and the frame. Carefully start making your way around the perimeter of the screen, keeping the glass hot.
-
Once a cutting wire fits between the glass and the LCD, switch from razor blade to cutting wire, and keeping the glass hot to touch, separate the glass. I recommend researching this process further beforehand. Sadly, I do not have any pictures of the process for this device.
-
Now you should have exposed the digitizer film. This has to be pried off, and in my opinion the best way to do so is to use the same cutting wire method. Now, be extra careful with the heat gun. I recommend holding the phone in your hand when heating with a heat gun, this way you will feel burning before you damage the LCD screen.
-
-
-
When separating the digitizer film, keep something in between the LCD and the digitizer to prevent the heated digitizer from readhering itself back onto the LCD.
-
The next step is to clean the LCD and the frame.
-
The old OCA can be rolled off with a finger, after a small amount of heat is used.
-
The old double-sided tape can be cut and peeled off with a blade, and the remnants come off easily with isopropyl alcohol.
-
-
-
Wipe every last bit of dirt off the LCD and the frame. Make sure there are no fingerprints present.
-
Apply double-sided tape. This will help glue the glass onto the frame. I usually apply double layer before the camera and the speaker to prevent LOCA spilling inside them.
-
I also use backlight sealant to prevent LOCA from entering the backlight. A slim layer of transparent tape from .5mm on the LCD to the edge of the frame will also work.
-
You can go back later (remove the screen) and peel back the silver reflecting layer above the backlight and wipe the backlight clean, should any LOCA find itself inside the backlight.
-
-
-
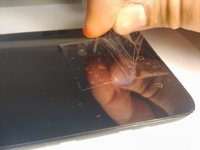
Apply LOCA glue like this. See a few Youtube videos on how to do it.
-
Make a tape handle onto the screen (picture) and route the digitizer first through its hole at the top.
-
Slowly lower the glass onto the LCD. Any bubbles and you will have to remove the glass and start from step 8 over again. Trust me, the bubbles look horrible.
-
-
-
Once the digitizer is in place, push on it until the glue has spread everywhere and cure in UV light (oven or flashlight). You can press on any spot that has too little glue until the glue hardens.
-
Reassemble the device by following the instructions in steps 1-6 in reverse order.
-


![Huawei Honor 4X Display Assembly Replacement, [Optional]: The front glass digitizer: Schritt 7, Bild 1 von 2](https://guide-images.cdn.ifixit.com/igi/pvwYuaiWUZ4nSJxy.medium)
![Huawei Honor 4X Display Assembly Replacement, [Optional]: The front glass digitizer: Schritt 7, Bild 2 von 2](https://guide-images.cdn.ifixit.com/igi/tJo5VjVeIJQILJAQ.medium)


The digitizer gluing part is included more as a curiosity. If, however, this piques your interest, I can post more elaborate guides on this.
The digitizer gluing part is included more as a curiosity. If, however, this piques your interest, I can post more elaborate guides on this.
Rückgängig: Ich habe diese Anleitung nicht absolviert.
23 weitere Personen haben diese Anleitung absolviert.
5 Kommentare zur Anleitung
Can we buy Honor 4x battery separately?
I love your site very much
Any idea after changed the battery, few days after, the phone cannot be charged when ON, but can only charge when phone is OFF. Thanks
i wont display