Diese Übersetzung enthält möglicherweise noch nicht die neuesten Änderungen der Original-Anleitung. Hilf mit, die Übersetzung zu aktualisieren oder sieh dir die Original-Anleitung an.
Was du brauchst
-
Dieser Schritt ist noch nicht übersetzt. Hilf mit, ihn zu übersetzen!
-
If possible remove the sim tray from the device.
-
-
Dieser Schritt ist noch nicht übersetzt. Hilf mit, ihn zu übersetzen!
-
If the LCD is not too badly damaged, switch the handset off.
-
Remove the two security screws at the bottom.
-
-
Dieser Schritt ist noch nicht übersetzt. Hilf mit, ihn zu übersetzen!
-
Using a pick or blade pry the back cover from the LCD frame.
-
Using the pick go along side the LCD and clip the back cover from the LCD frame.
-
-
-
Achtung! Sei vorsichtig, wenn du die Rückabdeckung öffnest, da das Flachbandkabel des Fingerabdrucksensors noch daran befestigt ist. Öffne das Gehäuse nach links.
-
Entferne alle Schrauben, die die Hauptplatine am Display befestigen sowie die, die Abdeckungen an der Hauptplatine befestigen.
-
Achtung! Die Schraube links unten unterscheidet sich von den anderen Schrauben.
-
-
-
Dieser Schritt ist noch nicht übersetzt. Hilf mit, ihn zu übersetzen!
-
Remove the plate covering the finger print flex connector to the left.
-
Then remove the plate covering the secondary board and the LCD connector to the left.
-
Plug all the flex connectors carefully out of the board along with the coaxial cable.
-
-
Dieser Schritt ist noch nicht übersetzt. Hilf mit, ihn zu übersetzen!
-
Remove the plate covering the from camera. BEWARE! The front cam connector may be attached to the plate, lift it up carefully, removing the connector and then remove the plate to the right.
-
Remove the plate covering the main camera connector and disconnect it.
-
Carefully! Pry from beneath the board gently upwards where indicated, then gently pull to the left/downwards in and upwards direction.
-
-
Dieser Schritt ist noch nicht übersetzt. Hilf mit, ihn zu übersetzen!
-
Remove all the screws.
-
BEWARE! The speaker unit may have some adhesive underneath. Pry the unit upwards and then pull it gently.
-
-
Dieser Schritt ist noch nicht übersetzt. Hilf mit, ihn zu übersetzen!
-
Beware! Apply generous amount of heat to the screen, be careful to not burn the plastic LCD frame!
-
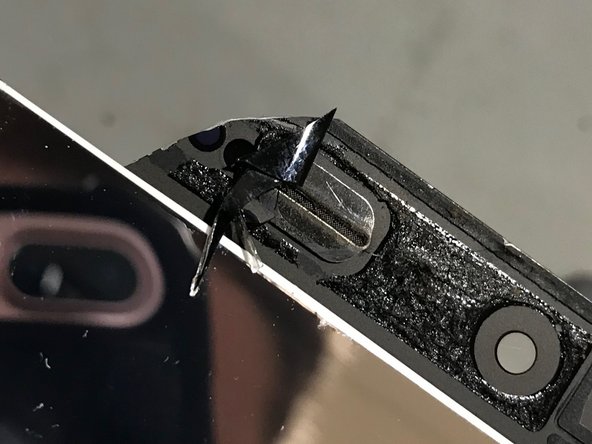
Beware! The glass shards are extremely sharp Using a blade or pick get underneath the side of the screen and pry it loose from the frame, use heat where you experience resistance.
-
Lift the screen upwards from the top.
-
-
Dieser Schritt ist noch nicht übersetzt. Hilf mit, ihn zu übersetzen!
-
Be careful, before removing the screen, underneath the secondary board there is a small flex gently pull it from underneath.
-
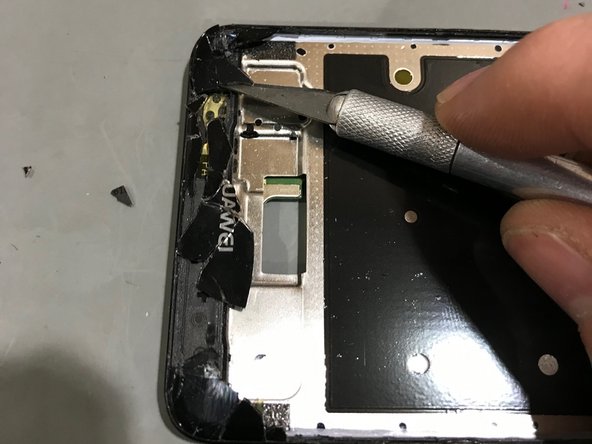
Clean the residing glass shards from the LCD frame. Be careful not to cut yourself as these pieces are very sharp.
-
Make sure the frame is cleaned of all glass and most of the adhesive.
-
-
Dieser Schritt ist noch nicht übersetzt. Hilf mit, ihn zu übersetzen!
-
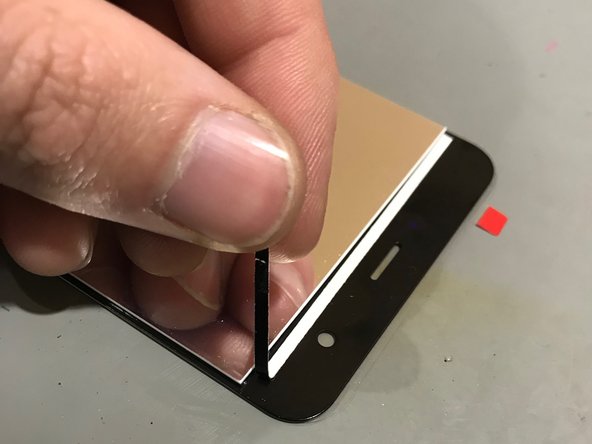
Prepare the LCD and apply adhesive.
-
Make sure to transfer the ear-speaker mesh to the new LCD if a new one is not included.
-
-
Dieser Schritt ist noch nicht übersetzt. Hilf mit, ihn zu übersetzen!
-
Reverse the disassembly steps to complete the handset.
-
Make sure to apply pressure to the new screen where the new adhesive was placed.
-
Place back the two bottom security screws.
-


Rückgängig: Ich habe diese Anleitung nicht absolviert.
Ein:e weitere:r Nutzer:in hat diese Anleitung absolviert.
Besonderer Dank geht an diese Übersetzer:innen:
7%

Diese Übersetzer:innen helfen uns, die Welt zu reparieren! Wie kann ich mithelfen?
Hier starten ›

3 Kommentare
Thanks bit I want to buy the screen
I need the screen please