Einleitung
If your Huion PW100 pen dropped, there is a chance that it while it is hovering starts drawing on its own. This is caused by ether the wires on the chip disconnection of the inner pin that broke.
Was du brauchst
-
-
I only had to glue the inner metal pin. There fore the soldering part will not be included in the guide, there are however only two wires on the chip. so instead of glueing you have to solder a wire back on.
-
This is the type of tooth pick I used
-
also, while taking the picueres for this guide I forgot to take of the pen nib don't do that
-
-
-
Remove the pen nib with the stand that came with the tablet.
-
Then push the rubber grip over and slowly pull the grip of the pen
-
-
-
The middle of the button is attached with a clip in the middle of the button.
-
Take the screwdriver, insert it against the clip and push the button up diagonally
-
-
-
-
be careful, Huion used glue to secure the parts together.
-
The parts are glued somewhere near the red line.
-
Take the pen and bend it ever so slightly on the red line. Rotate the pen a bit and bend it again.
-
After one full rotation, take the botem and top part of the pen and twist them against each-other. Again be careful.
-
repeat the above 2 steps on till the top part comes off. I recommend a quit room so that you can hear the clue crack during the bending processes. This takes a whle
-
-
-
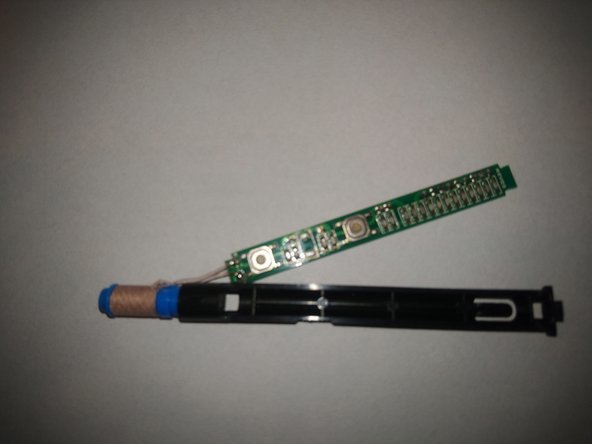
Take the bottem part of the pen, that is where all the hardware is.
-
Flip it upside down, there is a little pin that chip case in place
-
Take the screw driver, press it and then slowly pull the chip case out.
-
There should be no resistance. if there is, slowly push the case back in and retry. the wires form the EMR coils are unprotected and can get stuck behind something. If you just pull the chip case out those break
-
-
-
Then end of the chip case as a little lip, keeping the chip in place.
-
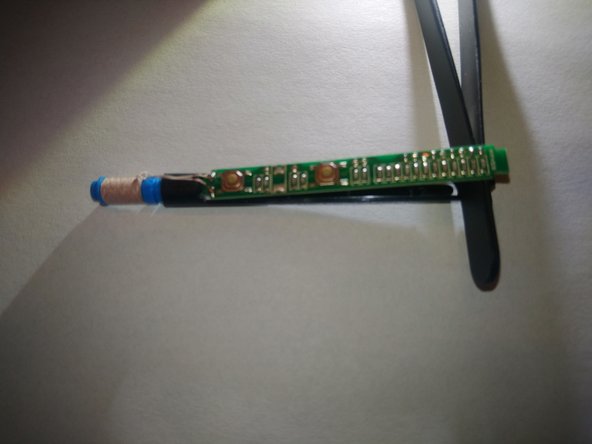
press the lip outward and carefully lift the chip out of its casing.
-
-
-
you can now unscrew the blue tip from the chip casing.
-
this tip holds 3 parts. a rubber stopper, spring and a metal rod/pin.
-
This is also the part where you can see what you need to fix.
-
If it is the wires, take the soldering iron and reattach them. (I have no pictures for this)
-
or the metal pin broke (as in the picture), in with case you need to clue
-
-
-
This is what you need toothpicks for.
-
place one the toothpick , place the other part of the rod on the other toothpick.
-
Align the rod parts on the break line
-
once that is done glue the parts together.
-
Let the glue sit on till dried
-
-
-
Take the pen nib, insert into the metal rod. take the side the the nib fits in fully. Remove the nib, put that side into to blue tip of the chip
-
Take the rubber stopper and spring, assemble chose and put them in the blue tip.
-
screw the chip casing back on. And put the chip back into the case
-
Slade the chip case back onto the front part of the pen. insert a nib and test the pen on the tablet.if you want more/less resistance on the pen nib, fiddle with how far you screw the blue top to the chip case
-
put the button pack on, with the raised and smaller section on top, just click it into place.
-
From the back slide the rubber grip back on the pen. The wider part of the grip should be put on first
-
take the top part of the pan and click it back into place, of glue it back on. either way it snaps back on with a click.
-


To reassemble your device, follow these instructions in reverse order.
To reassemble your device, follow these instructions in reverse order.
Rückgängig: Ich habe diese Anleitung nicht absolviert.
Eine weitere Person hat diese Anleitung absolviert.
3 Kommentare
Hey, does the pen work normally after this? I’ve seen others post online that glueing doesn’t solve the hovering issue
sorry for the late replay,
but I can’t say, because that pin broke again. I needed some more pic for this guide and during reassembly dog happened :(,
But I don’t remember the pen working a 100% after this, you might want to try some conductive glue
danke für die geile hilfe