Zum Hauptinhalt wechseln

Hytera TC-580 Microphone Replacement

Was du brauchst

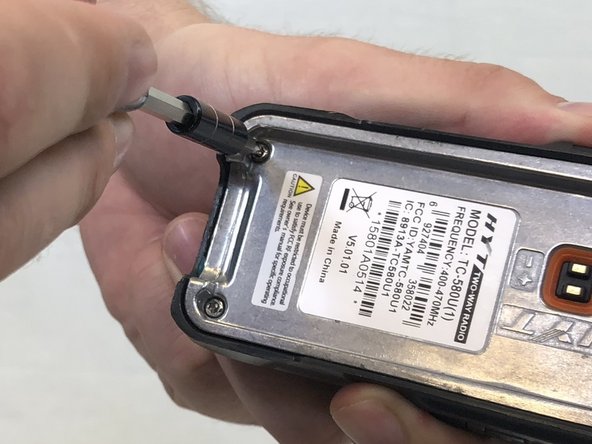
  1. Hytera TC-580 Microphone Replacement, Battery: Schritt 1, Bild 1 von 2 Hytera TC-580 Microphone Replacement, Battery: Schritt 1, Bild 2 von 2
    • Remove the two 10mm Phillips #0 from the belt clip.

  2. Hytera TC-580 Microphone Replacement: Schritt 2, Bild 1 von 2 Hytera TC-580 Microphone Replacement: Schritt 2, Bild 2 von 2
    • Push in the release button and pull up on the battery to remove.

  3. Hytera TC-580 Microphone Replacement, Antenna: Schritt 3, Bild 1 von 1
    • Twist antenna counter-clockwise and set damaged antenna aside.

  4. Hytera TC-580 Microphone Replacement, Keypad: Schritt 4, Bild 1 von 1
    • Remove the volume knob by firmly lifting up on both sides of it.

  5. Hytera TC-580 Microphone Replacement: Schritt 5, Bild 1 von 1
    • Remove the orange o-ring around volume knob using tweezers.

  6. Hytera TC-580 Microphone Replacement: Schritt 6, Bild 1 von 1
    • Remove grey nut from base of volume knob by turning it counterclockwise with a set of tweezers.

  7. Hytera TC-580 Microphone Replacement: Schritt 7, Bild 1 von 1
    • Remove the brass washer from the base of the antenna slot by turning it counterclockwise with a set of tweezers.

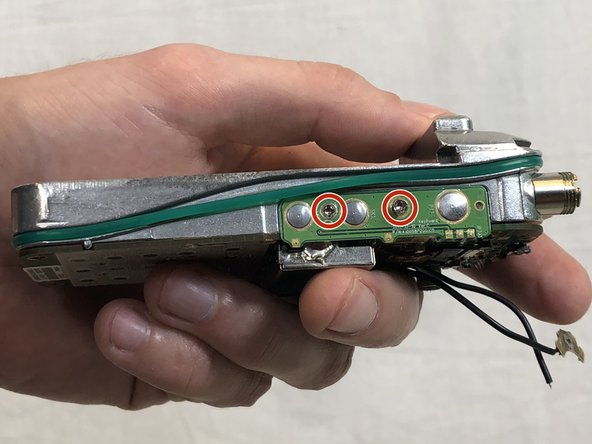
  8. Hytera TC-580 Microphone Replacement: Schritt 8, Bild 1 von 2 Hytera TC-580 Microphone Replacement: Schritt 8, Bild 2 von 2
    • Remove the two 15mm T8 Torx screws from the base of the battery cavity.

  9. Hytera TC-580 Microphone Replacement: Schritt 9, Bild 1 von 1
    • Using a plastic opening tool, pry in between the plastic case and metal circuit board to remove the board.

  10. Hytera TC-580 Microphone Replacement: Schritt 10, Bild 1 von 1
    • Peel off the keypad by hand.

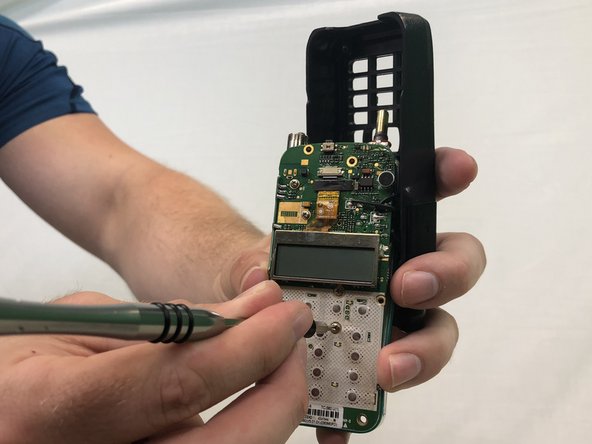
  11. Hytera TC-580 Microphone Replacement, Speaker: Schritt 11, Bild 1 von 3 Hytera TC-580 Microphone Replacement, Speaker: Schritt 11, Bild 2 von 3 Hytera TC-580 Microphone Replacement, Speaker: Schritt 11, Bild 3 von 3
    • Remove eleven 4mm Phillips #00 screws.

  12. Hytera TC-580 Microphone Replacement: Schritt 12, Bild 1 von 1
    • Apply a soldering iron to the solder joints to remove the two wires connecting the speaker to the circuit board.

  13. Hytera TC-580 Microphone Replacement, Microphone: Schritt 13, Bild 1 von 1
    • If not already done, remove the circuit board completely from the case.

  14. Hytera TC-580 Microphone Replacement: Schritt 14, Bild 1 von 1
    • Desolder the two microphone solder joints.

  15. Hytera TC-580 Microphone Replacement: Schritt 15, Bild 1 von 1
    • The microphone should fall out after all the solder has been removed.

Abschluss

To reassemble your device, follow these instructions in reverse order.

Stuart

Mitglied seit: 02/14/18

464 Reputation

3 Anleitungen geschrieben

Team

USF Tampa, Team S3-G4, Nance Spring 2018 Mitglied von USF Tampa, Team S3-G4, Nance Spring 2018

USFT-NANCE-S18S3G4

3 Mitglieder

5 Anleitungen geschrieben

0 Kommentare

Kommentar hinzufügen

Seitenaufrufe:

Letzte 24 Stunden: 0

Letzte 7 Tage: 4

Letzte 30 Tage: 7

Insgesamt: 708