Zum Hauptinhalt wechseln

IBM ThinkPad R40 Hard Drive Replacement

Was du brauchst

  1. IBM ThinkPad R40 Hard Drive Replacement, Remove the battery: Schritt 1, Bild 1 von 2 IBM ThinkPad R40 Hard Drive Replacement, Remove the battery: Schritt 1, Bild 2 von 2
    • To remove the battery, slide the battery lock lever right, while pulling on the battery tab.

  2. IBM ThinkPad R40 Hard Drive Replacement, Remove the hard drive holder.: Schritt 2, Bild 1 von 2 IBM ThinkPad R40 Hard Drive Replacement, Remove the hard drive holder.: Schritt 2, Bild 2 von 2
    • Remove the Phillips #1 screw from the bottom of the laptop.

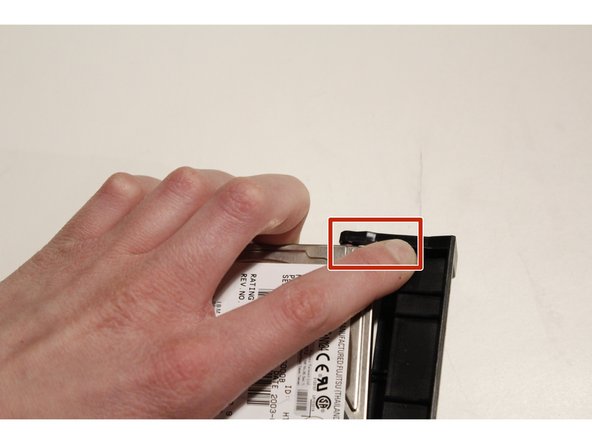
    • Pull on the small rise in the plastic to remove the hard drive holder.

    • Don't be afraid to use some force, it requires quite a bit of pressure to remove.

  3. IBM ThinkPad R40 Hard Drive Replacement, Remove the hard drive holder.: Schritt 3, Bild 1 von 3 IBM ThinkPad R40 Hard Drive Replacement, Remove the hard drive holder.: Schritt 3, Bild 2 von 3 IBM ThinkPad R40 Hard Drive Replacement, Remove the hard drive holder.: Schritt 3, Bild 3 von 3
    • Remove the hard drive holder completely from the computer.

    • Push on the plastic, and the hard drive will pop out.

  4. IBM ThinkPad R40 Hard Drive Replacement, Remove the hard drive.: Schritt 4, Bild 1 von 1
    • Remove the four Phillips #1 screws.

Abschluss

To reassemble your device, follow these instructions in reverse order.

2 weitere Nutzer:innen haben diese Anleitung absolviert.

Alec M

Mitglied seit: 12/26/15

82 Reputation

2 Anleitungen geschrieben

0 Kommentare

Kommentar hinzufügen

Seitenaufrufe:

Letzte 24 Stunden: 1

Letzte 7 Tage: 5

Letzte 30 Tage: 15

Insgesamt: 4,953