Zum Hauptinhalt wechseln

IQ America VD-8810L Motherboard Replacement

Was du brauchst

  1. IQ America VD-8810L Motherboard Replacement, Motherboard: Schritt 1, Bild 1 von 3 IQ America VD-8810L Motherboard Replacement, Motherboard: Schritt 1, Bild 2 von 3 IQ America VD-8810L Motherboard Replacement, Motherboard: Schritt 1, Bild 3 von 3
    • Wedge the spudger into the slot of the panel on the bottom of the device.

    • Rotate out the panel to reveal the screw holding the device together.

  2. IQ America VD-8810L Motherboard Replacement: Schritt 2, Bild 1 von 2 IQ America VD-8810L Motherboard Replacement: Schritt 2, Bild 2 von 2
    • Use the Phillips head screwdriver to remove the screw.

    • Separate the Top and bottom halves of the device.

  3. IQ America VD-8810L Motherboard Replacement: Schritt 3, Bild 1 von 3 IQ America VD-8810L Motherboard Replacement: Schritt 3, Bild 2 von 3 IQ America VD-8810L Motherboard Replacement: Schritt 3, Bild 3 von 3
    • Remove batteries from the battery slot.

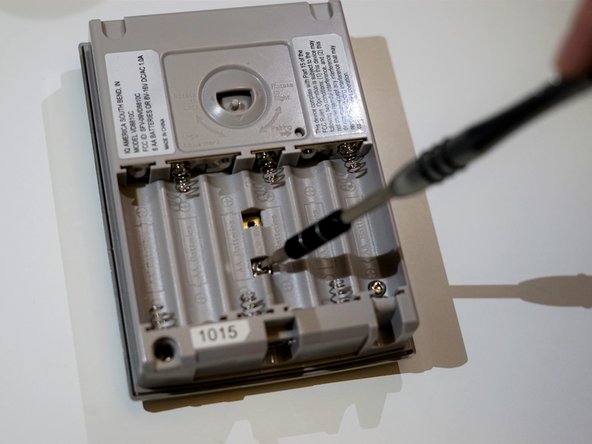
    • Unscrew the two Phillips head screws in the center of the battery slot.

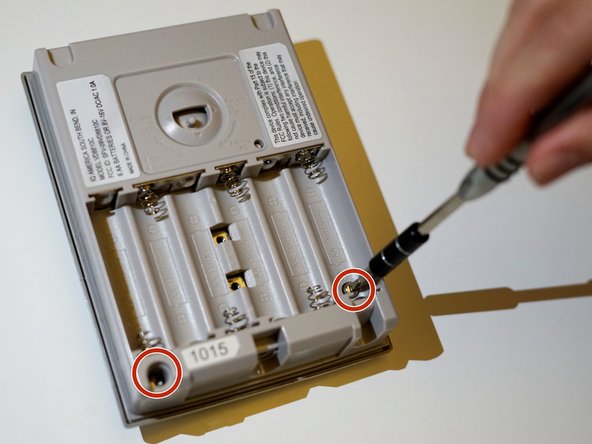
    • Unscrew the remaining two screws at the bottom of the unit using the 3.0 triangle head screwdriver.

  4. IQ America VD-8810L Motherboard Replacement: Schritt 4, Bild 1 von 1
    • Use the spudger to separate the top and bottom halves of the screen.

  5. IQ America VD-8810L Motherboard Replacement: Schritt 5, Bild 1 von 1
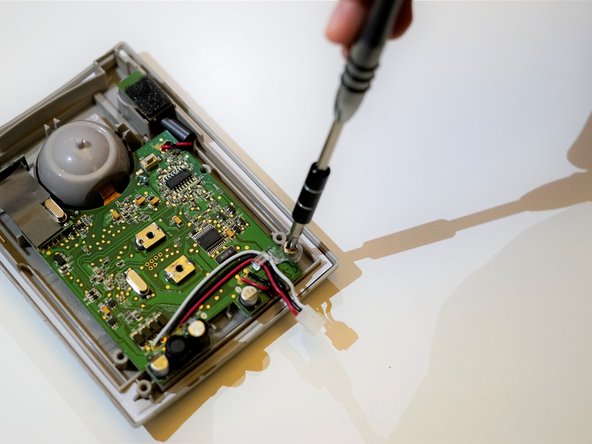
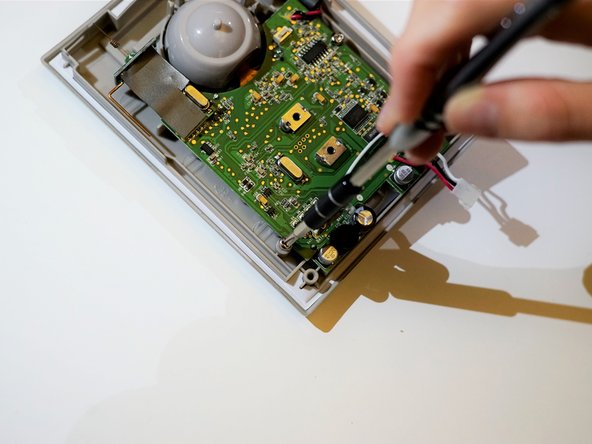
    • Disconnect the wires from the green motherboard to the bottom half by pulling apart the connecting pins.

  6. IQ America VD-8810L Motherboard Replacement: Schritt 6, Bild 1 von 3 IQ America VD-8810L Motherboard Replacement: Schritt 6, Bild 2 von 3 IQ America VD-8810L Motherboard Replacement: Schritt 6, Bild 3 von 3
    • Unscrew all 3 Phillips head screws on the outside edges of the motherboard.

  7. IQ America VD-8810L Motherboard Replacement: Schritt 7, Bild 1 von 1
    • Carefully remove the microphone from the casing by pulling away from the device.

  8. IQ America VD-8810L Motherboard Replacement: Schritt 8, Bild 1 von 2 IQ America VD-8810L Motherboard Replacement: Schritt 8, Bild 2 von 2
    • Gently lift the motherboard from the casing to reveal the speaker.

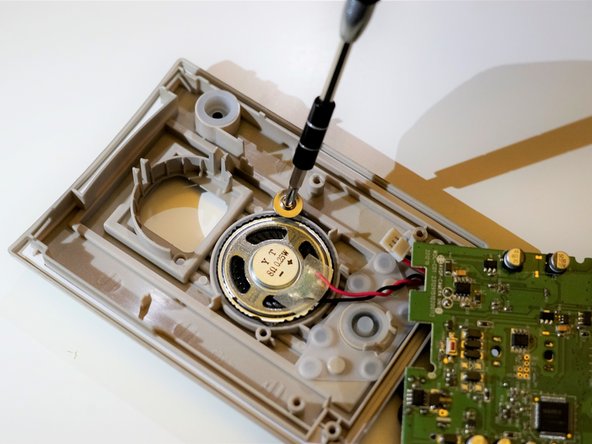
    • Unscrew the two Phillips head screws that hold the speaker in place.

  9. IQ America VD-8810L Motherboard Replacement: Schritt 9, Bild 1 von 1
    • Refer to this guide to desolder the speaker from the motherboard.

Abschluss

To reassemble your device, follow these instructions in reverse order.

Jackey Lau

Mitglied seit: 10/17/17

301 Reputation

3 Anleitungen geschrieben

Team

UC Santa Barbara, Team S1-G3, Weedon Fall 2017 Mitglied von UC Santa Barbara, Team S1-G3, Weedon Fall 2017

UCSB-WEEDON-F17S1G3

5 Mitglieder

6 Anleitungen geschrieben

0 Kommentare

Kommentar hinzufügen

Seitenaufrufe:

Letzte 24 Stunden: 0

Letzte 7 Tage: 0

Letzte 30 Tage: 2

Insgesamt: 230