Diese Version enthält möglicherweise inkorrekte Änderungen. Wechsle zur letzten geprüften Version.
Was du brauchst
-
Dieser Schritt ist noch nicht übersetzt. Hilf mit, ihn zu übersetzen!
-
Turn the peg in the direction of less resistance. The string should become more slacked or droopy.
-
-
Dieser Schritt ist noch nicht übersetzt. Hilf mit, ihn zu übersetzen!
-
When the string is very loose and is no longer coiled around the peg, slide it through the hole in the peg to remove it from the head.
-
-
Dieser Schritt ist noch nicht übersetzt. Hilf mit, ihn zu übersetzen!
-
Using the all-in-one tool, slide the peg between the groove and gently lift up until the peg comes out.
-
-
-
Dieser Schritt ist noch nicht übersetzt. Hilf mit, ihn zu übersetzen!
-
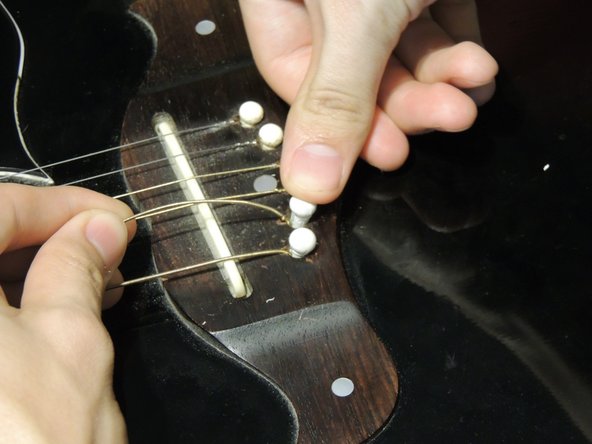
With your new string, align the nut end with the groove in the bridge pin so that the nut is at the opposite side of the head of the pin.
-
-
Dieser Schritt ist noch nicht übersetzt. Hilf mit, ihn zu übersetzen!
-
Slide both the string and the bridge pin back into the hole,(make sure the groove is facing the string) and then when in place, apply a small amount of force with your thumb until you hear it click into place.
-
-
Dieser Schritt ist noch nicht übersetzt. Hilf mit, ihn zu übersetzen!
-
Thread the end of the new string through the hole of the peg, but don't pull it all the way tight, leave the string loose on the neck.
-
-
Dieser Schritt ist noch nicht übersetzt. Hilf mit, ihn zu übersetzen!
-
With the new string loose on the neck, tighten the peg so the string winds in the same direction as the other strings and wind it until it is tight and does not wobble. Make sure the string is aligned with the groove in the neck.
-
-
Dieser Schritt ist noch nicht übersetzt. Hilf mit, ihn zu übersetzen!
-
Using guitar string cutters, leave between a quarter inch to half of an inch of string so the excess string does not get in the way.
-


Rückgängig: Ich habe diese Anleitung nicht absolviert.
Ein:e weitere:r Nutzer:in hat diese Anleitung absolviert.
Team

USF Tampa, Team 1-26, Donnelly Fall 2014 Mitglied von USF Tampa, Team 1-26, Donnelly Fall 2014
USFT-DONNELLY-F14S1G26
1 Mitglied
1 Anleitung geschrieben