Diese Version enthält möglicherweise inkorrekte Änderungen. Wechsle zur letzten geprüften Version.
Was du brauchst
-
Dieser Schritt ist noch nicht übersetzt. Hilf mit, ihn zu übersetzen!
-
Wedge the plastic opening tool into the seam nearest to the screen surface and begin to pry off the back of the device.
-
-
Dieser Schritt ist noch nicht übersetzt. Hilf mit, ihn zu übersetzen!
-
Move the plastic opening tool along the perimeter of the device, loosening the entire back as you go.
-
-
Dieser Schritt ist noch nicht übersetzt. Hilf mit, ihn zu übersetzen!
-
After the entire perimeter has been pried, remove the back of the device.
-
-
-
Dieser Schritt ist noch nicht übersetzt. Hilf mit, ihn zu übersetzen!
-
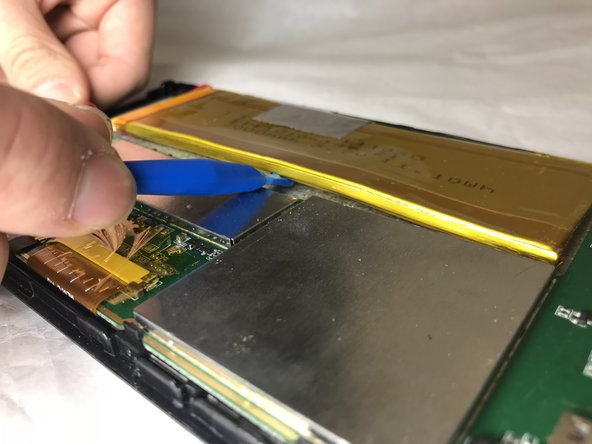
Remove the transparent, orange tape from the edge of the battery.
-
Pry the battery off, using the plastic opening tool.
-
-
Dieser Schritt ist noch nicht übersetzt. Hilf mit, ihn zu übersetzen!
-
Desolder the positive and negative leads.
-
-
Dieser Schritt ist noch nicht übersetzt. Hilf mit, ihn zu übersetzen!
-
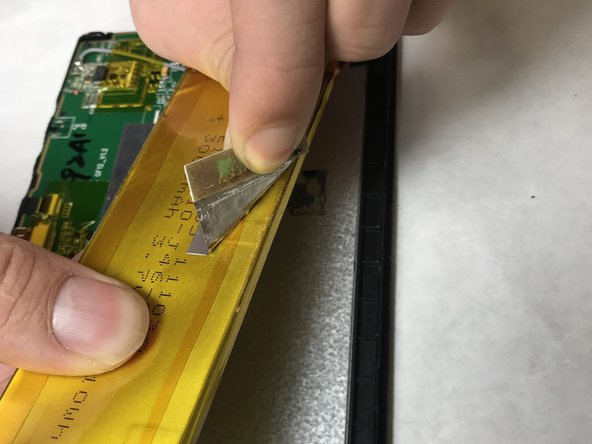
Pull the battery away from the adhesive.
-
Peel the gray tape from the top of the battery.
-
-
Dieser Schritt ist noch nicht übersetzt. Hilf mit, ihn zu übersetzen!
-
Remove the five 5 mm screws from the motherboard, using the #0 Phillips Screwdriver.
-
-
Dieser Schritt ist noch nicht übersetzt. Hilf mit, ihn zu übersetzen!
-
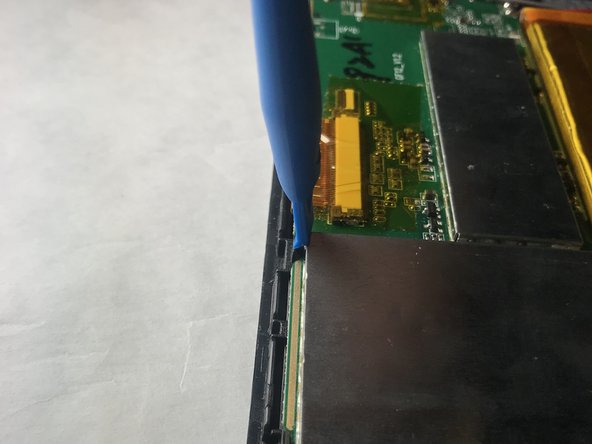
Using the plastic opening tool tool, pry back the 4 four clips to release the motherboard.
-
-
Dieser Schritt ist noch nicht übersetzt. Hilf mit, ihn zu übersetzen!
-
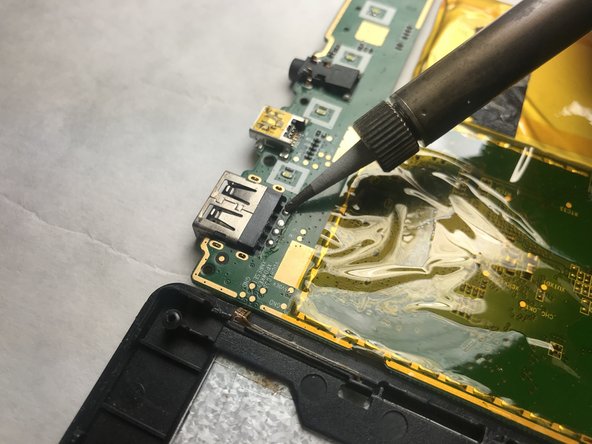
Desolder the eight solder joints holding the USB Port in place.
-


Team

IUPUI, Team S1-G5, Baechle Fall 2018 Mitglied von IUPUI, Team S1-G5, Baechle Fall 2018
IUPUI-BAECHLE-F18S1G5
3 Mitglieder
6 Anleitungen geschrieben