Diese Version enthält möglicherweise inkorrekte Änderungen. Wechsle zur letzten geprüften Version.
Was du brauchst
-
Dieser Schritt ist noch nicht übersetzt. Hilf mit, ihn zu übersetzen!
-
Turn the projector so that the lens is facing you.
-
Use a Phillips #1 screwdriver to remove the 6 mm screw that secures top cover.
-
Remove the service cover.
-
-
-
Dieser Schritt ist noch nicht übersetzt. Hilf mit, ihn zu übersetzen!
-
Use a Phillips #1 screwdriver to remove the seven 6 mm screws.
-
Use a Phillips #1 screwdriver to remove the two 5 mm screws.
-
Remove the top cover.
-
-
Dieser Schritt ist noch nicht übersetzt. Hilf mit, ihn zu übersetzen!
-
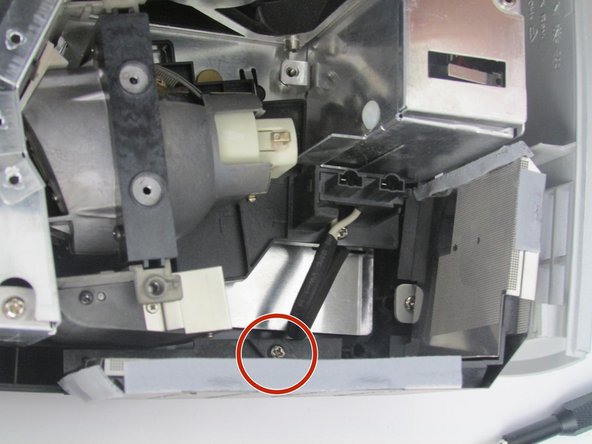
Use a Phillips # 1 screw driver to remove the 6 mm screw that secures the filter.
-
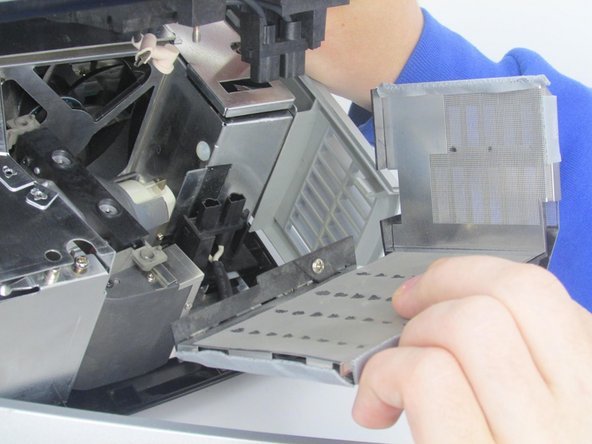
Once the screw is removed, remove the filter by pulling it straight out.
-


Team

Embry-Riddle Aeronautical University, Team S5-G5, Watkins Spring 2020 Mitglied von Embry-Riddle Aeronautical University, Team S5-G5, Watkins Spring 2020
ERAU-WATKINS-S20S5G5
4 Mitglieder
7 Anleitungen geschrieben