Einleitung
Use this guide to remove the fans on the left side (from the front) of the InFocus IN3114 projector.
Fans are used to keep devices cool. As computer parts are used, they emit heat. Keeping fans clean, unobstructed, and operable are critical to maintaining a device long-term.
Fans may be broken, obstructed, stuck, or unplugged. More often than not, removing the fans, cleaning them, and replacing the fans is sufficient restoration.
Was du brauchst
-
-
Use a Phillips #1 screwdriver to remove the 1.2 cm Phillips-head screw from each side of the projector.
-
-
-
Use your hands to slide the top plate off of the projector.
-
Lift and remove the plate.
-
-
-
Use a Phillips #1 screwdriver to unscrew the two 9 mm screws on the top of the lamp housing unit.
-
-
-
Use your hands to pull up on the silver handle and remove the lamp housing unit.
-
-
-
Once the lamp housing is removed flip it over where silver pull tab is face down.
-
Use a Phillips #00 screwdriver to remove the 5 mm screw from the right side of the lamp housing unit.
-
Use a Phillips #00 screwdriver to remove the two 5 mm screws from the top of the unit.
-
-
-
-
Once the cover is removed, flip the housing unit so the bulb is face down.
-
Remove the four 4 mm screws with a Phillips #00 screwdriver.
-
-
-
Use hands to pull out the bulb and silver cover.
-
Gently pull on the two wires that connect the bulb to its housing to disconnect them.
-
-
-
Once wires are disconnected, Remove the bulb from the silver cover and replace.
-
-
-
Use a Phillips #1 screwdriver to loosen and remove the five 7 mm screws that secure the frame.
-
-
-
Pull back the top of the front face slightly.
-
Use a Phillips #1 screwdriver to remove the two 7 mm screws, and lift upwards.
-
-
-
Carefully pull the left vent back, and use a Phillips #1 screwdriver to remove the screws that secure it in place.
-
-
-
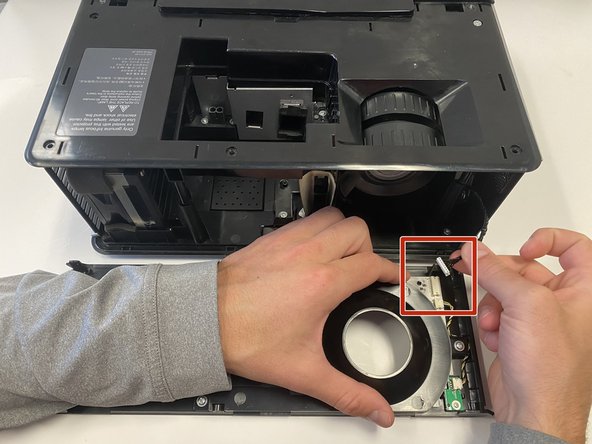
Carefully remove each fan, and use your hands to gently unplug their connectors from the circuit board.
-
To reassemble your device, follow these instructions in reverse order.
To reassemble your device, follow these instructions in reverse order.


