Diese Version enthält möglicherweise inkorrekte Änderungen. Wechsle zur letzten geprüften Version.
Was du brauchst
-
Dieser Schritt ist noch nicht übersetzt. Hilf mit, ihn zu übersetzen!
-
Flip the projector right-side up and turn it so that the back ports are facing you.
-
Remove the 7 mm metallic screws using the flat-head screwdriver.
-
Using the T10 Torx screwdriver, remove the two black 10 mm screws located at the center of the back panel.
-
-
Dieser Schritt ist noch nicht übersetzt. Hilf mit, ihn zu übersetzen!
-
Flip the projector over.
-
Use the T10 Torx screwdriver head to remove the two 77mm screws located nearest to the back panel ports.
-
Remove the two 10mm screws located near the lens side with the T10 Torx screwdriver head.
-
Flip the projector back over.
-
-
Dieser Schritt ist noch nicht übersetzt. Hilf mit, ihn zu übersetzen!
-
Unplug the speaker wire from the circuit board by simultaneously squeezing the sides and pulling.
-
Pull on the brown tabs located at the sides of the white plastic ribbon holder and pull the ribbon out.
-
Remove the top cover.
-
-
-
Dieser Schritt ist noch nicht übersetzt. Hilf mit, ihn zu übersetzen!
-
Hold down the release tabs to remove the cables from the white tabs.
-
-
Dieser Schritt ist noch nicht übersetzt. Hilf mit, ihn zu übersetzen!
-
Use the T10 Torx screwdriver to remove the five 5mm screws located throughout the motherboard.
-
Pull up the five metal tabs located at the rear of the projector.
-
-
Dieser Schritt ist noch nicht übersetzt. Hilf mit, ihn zu übersetzen!
-
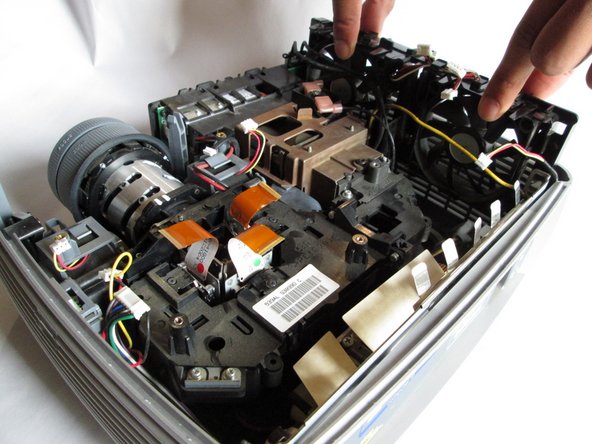
Remove the three gold ribbons by flipping up the black taps that hold the ribbon in place.
-
Pull the ribbons out carefully and place them under the main board.
-
Carefully lift the entire main board up.
-
-
Dieser Schritt ist noch nicht übersetzt. Hilf mit, ihn zu übersetzen!
-
Once the main board has been removed, carefully lift the fans upward. Make sure no cables are tangled in the process.
-


Rückgängig: Ich habe diese Anleitung nicht absolviert.
Ein:e weitere:r Nutzer:in hat diese Anleitung absolviert.
Team

Cal Poly, Team 13-17, Regan Winter 2014 Mitglied von Cal Poly, Team 13-17, Regan Winter 2014
CPSU-REGAN-W14S13G17
6 Mitglieder
5 Anleitungen geschrieben