Einleitung
Although there are no known hazards with removing the camera, be careful not to damage any small components or permanently damage any connectors.
Was du brauchst
-
-
Carefully open the laptop and remove the keyboard by disconnecting it.
-
Place keyboard to the side as you will not need it.
-
-
-
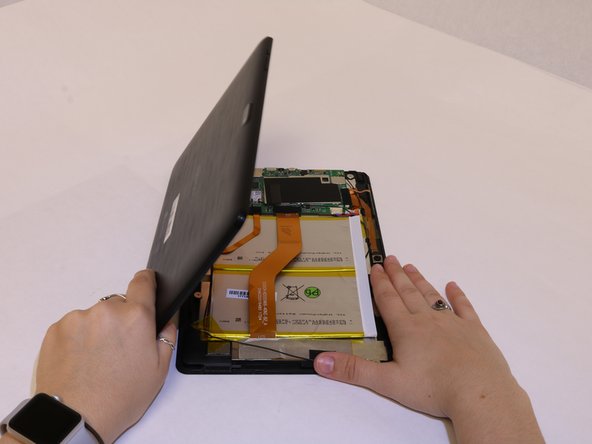
Lay the screen flat on its surface and use the iFixit opening tool to remove the cover by gently prying the back cover from the screen.
-
-
-
-
Use your fingers and pry the back cover from the screen. You may need to wiggle the cover a bit to separate the pieces.
-
If the back cover does not come off work your fingers around the corners and slowly pry the cover off using your fingers.
-
-
-
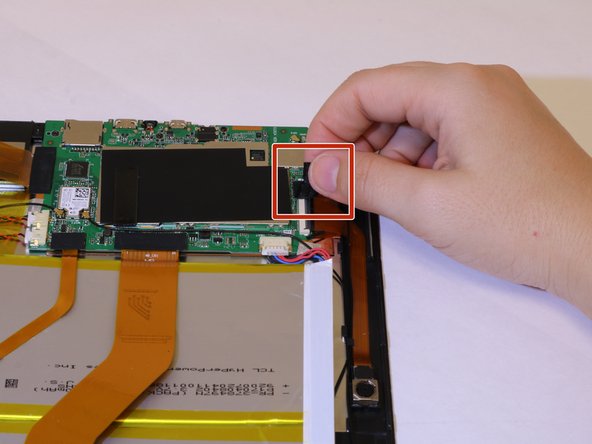
Carefully remove the yellow tape holding down the camera ribbon connector by pulling it upwards.
-
Remove the black tape holding down the camera ribbon connector which is attached to the motherboard.
-
-
-
Disconnect the zero insertion force (ZIF) connector by using your fingernail to flip the small locking flap.
-
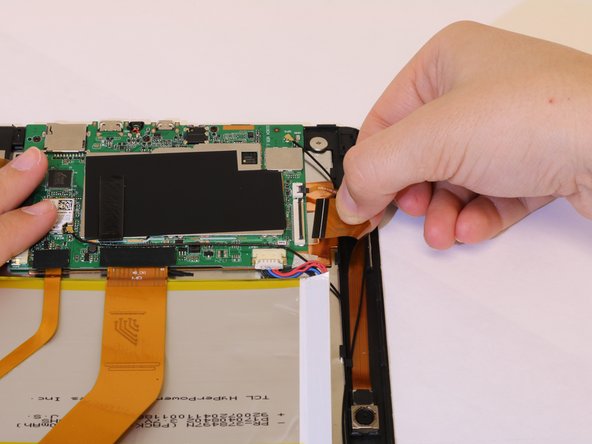
Disconnect the cable by gently pulling it outward.
-


To reassemble your device, follow these instructions in reverse order.
To reassemble your device, follow these instructions in reverse order.
Rückgängig: Ich habe diese Anleitung nicht absolviert.
Ein:e weitere:r Nutzer:in hat diese Anleitung absolviert.
Team

Western Carolina University, Team S1-G2, Virtue Spring 2019 Mitglied von Western Carolina University, Team S1-G2, Virtue Spring 2019
WCU-VIRTUE-S19S1G2
4 Mitglieder
5 Anleitungen geschrieben